Account Management
This guide explains how to access and manage accounts in the Family Navigator application, including creating, editing, and deleting accounts.
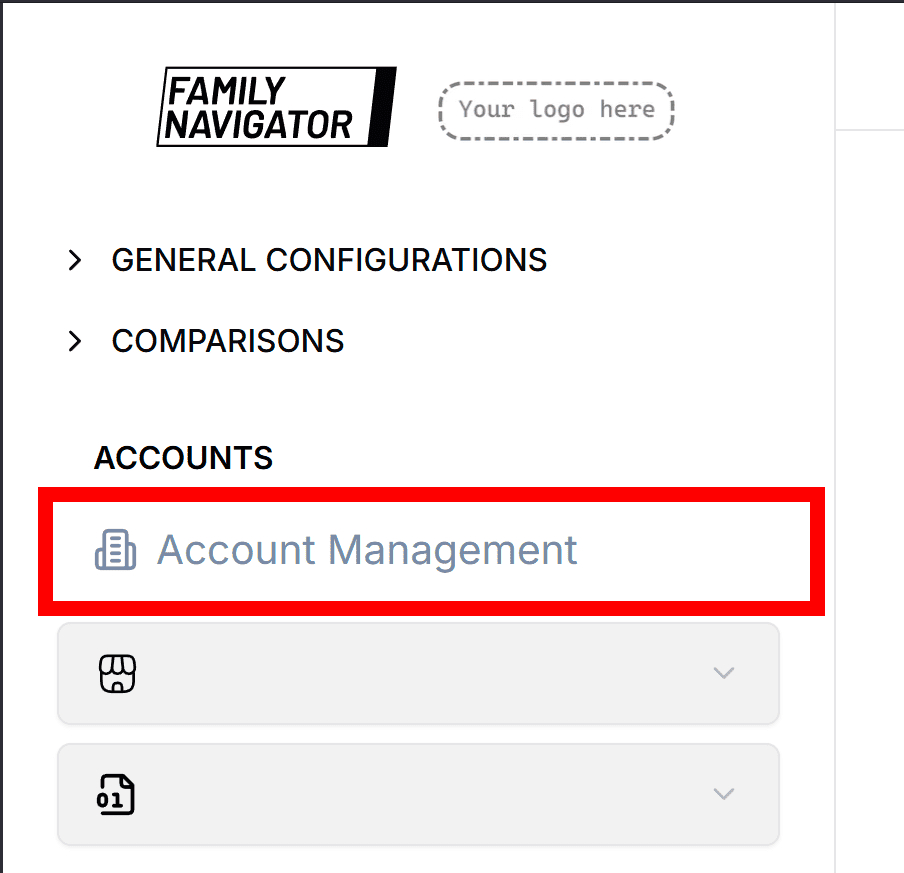
Accessing Account Management
- Log in to the Family Navigator application.
- Navigate to the Account Management section from the main menu or dashboard.
Creating an Account
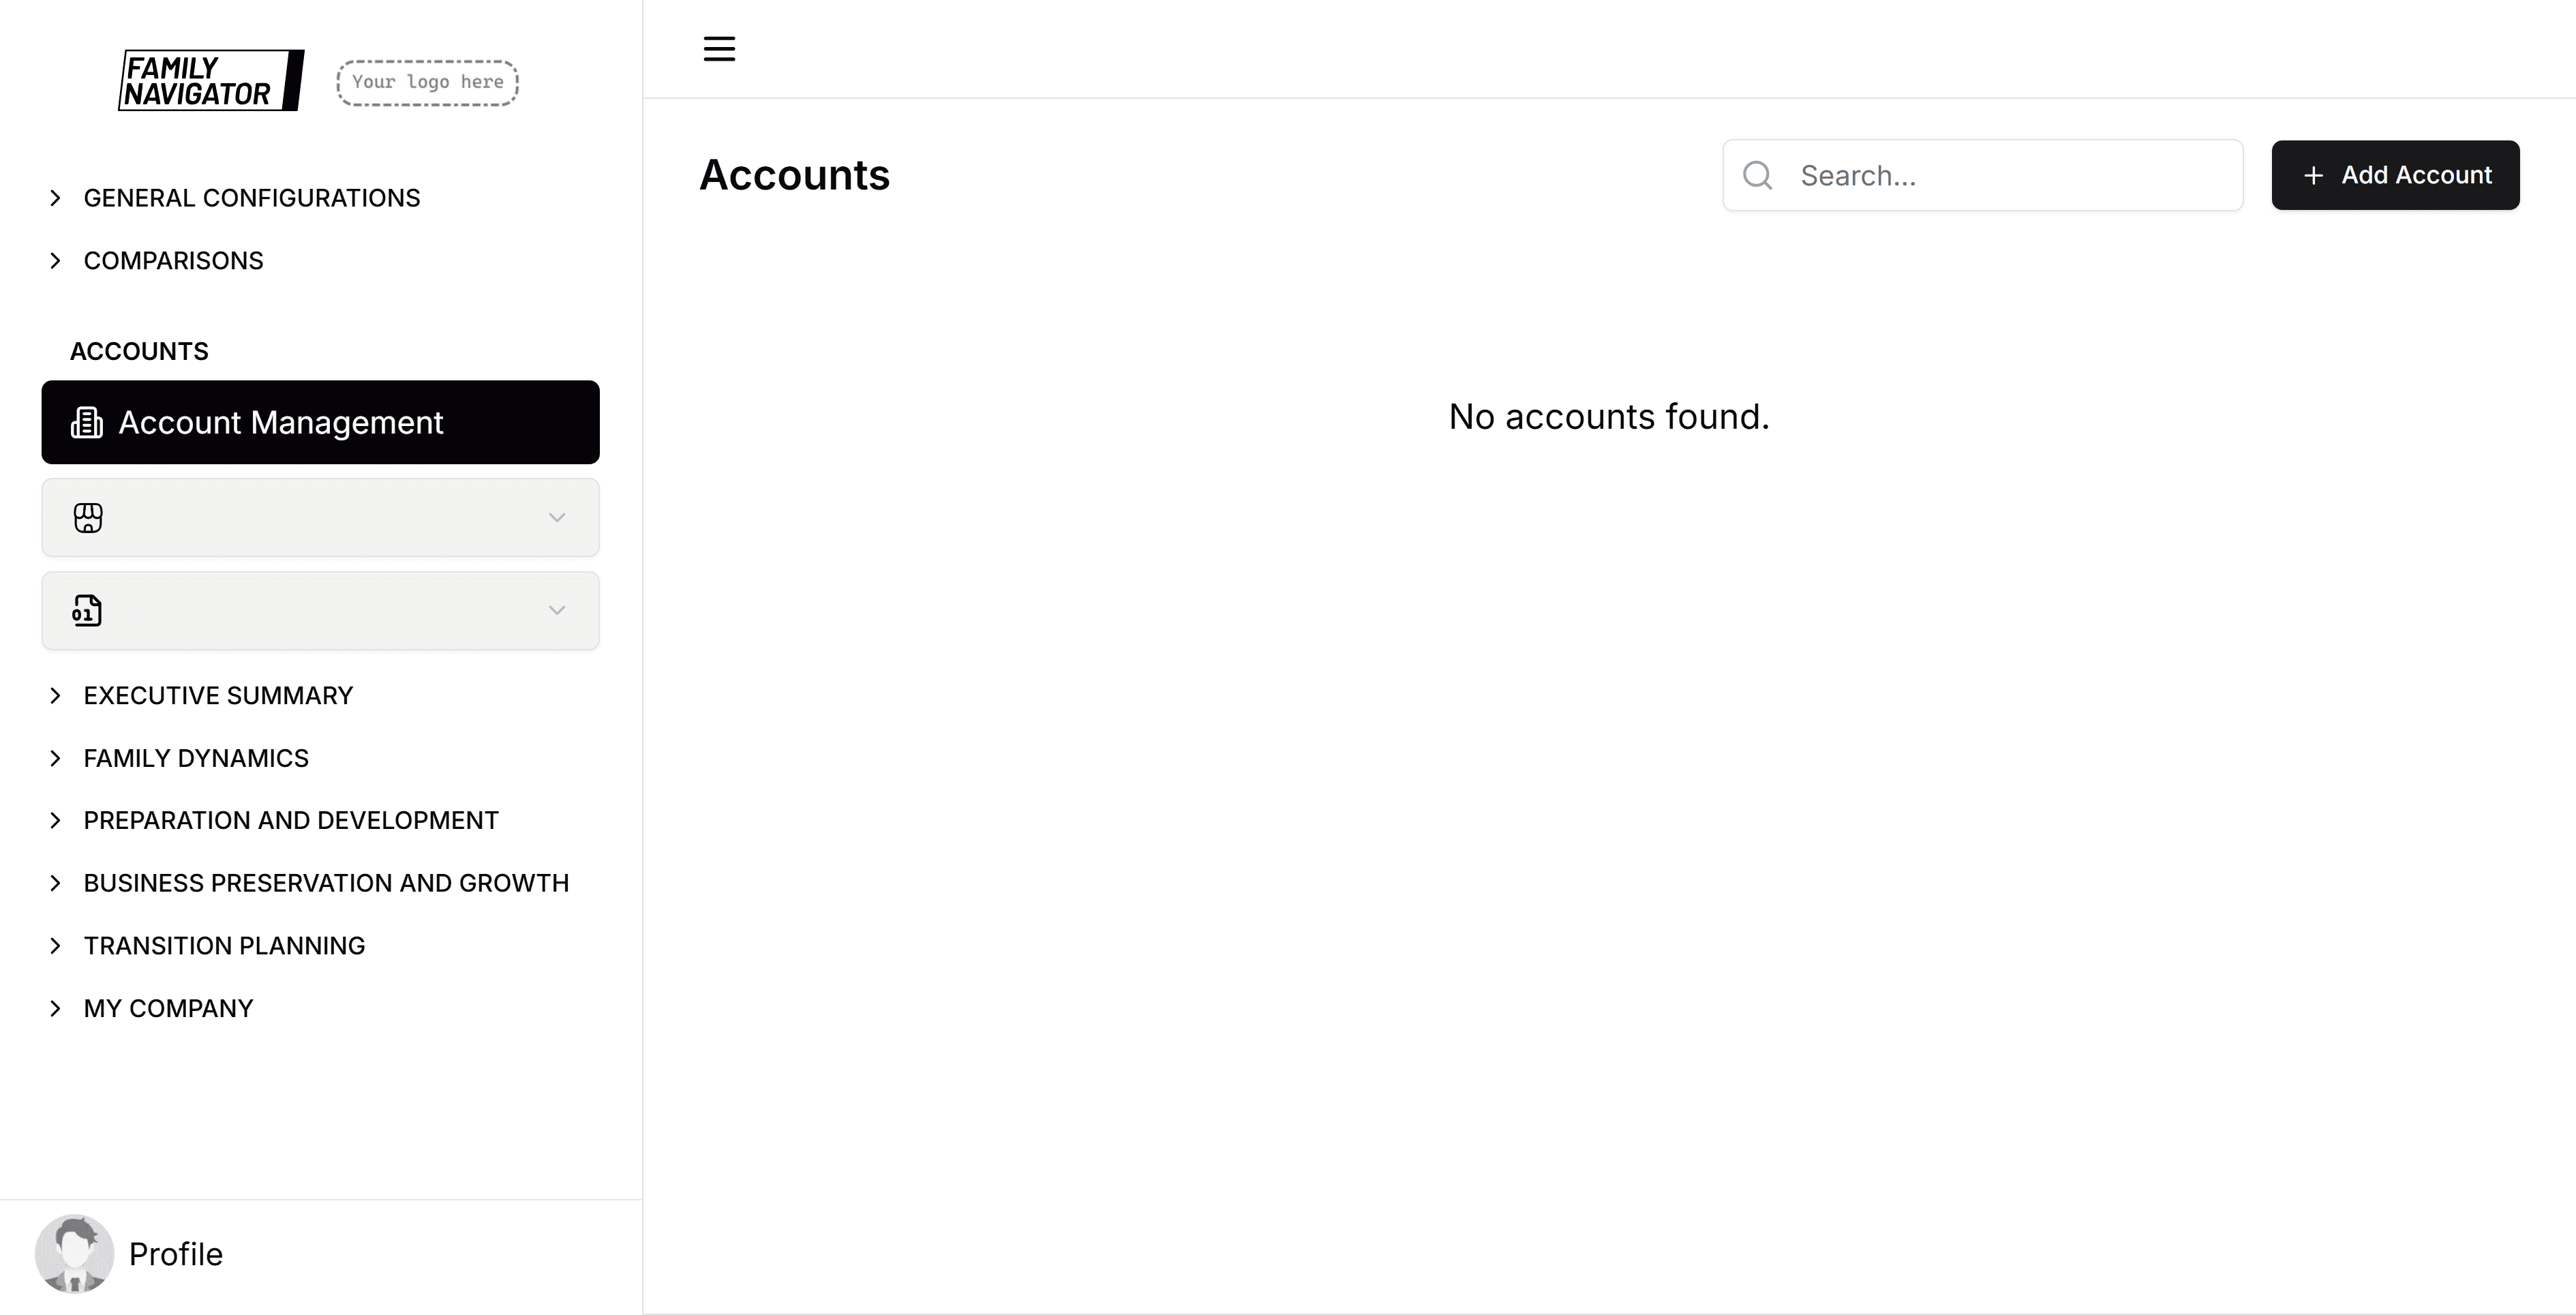
Step 1: Open the Add Account Form
Click the "Add Account" button located at the top right of the Account Management page.
Step 2: Fill in the Account Details
The form will open in a sidebar. Fill in the following required fields:
- Account Name: Enter a unique name for the account (max 50 characters).
- Version: Specify the version number or identifier (max 50 characters).
- Description: Provide a brief description of the account (max 210 characters).
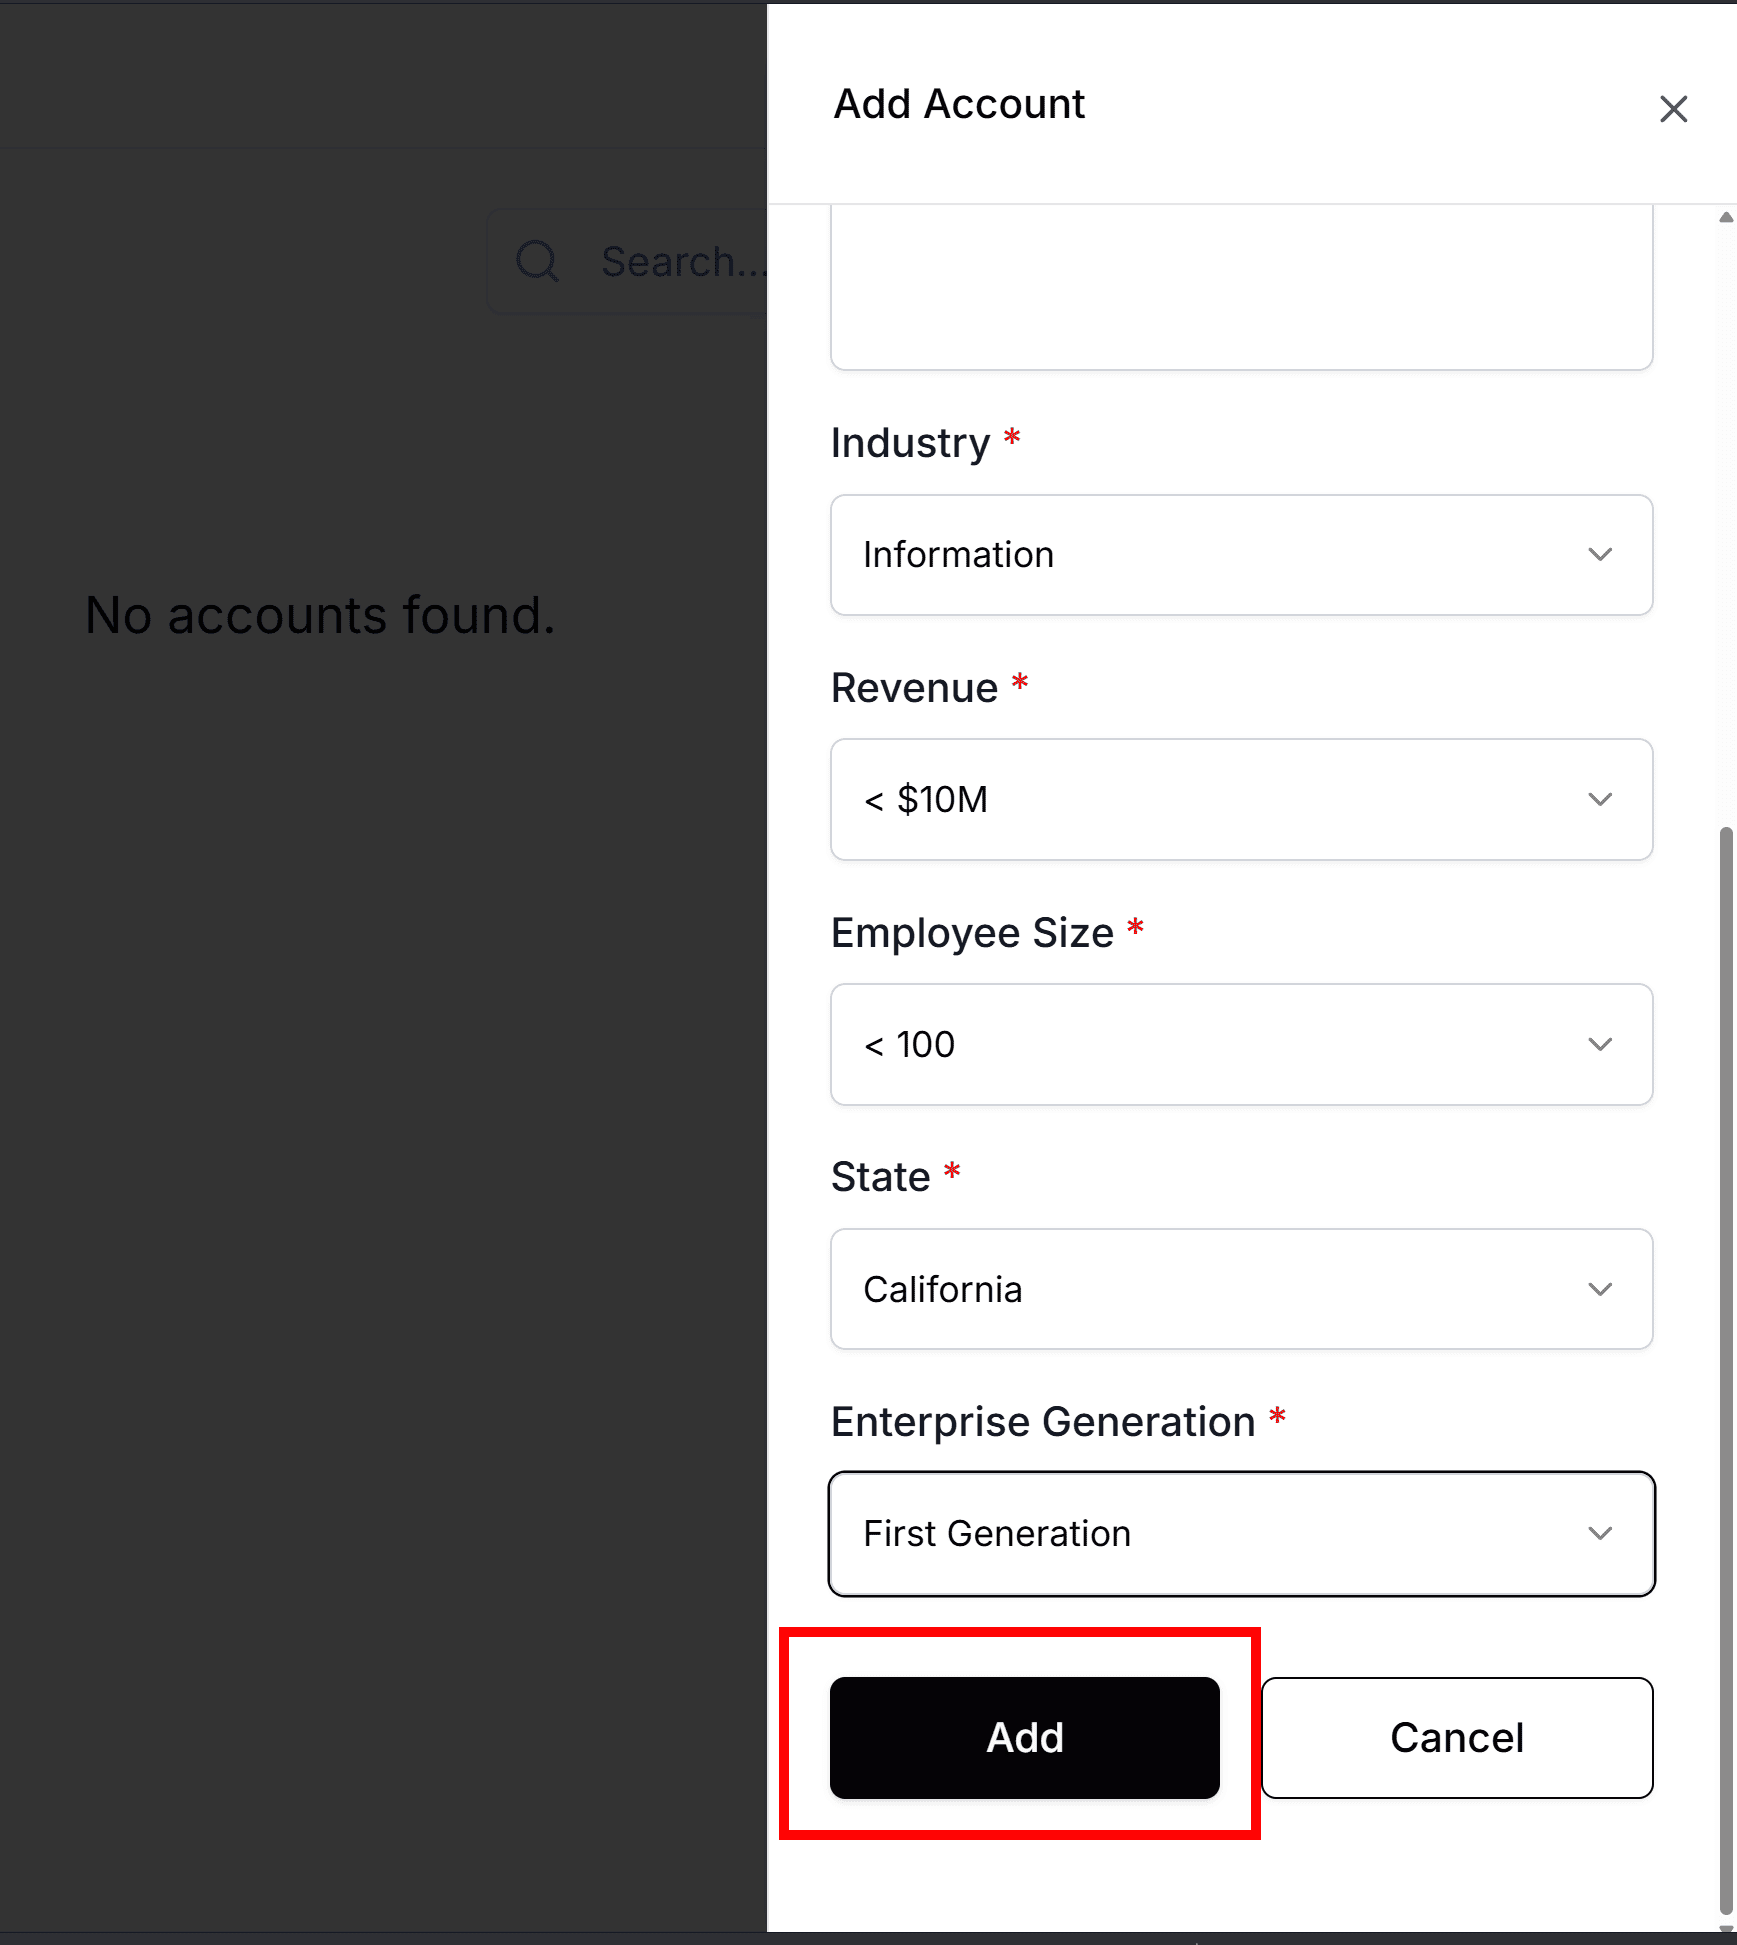
- Industry: Select the industry from the dropdown list.
- Revenue: Select the revenue range from the dropdown list.
- Employee Size: Select the employee size category from the dropdown list.
- State: Select the state or region from the dropdown list.
- Enterprise Generation: Select the enterprise generation from the dropdown list.
Optionally, check "Create new version from a previous account" to base the new account on an existing one, then select the previous account.
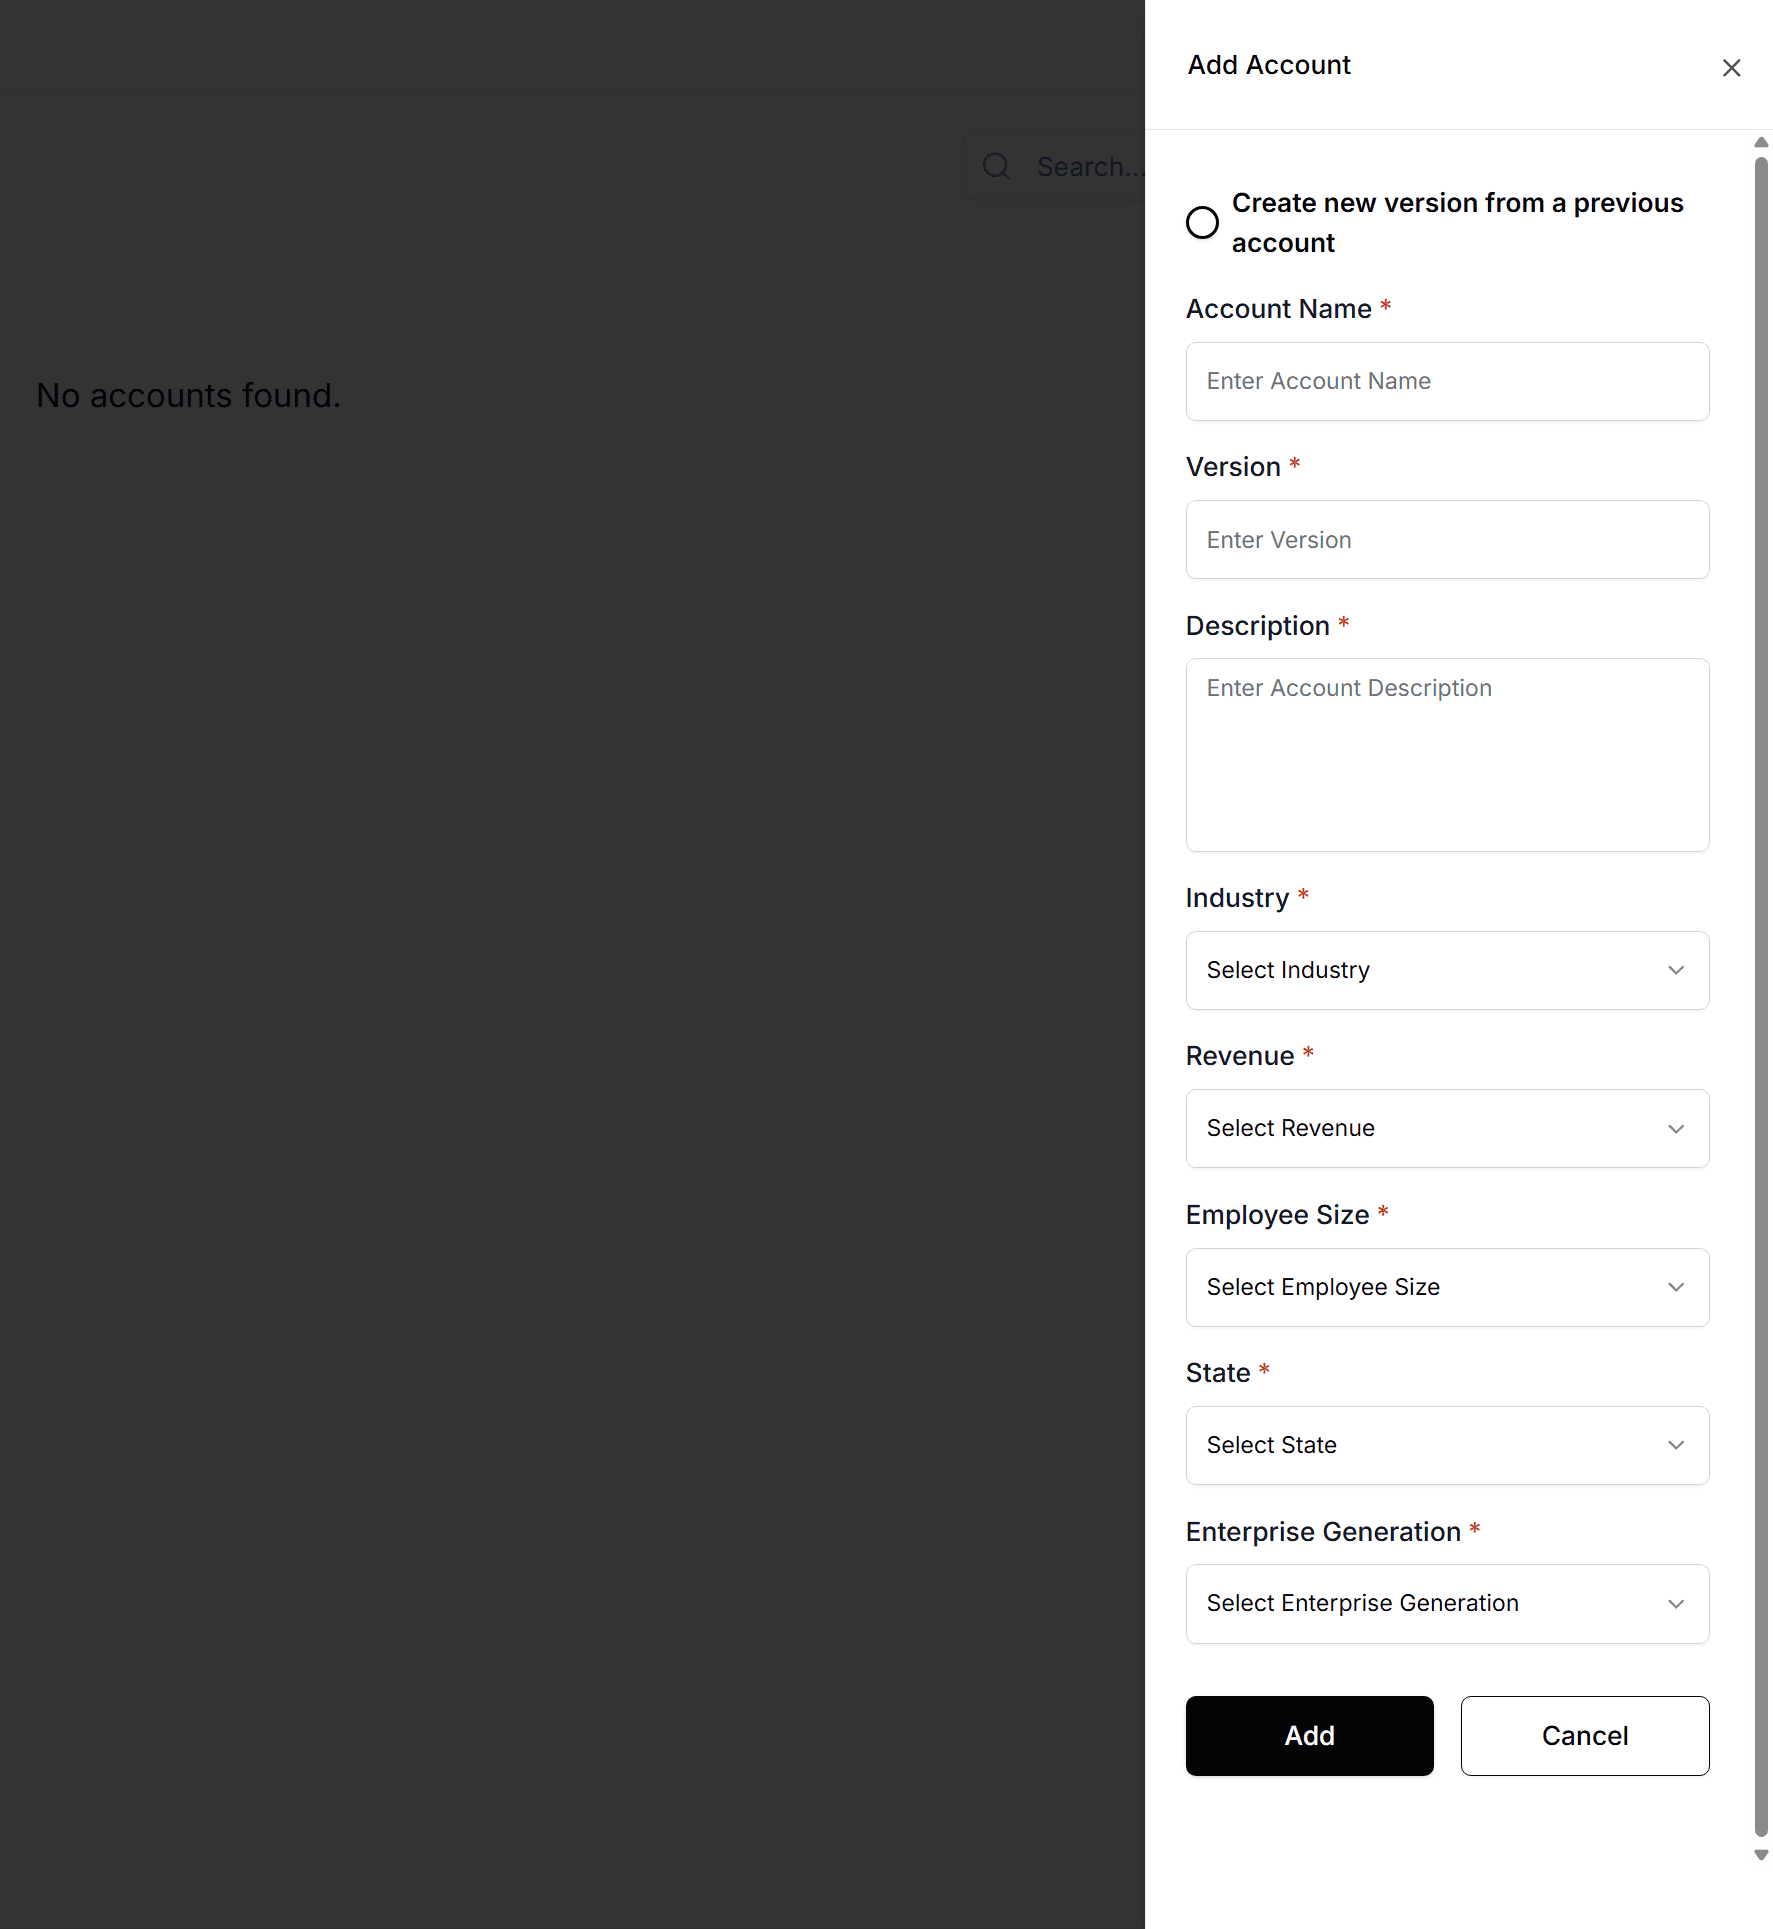
Step 3: Submit the Form
Click the "Add" button to create the account. You will see a success message upon completion.
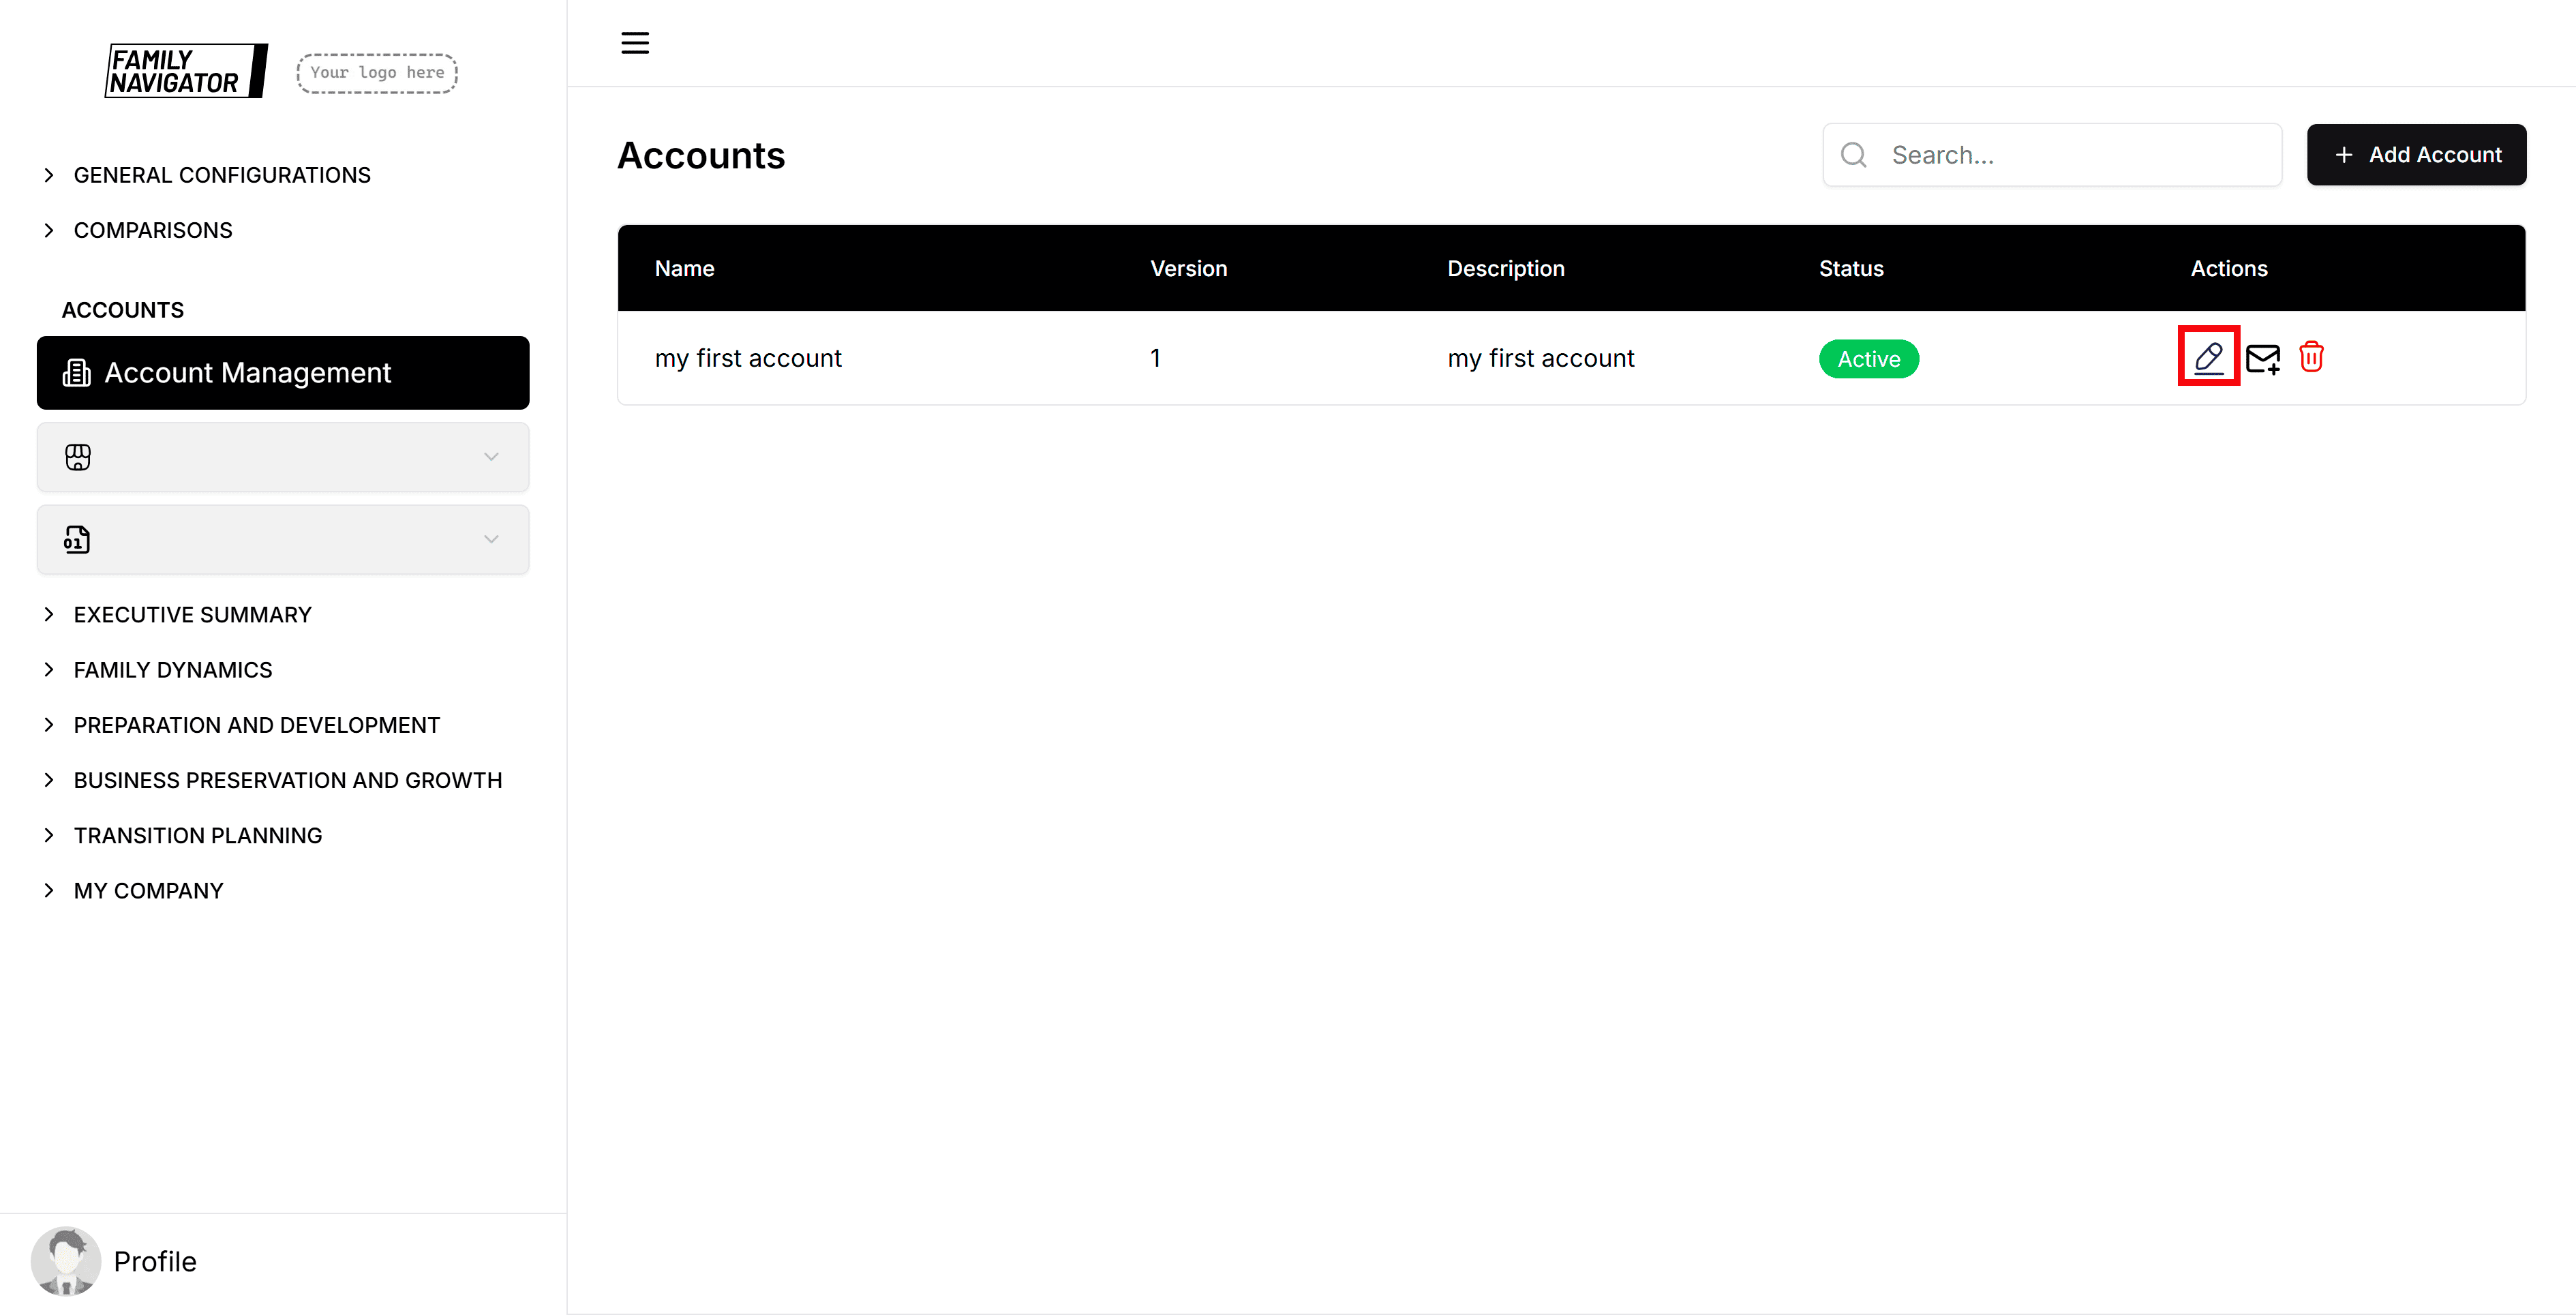
Editing an Account
Step 1: Locate the Account
Find the account you want to edit in the accounts table. You can use the search bar to filter accounts by name or description.
Step 2: Open the Edit Form
Click the "Edit" button (pencil icon) in the Actions column for the desired account.
Step 3: Modify the Details
Update any of the fields as needed. You can also toggle the "Is active?" checkbox to activate or deactivate the account.
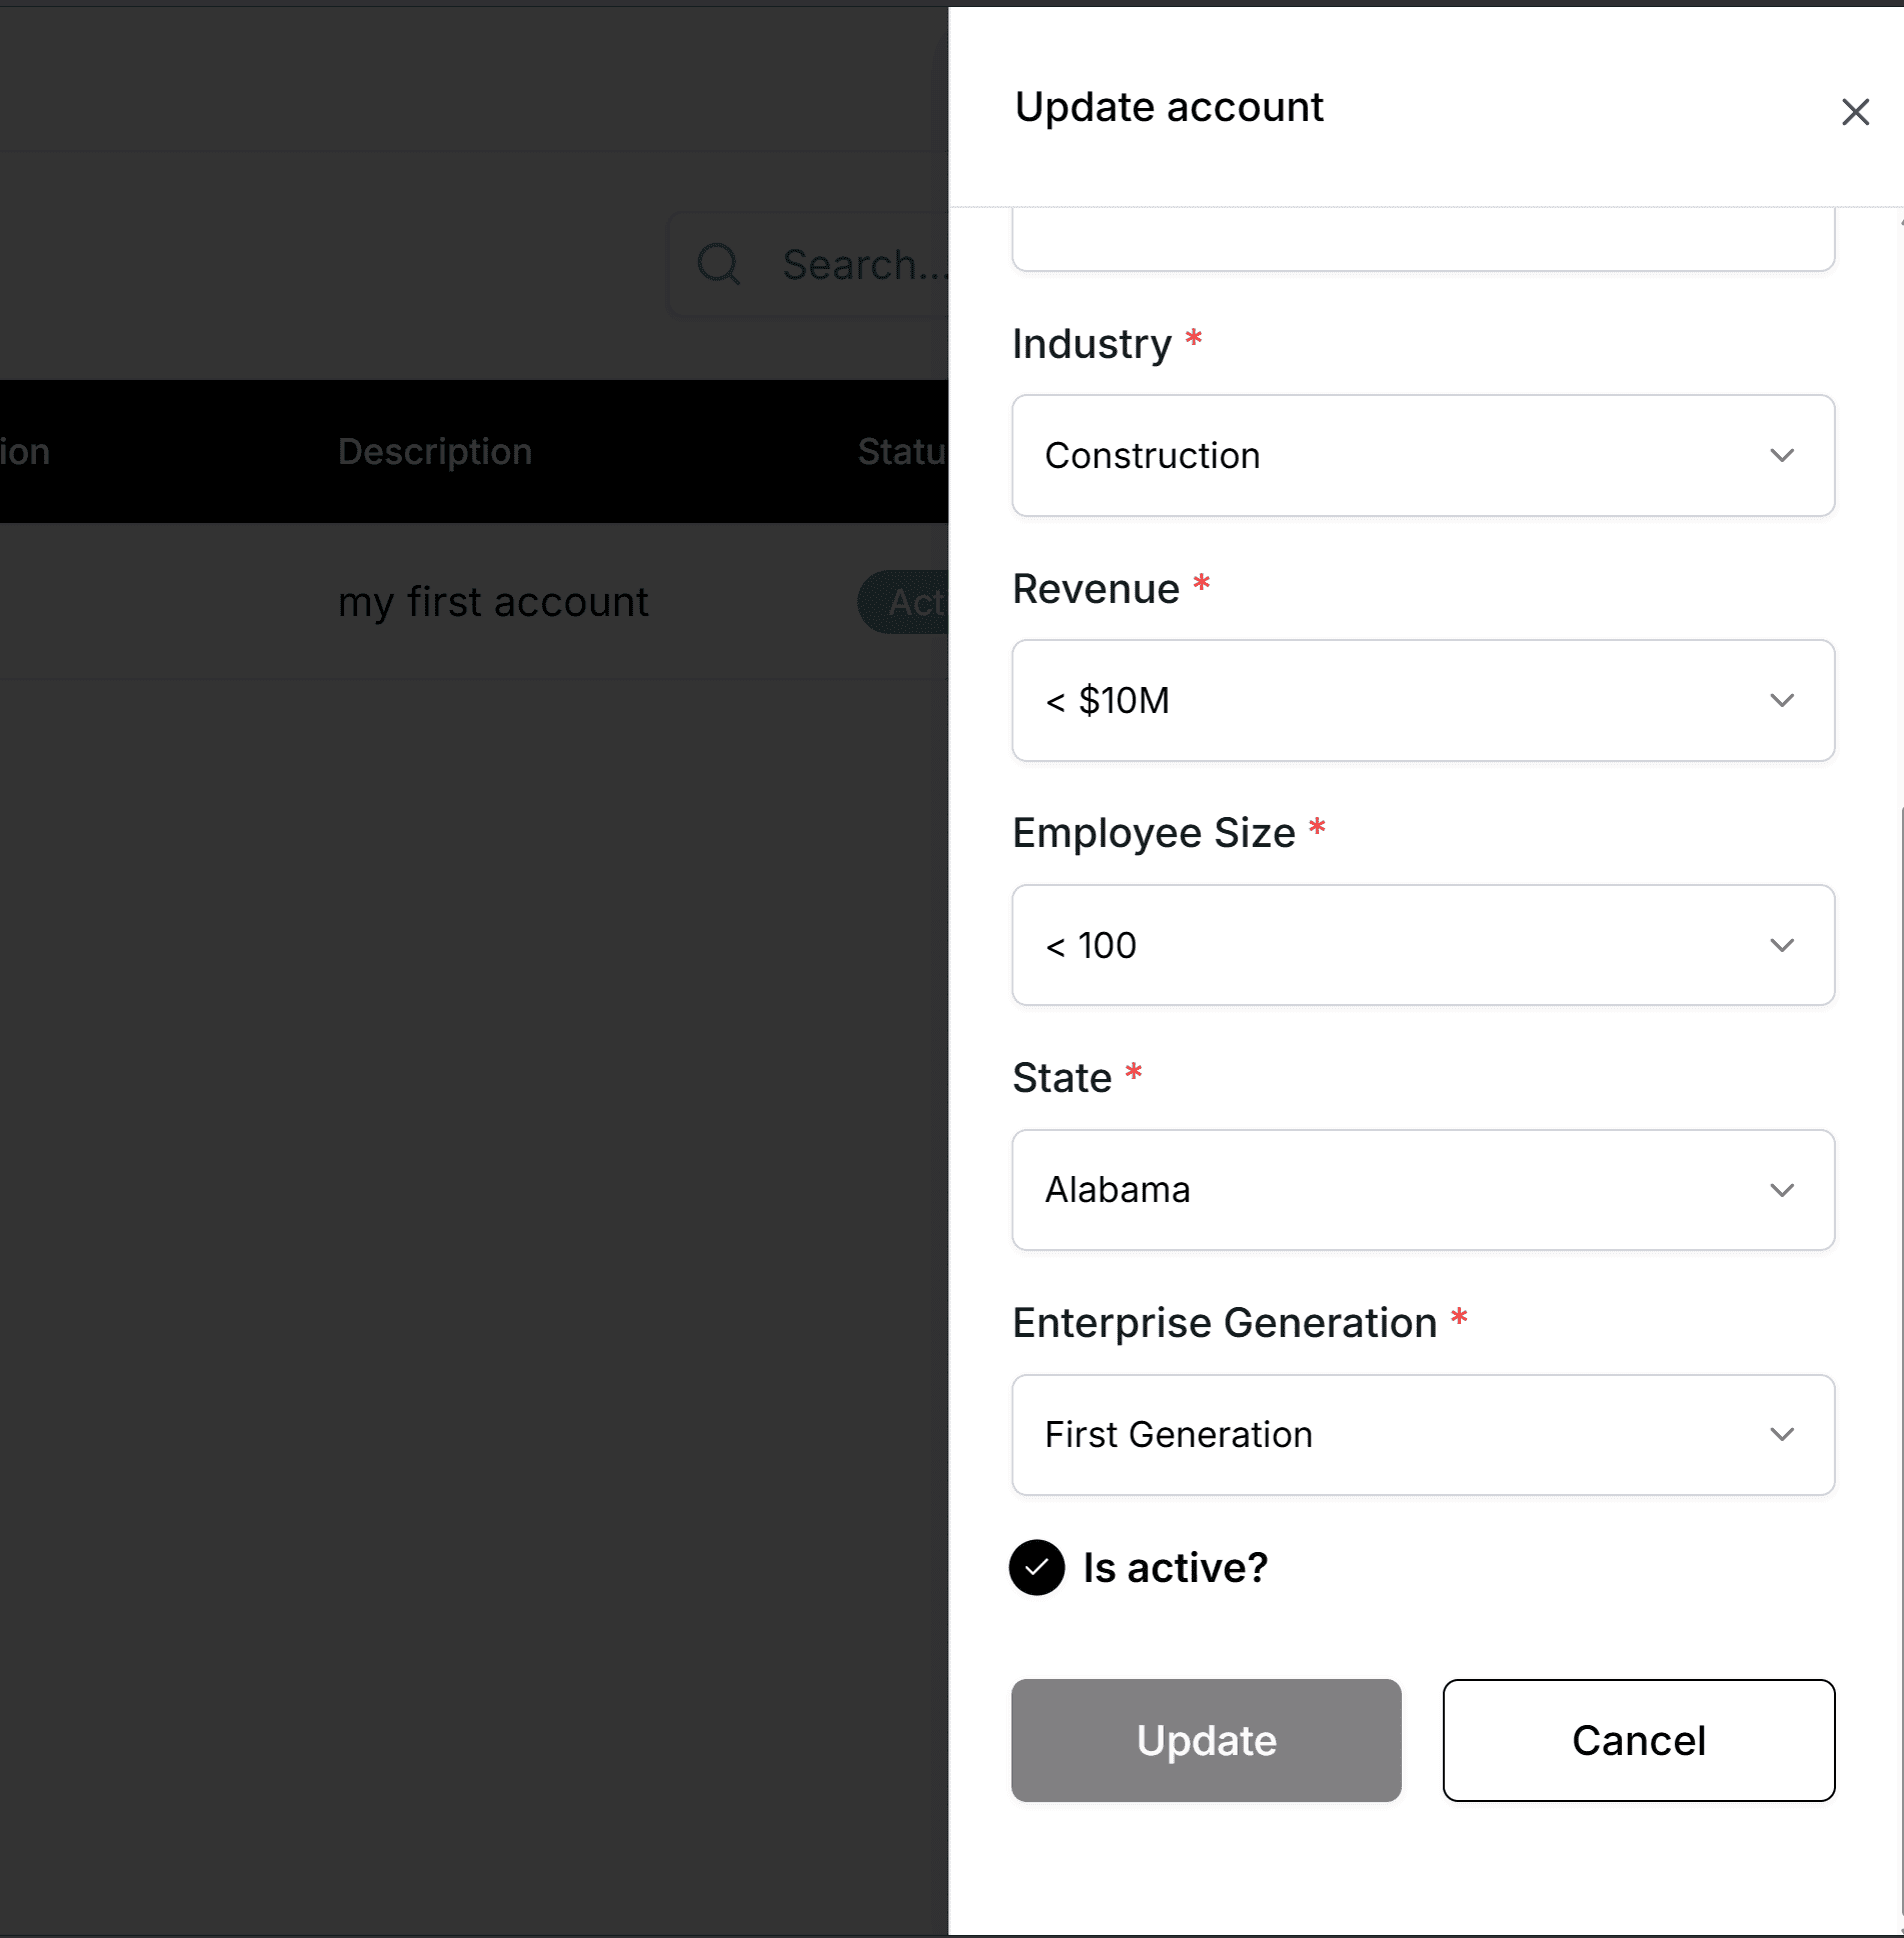
Step 4: Save Changes
Click the "Update" button to save your changes. A success message will confirm the update.
Adding Email Addresses for Notifications
Step 1: Locate the Account
Find the account for which you want to add notification email addresses in the accounts table.
Step 2: Open the Add Emails Form
Click the "Add Emails" button (mail plus icon) in the Actions column for the desired account.

Step 3: Add Email Addresses
In the sidebar that opens:
- Enter an email address in the input field.
- Click "Add" to include it in the list.
- Repeat for additional email addresses.
- You can remove emails from the list by clicking the X next to each email.
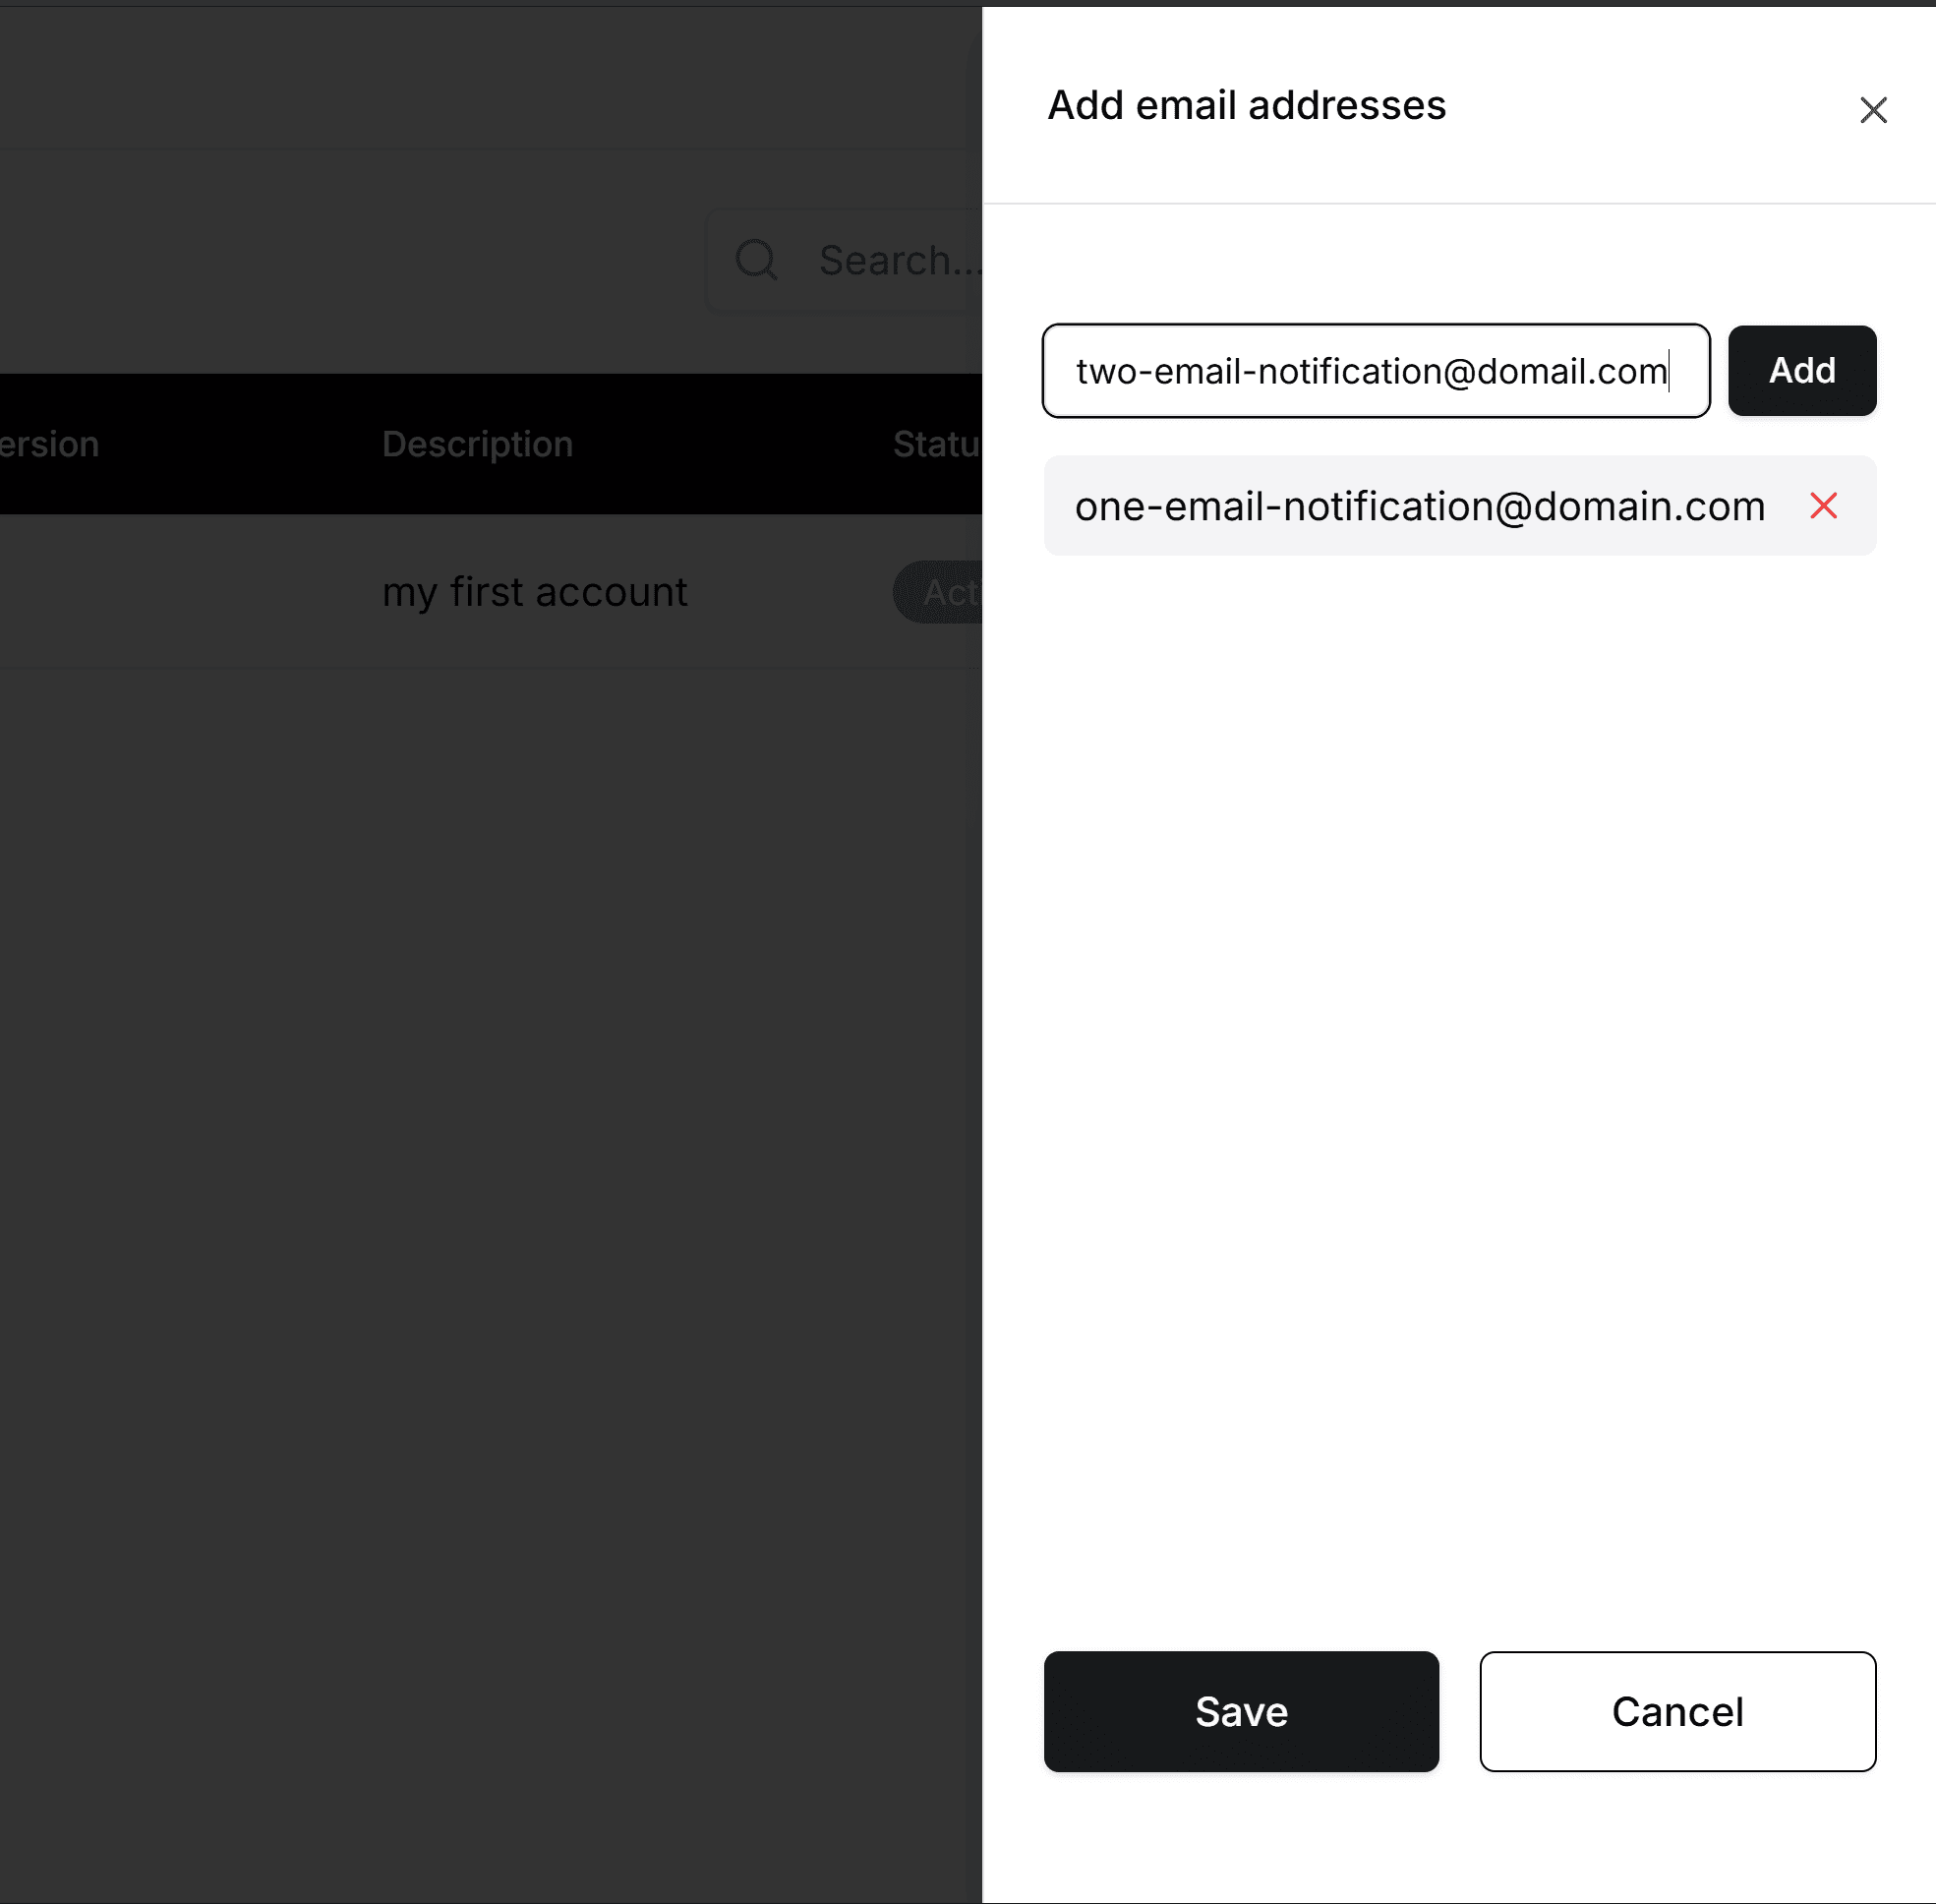
Step 4: Save the Email List
Click the "Save" button to save the notification email addresses for the account. You will see a success message upon completion.
Deleting an Account
Step 1: Locate the Account
Find the account you want to delete in the accounts table.
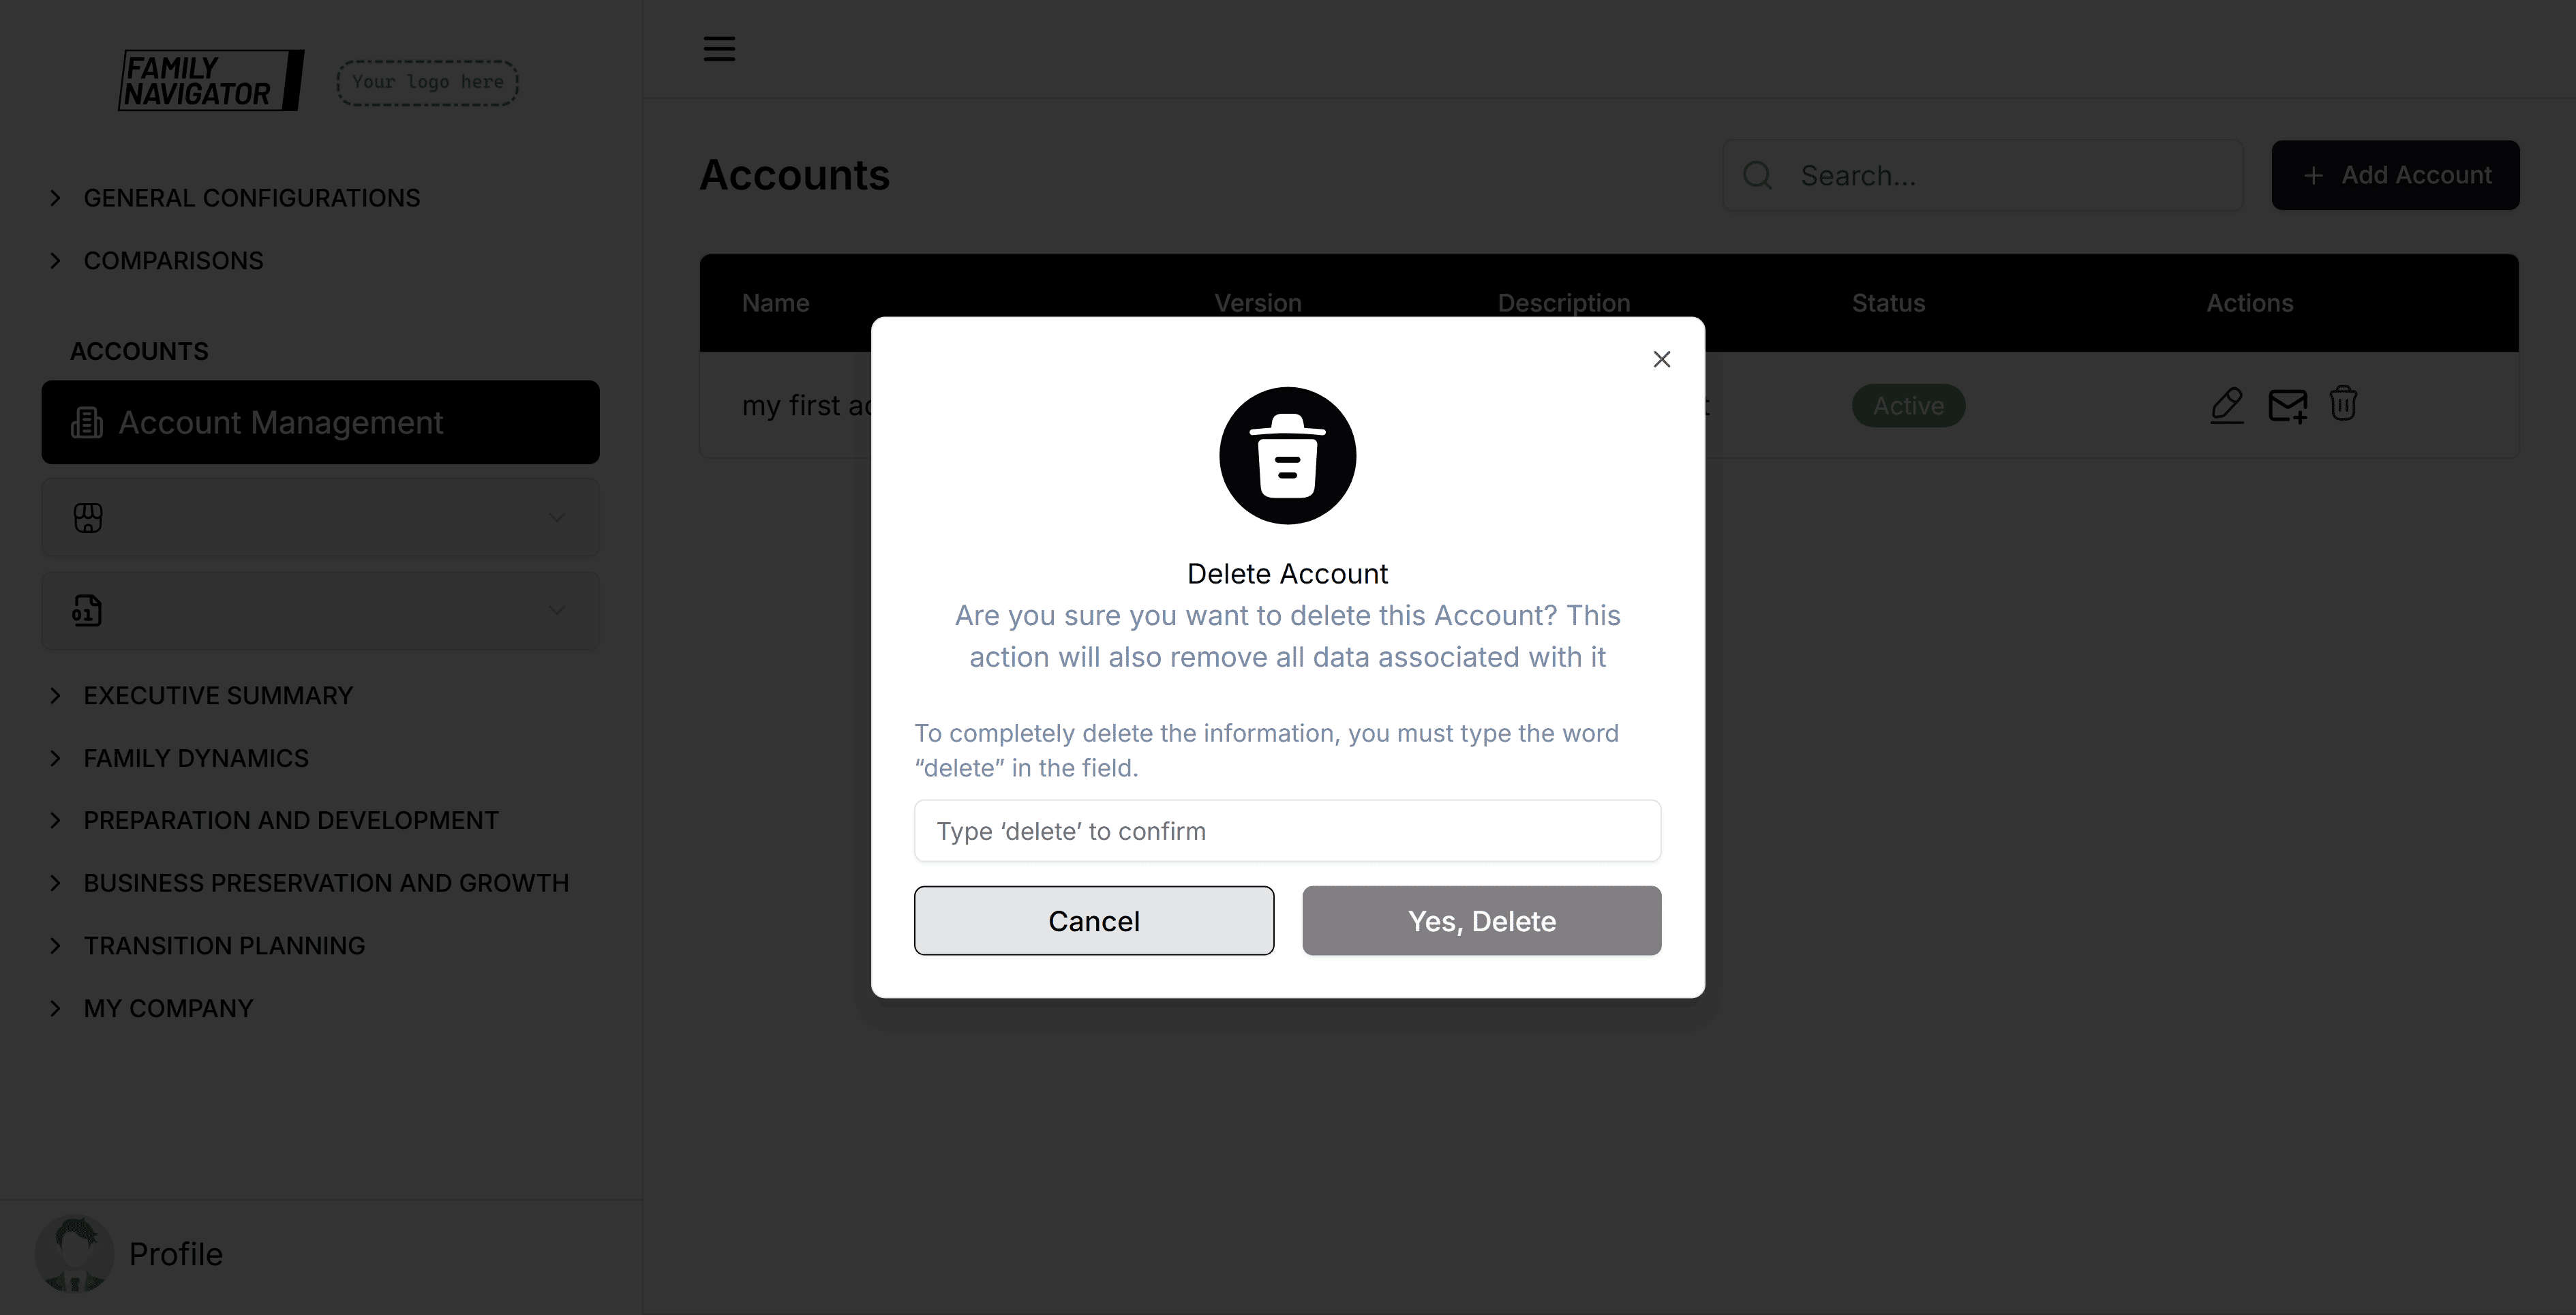
Step 2: Initiate Deletion
Click the "Delete" button (trash icon) in the Actions column for the desired account.

Step 3: Confirm Deletion
A confirmation modal will appear. Click "Confirm" to permanently delete the account.
Step 4: Deletion Complete
The account will be removed from the list, and you will see a success message.
Additional Features
- Search: Use the search bar to quickly find accounts by name or description.
- Status: Accounts can be active or inactive. Inactive accounts may have limited functionality.
- Versioning: You can create new versions of accounts based on previous ones to maintain history.
Troubleshooting
- Form Validation Errors: Ensure all required fields are filled and meet the character limits.
- Duplicate Names: Account names must be unique within the workspace.
- Permission Issues: Make sure you have the necessary permissions to create, edit, or delete accounts.