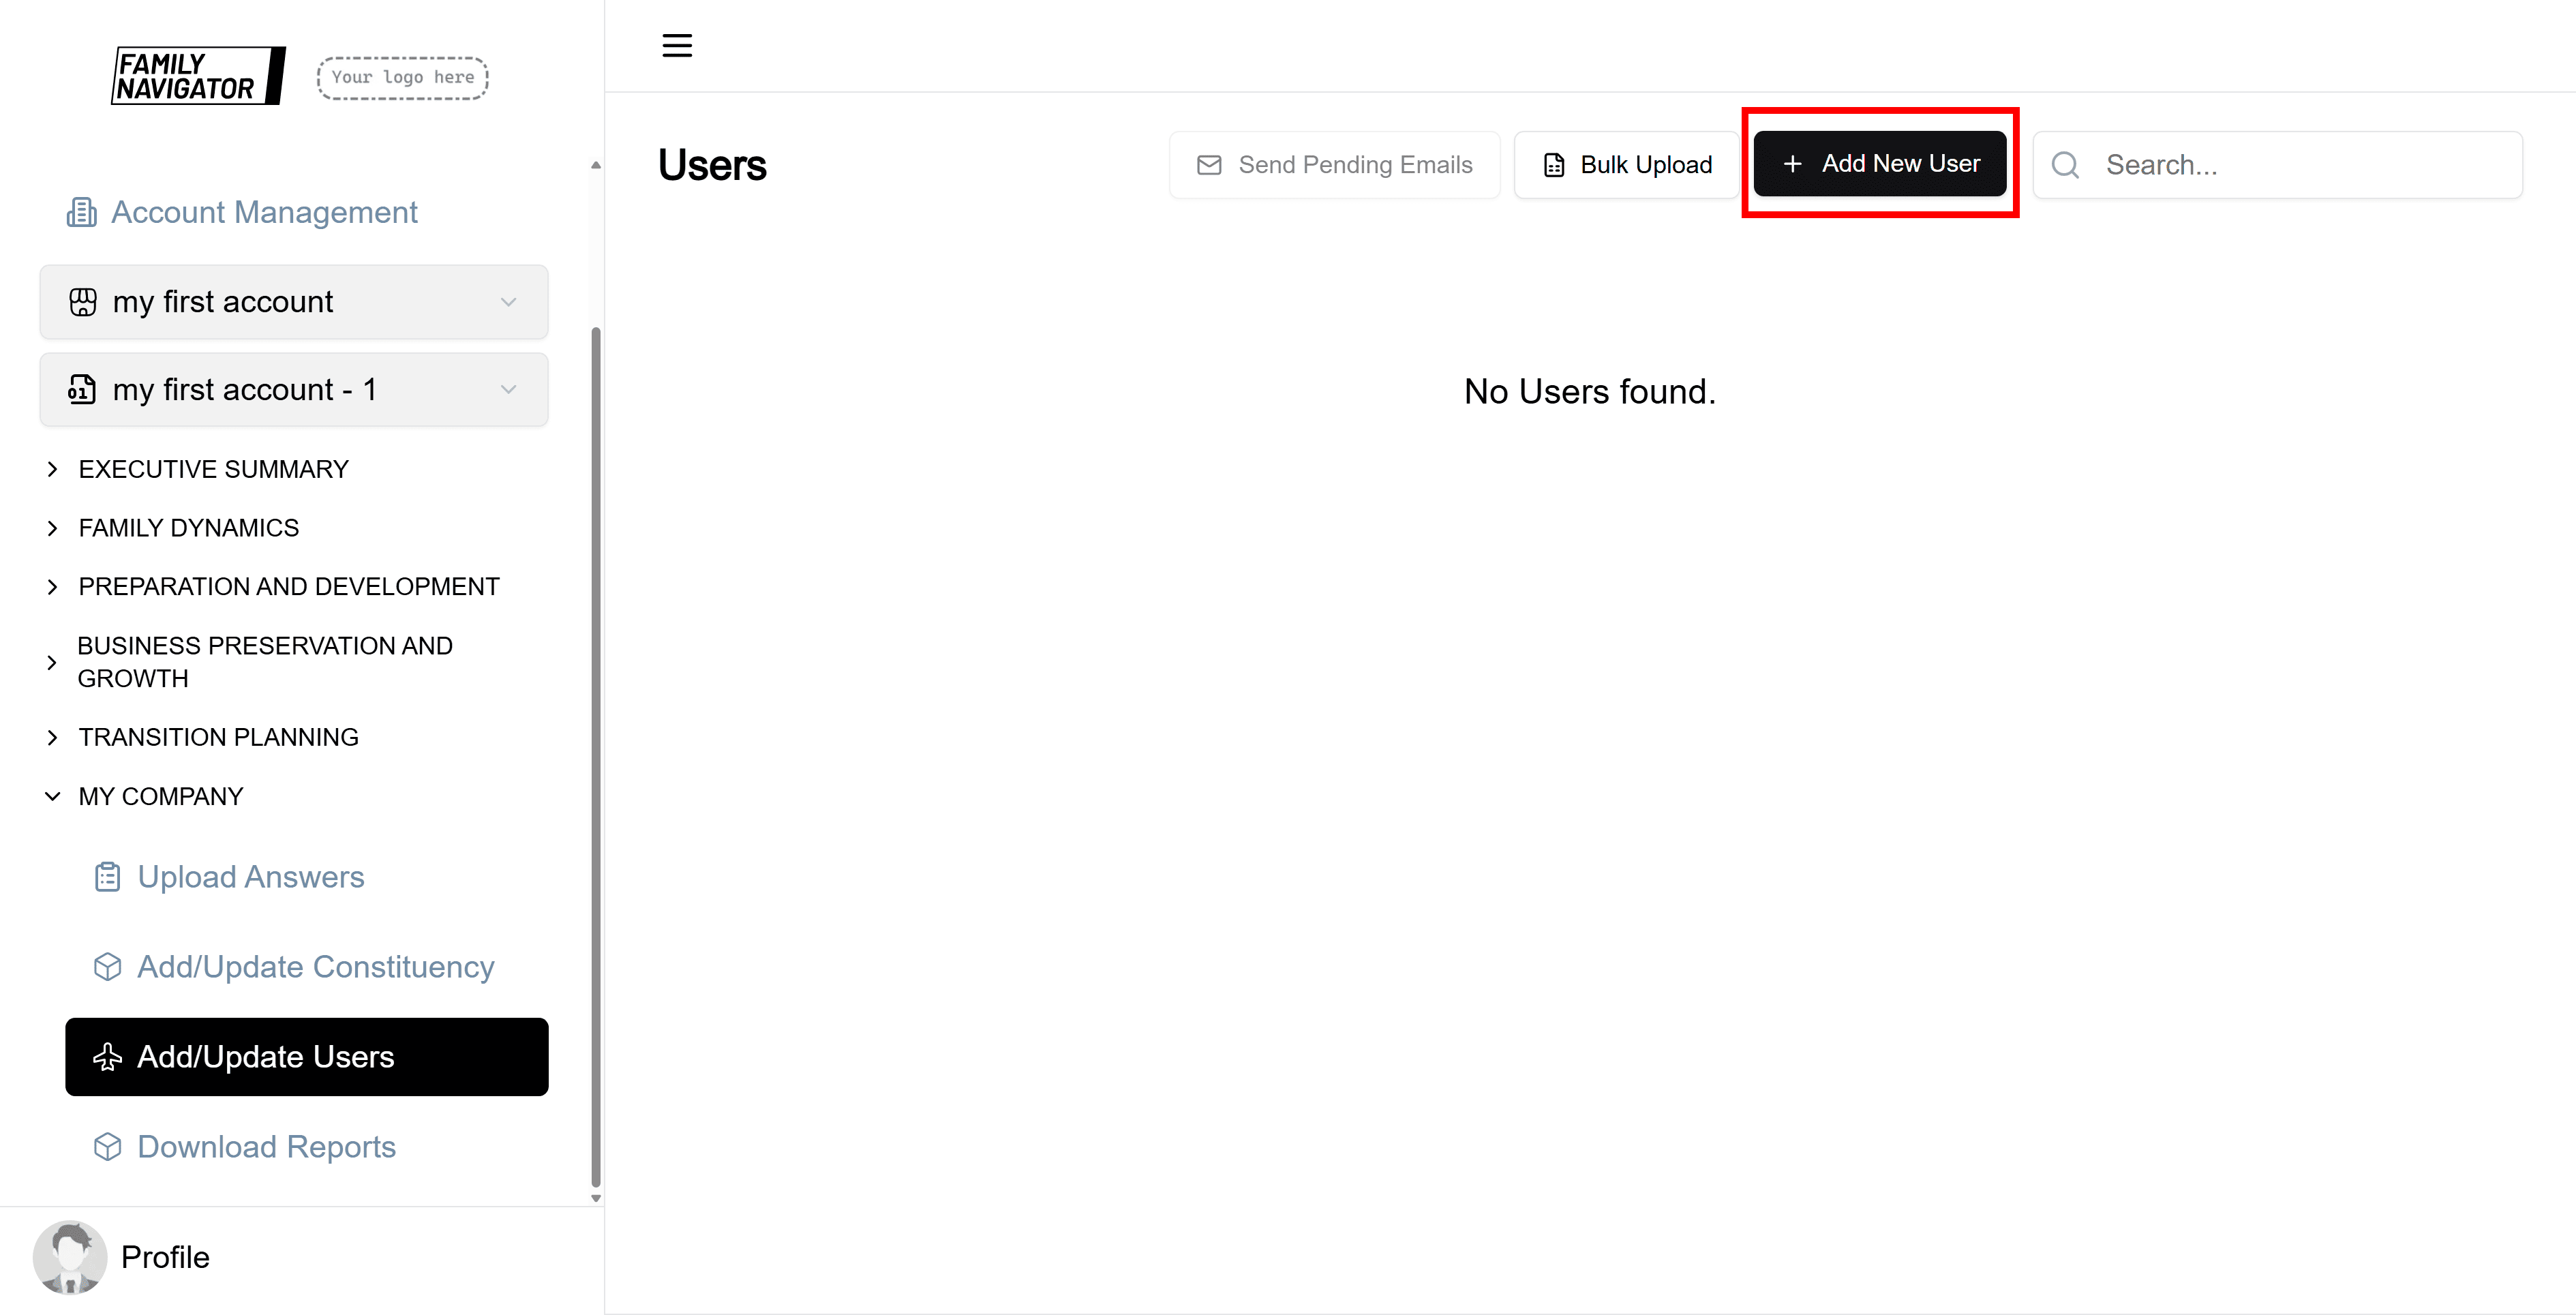
Users
This guide explains how to manage users in the Family Navigator application, including accessing the page, creating, editing, deleting users, and other related functionalities.
Accessing Users
- Log in to the Family Navigator application.
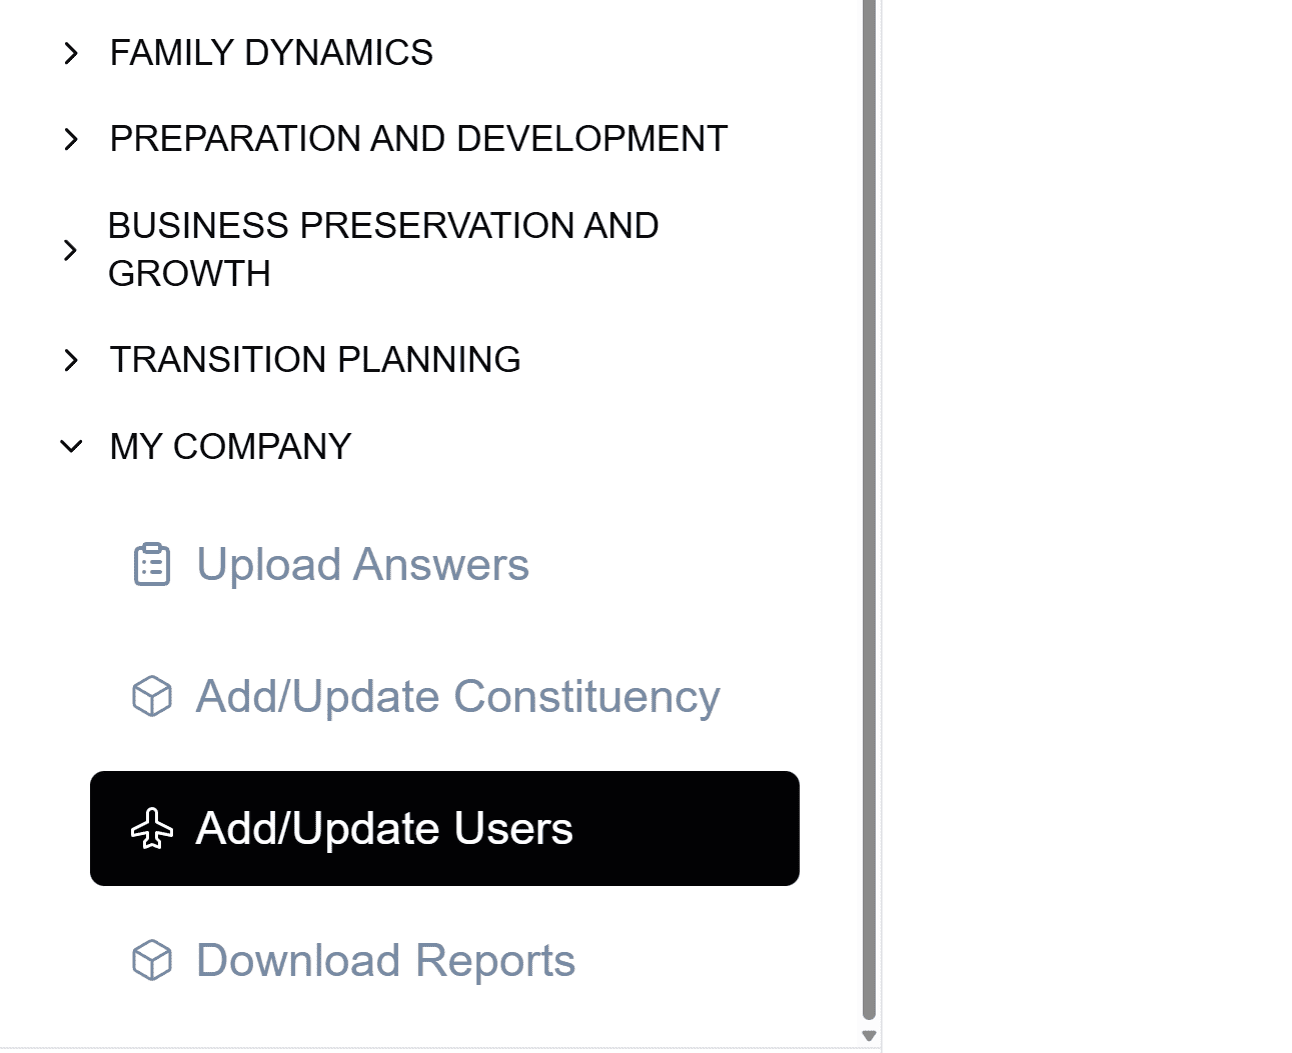
- Navigate to the "My Data" section from the main menu.
- Select "Users" from the submenu.
Creating a User
Step 1: Open the Add User Form
Click the "Add New User" button located at the top right of the Users page.
Step 2: Fill in the User Details
The form will open in a sidebar. Fill in the following required fields:
- First Name: Enter the user's first name.
- Last Name: Enter the user's last name.
- Constituency: Select the constituency from the dropdown list.
- Family Generation: Optionally select the family generation from the dropdown list.
- Email: Enter the user's email address.
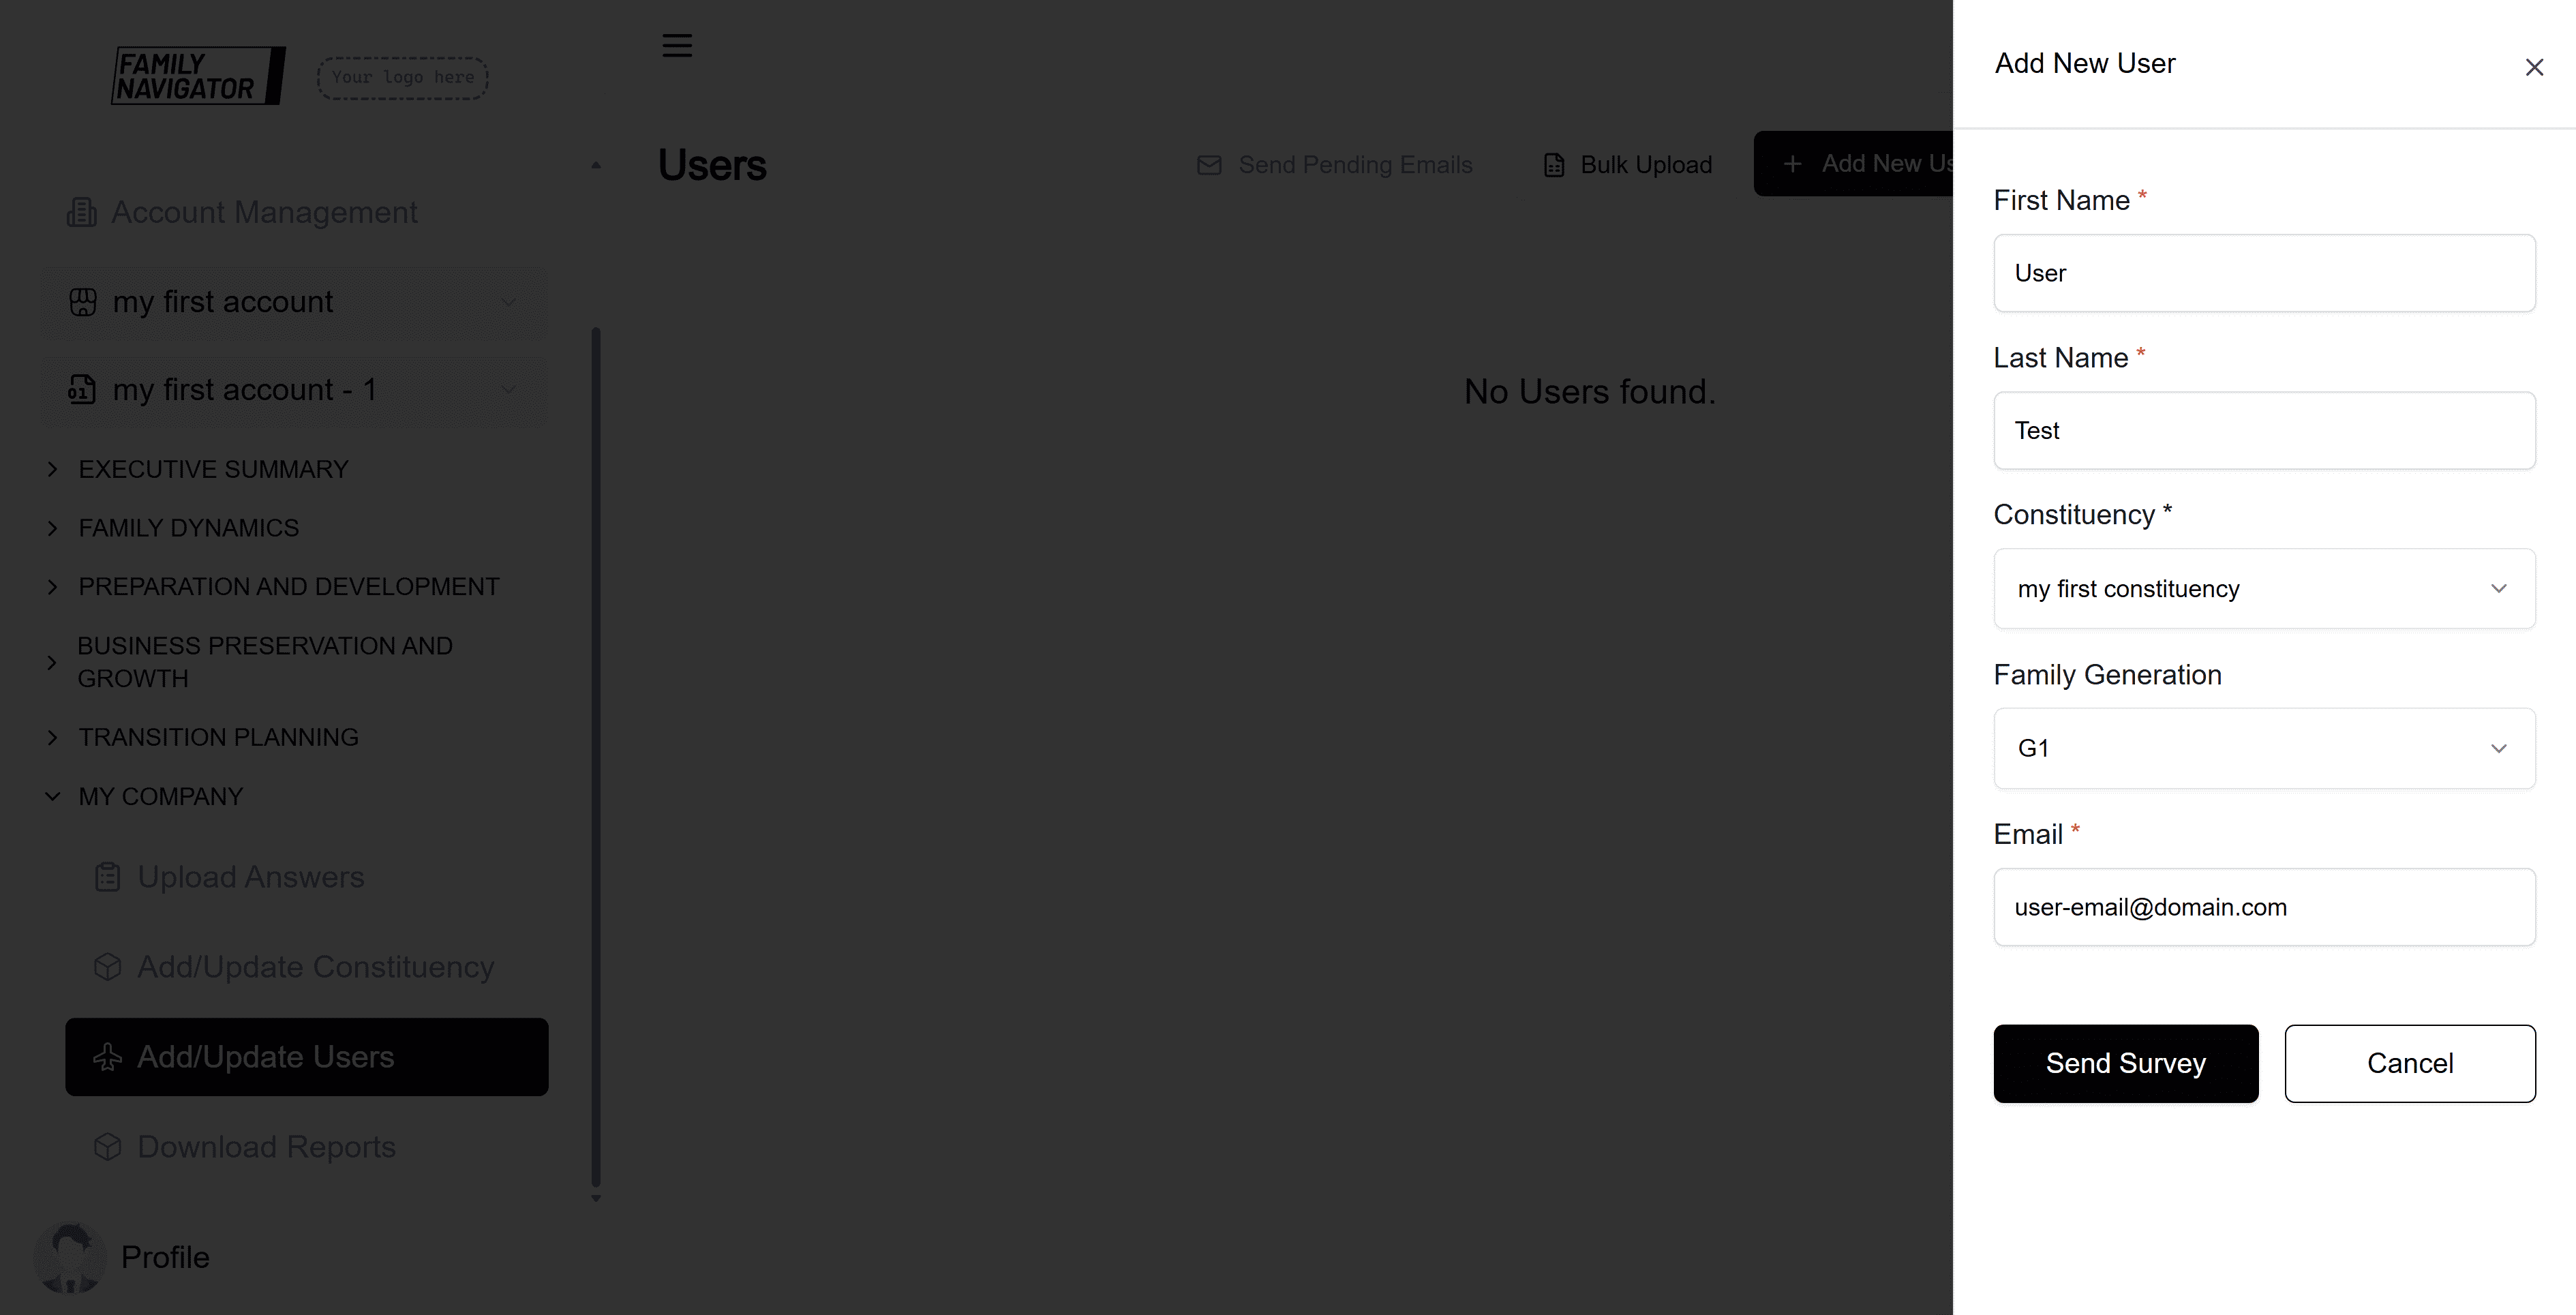
Step 3: Send Survey
Click the "Send Survey" button to create the user and send them the survey invitation. You will see a success message upon completion.
Editing a User
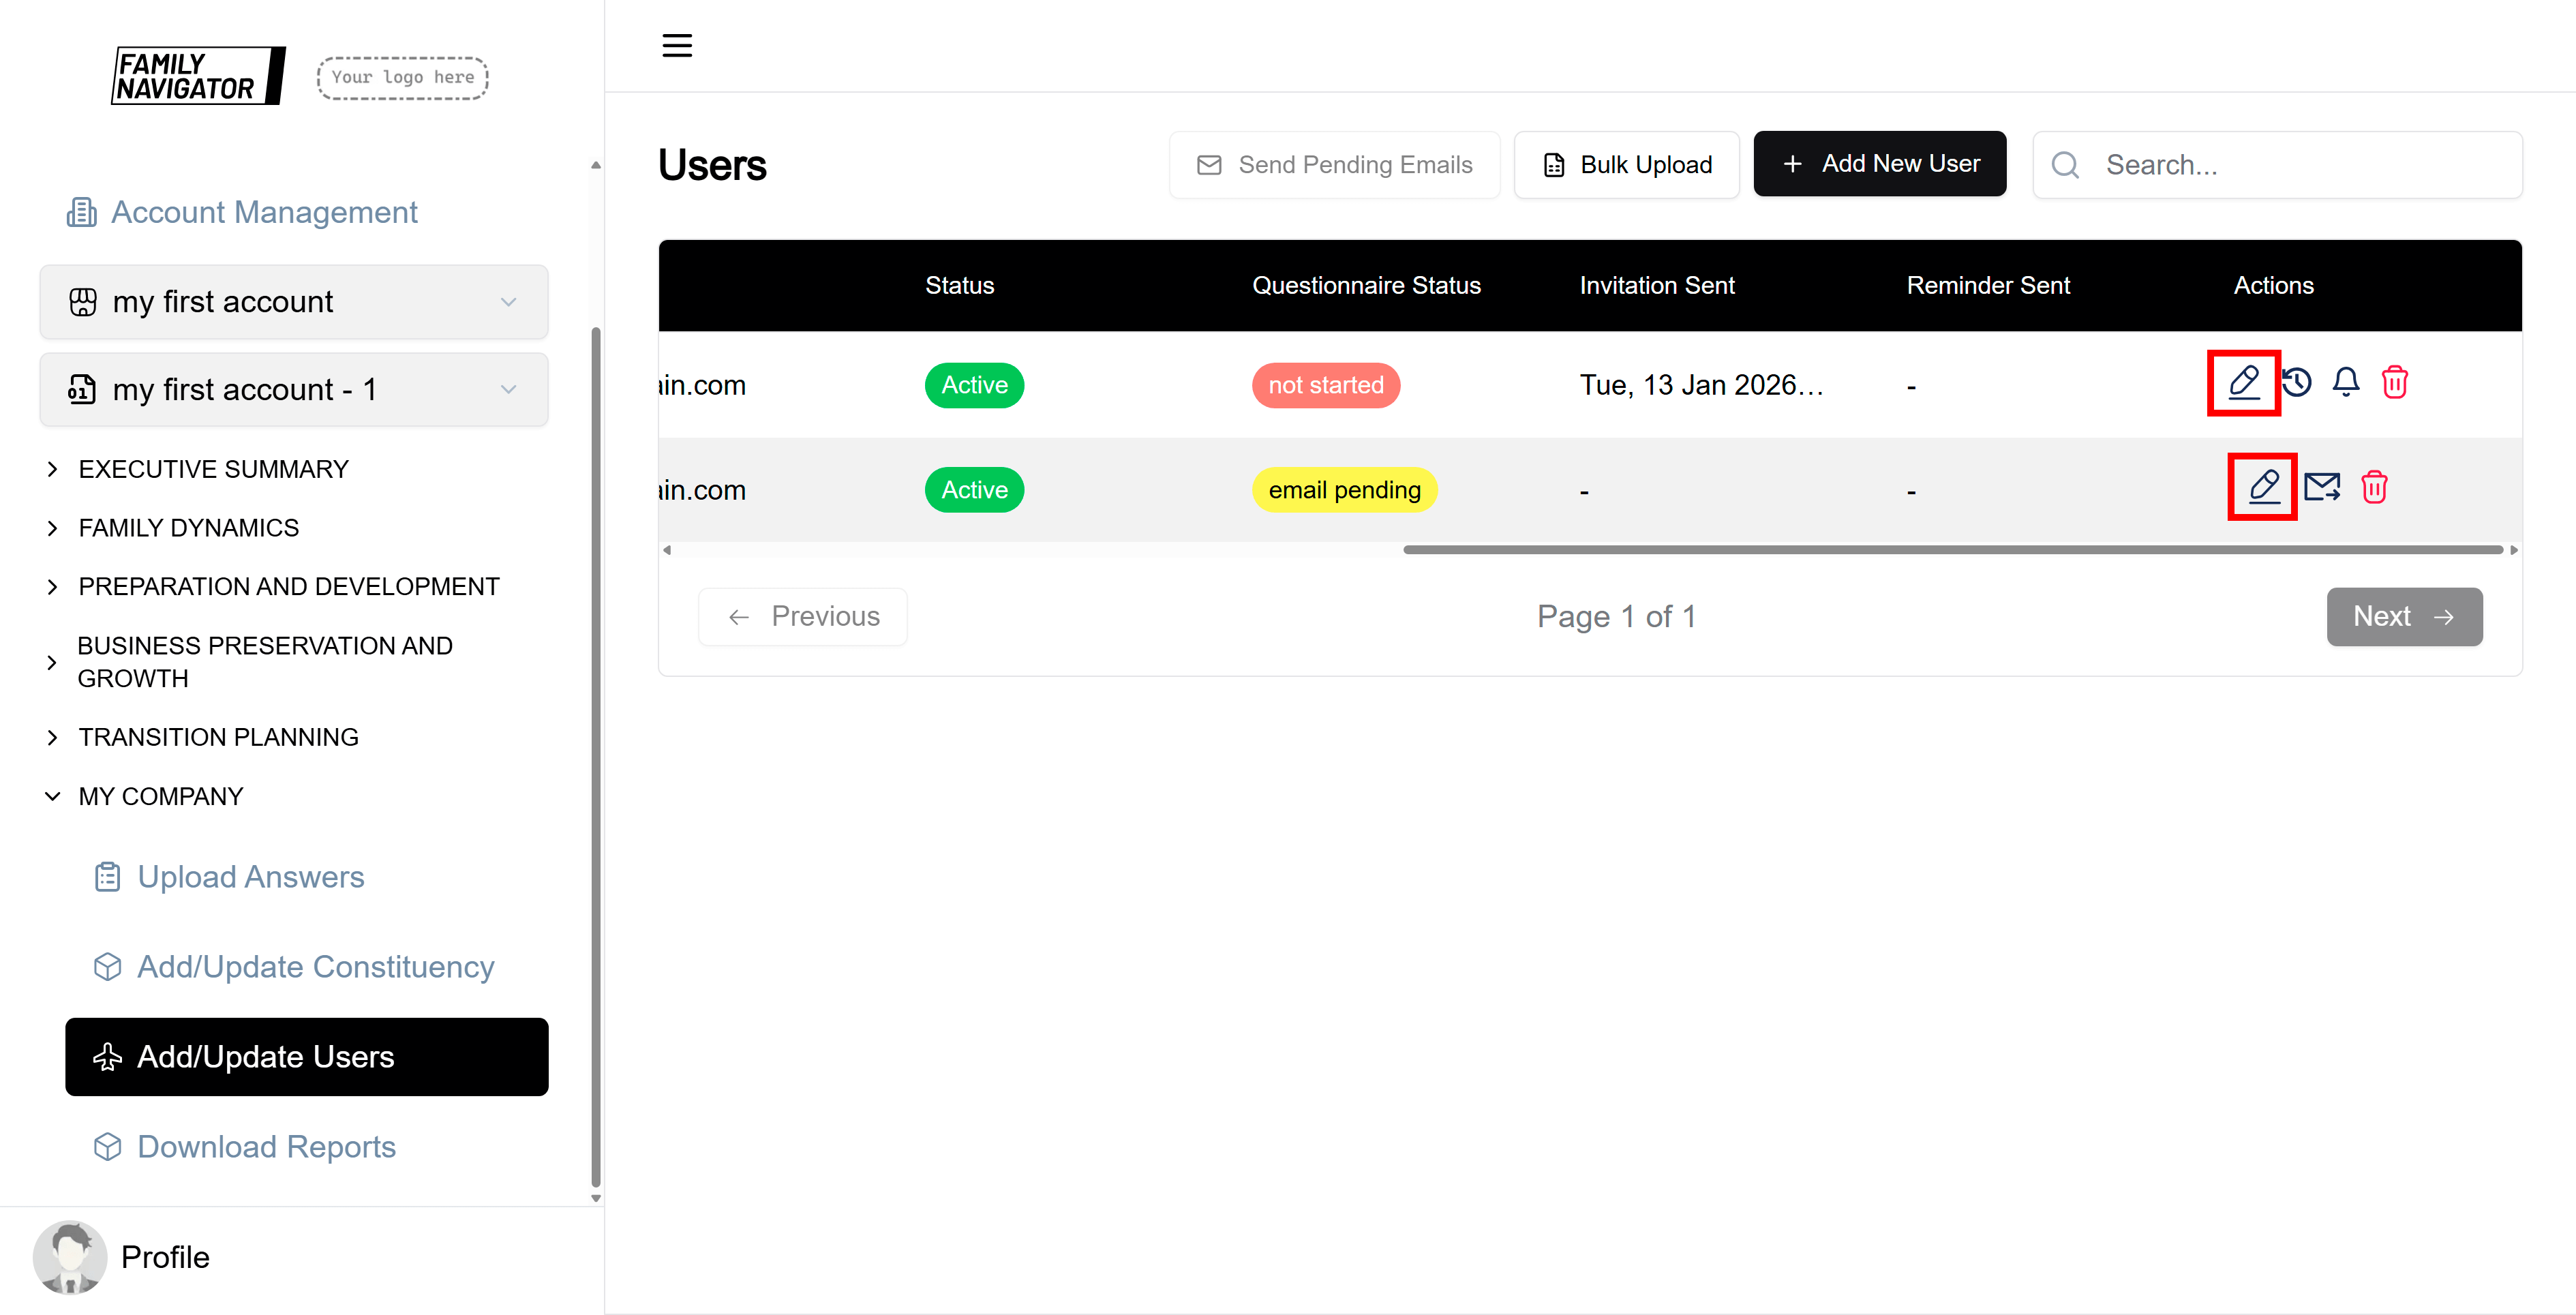
Step 1: Locate the User
Find the user you want to edit in the users table. You can use the search bar to filter users by name, email, or other criteria.
Step 2: Open the Edit Form
Click the "Edit" button (pencil icon) in the Actions column for the desired user.
Step 3: Modify the Details
Update any of the fields as needed. You can also toggle the "Is active?" checkbox to activate or deactivate the user.
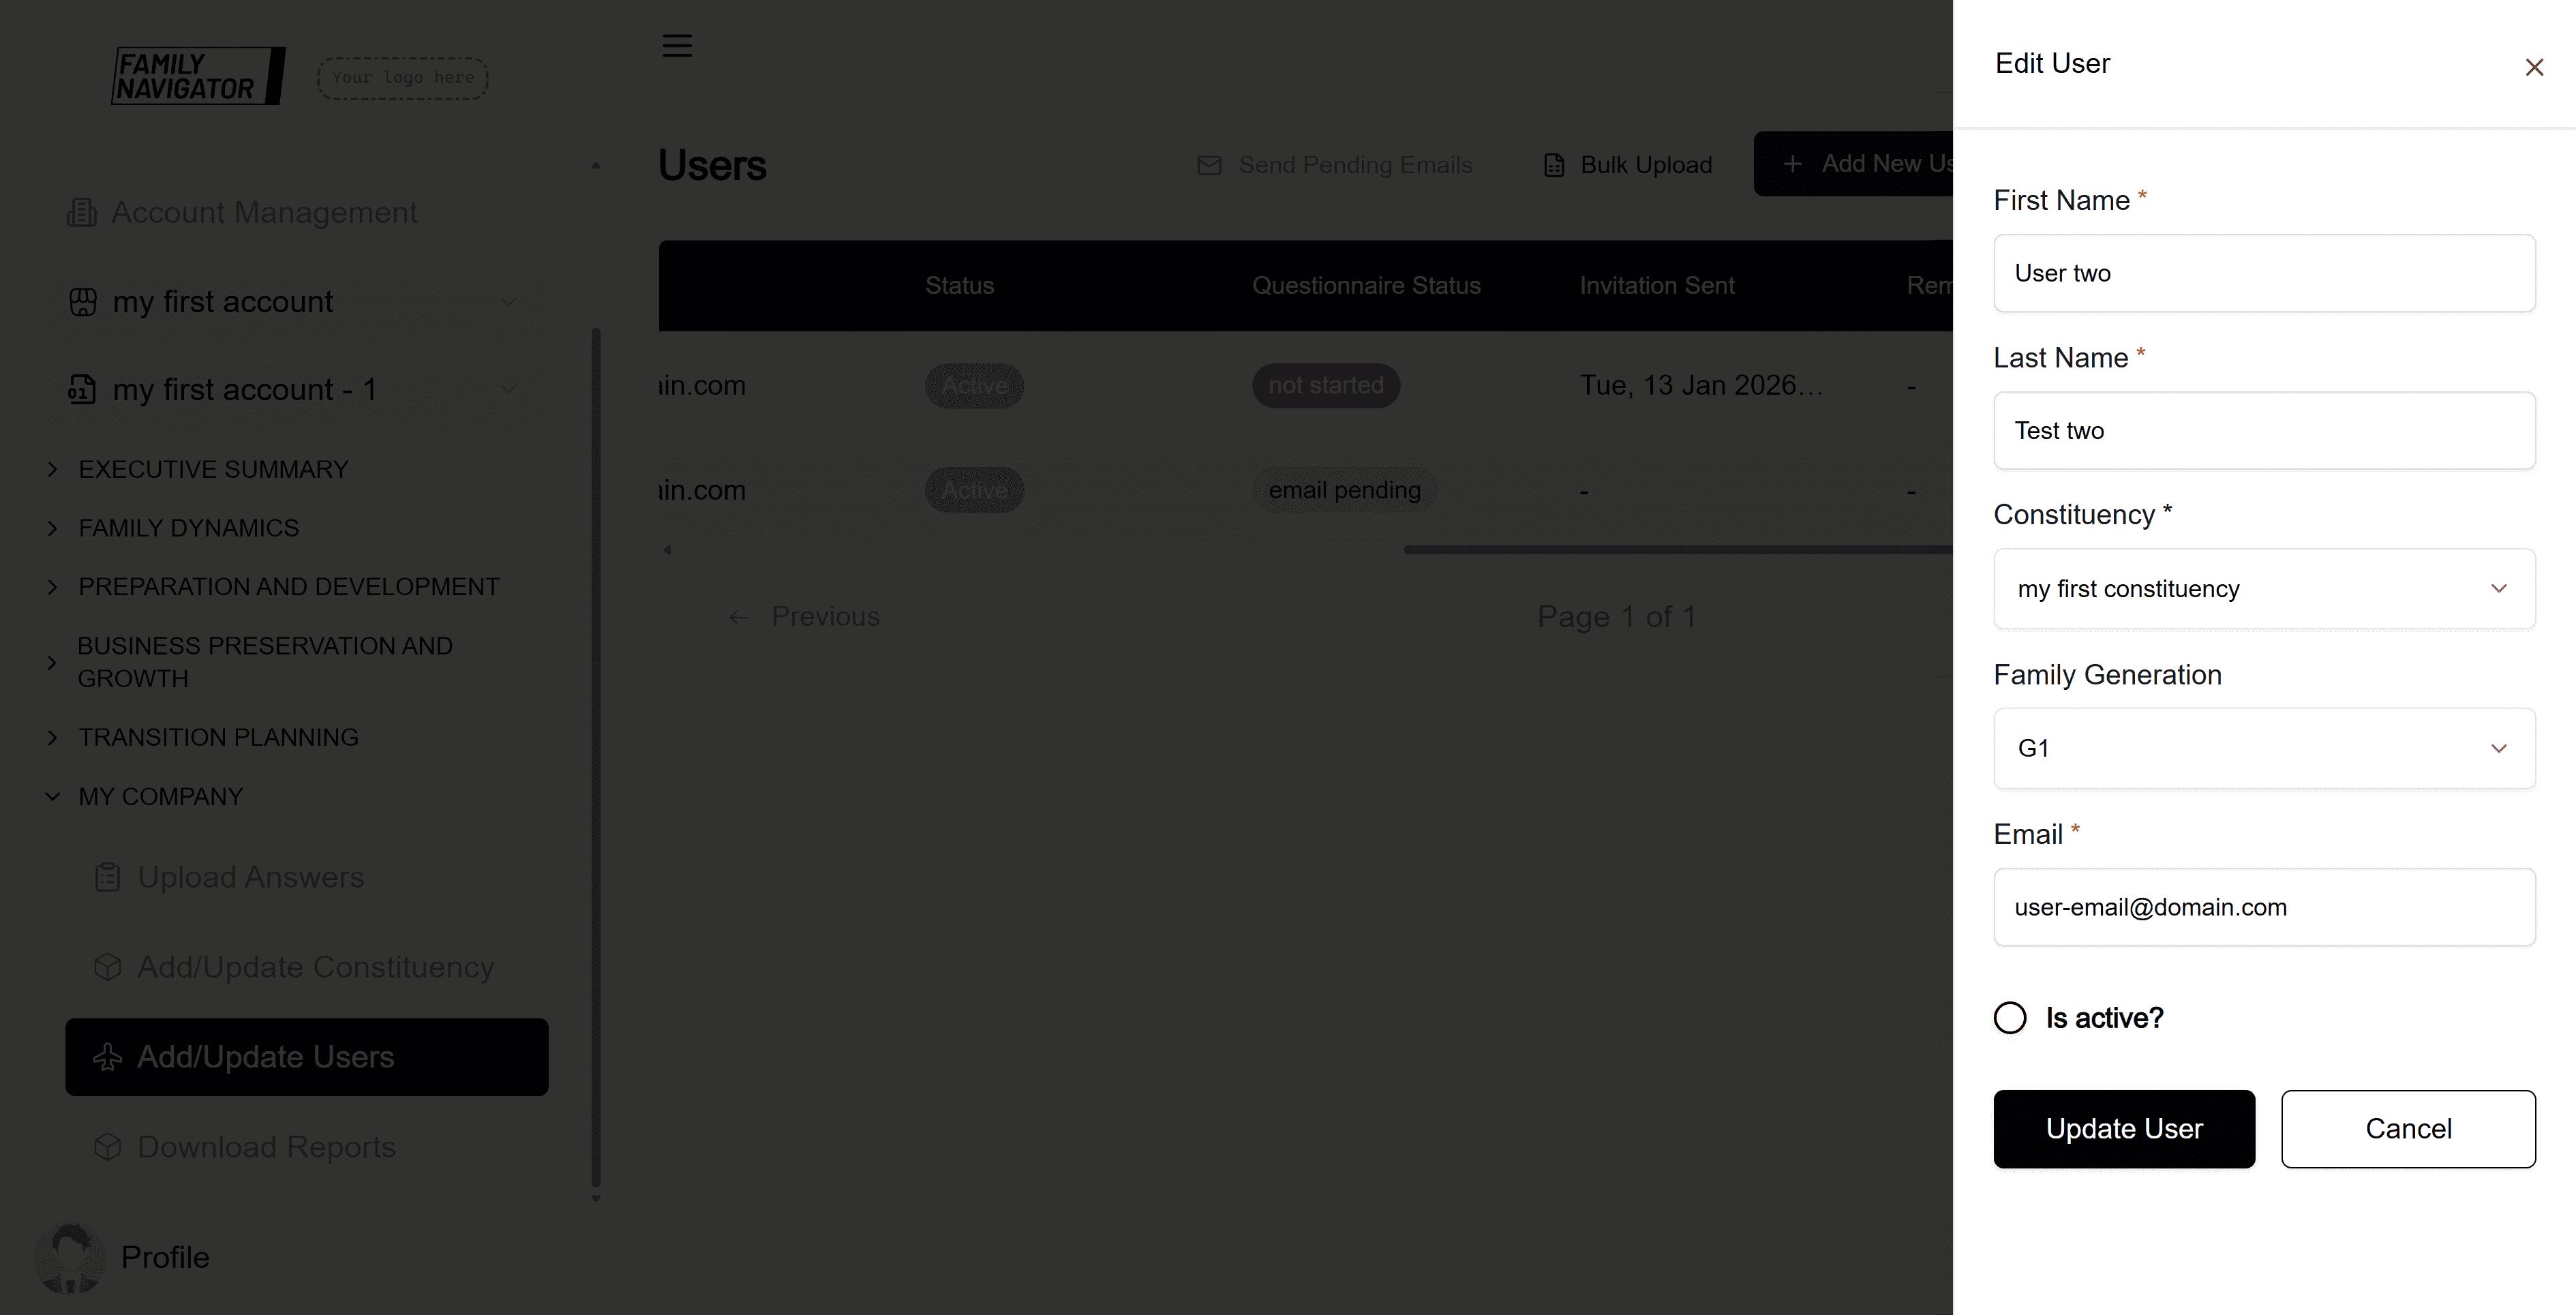
Step 4: Save Changes
Click the "Update User" button to save your changes. A success message will confirm the update.
Deleting a User
Step 1: Locate the User
Find the user you want to delete in the users table.
Step 2: Initiate Deletion
Click the "Delete" button (trash icon) in the Actions column for the desired user.

Step 3: Confirm Deletion
A confirmation modal will appear. Click "Confirm" to permanently delete the user.
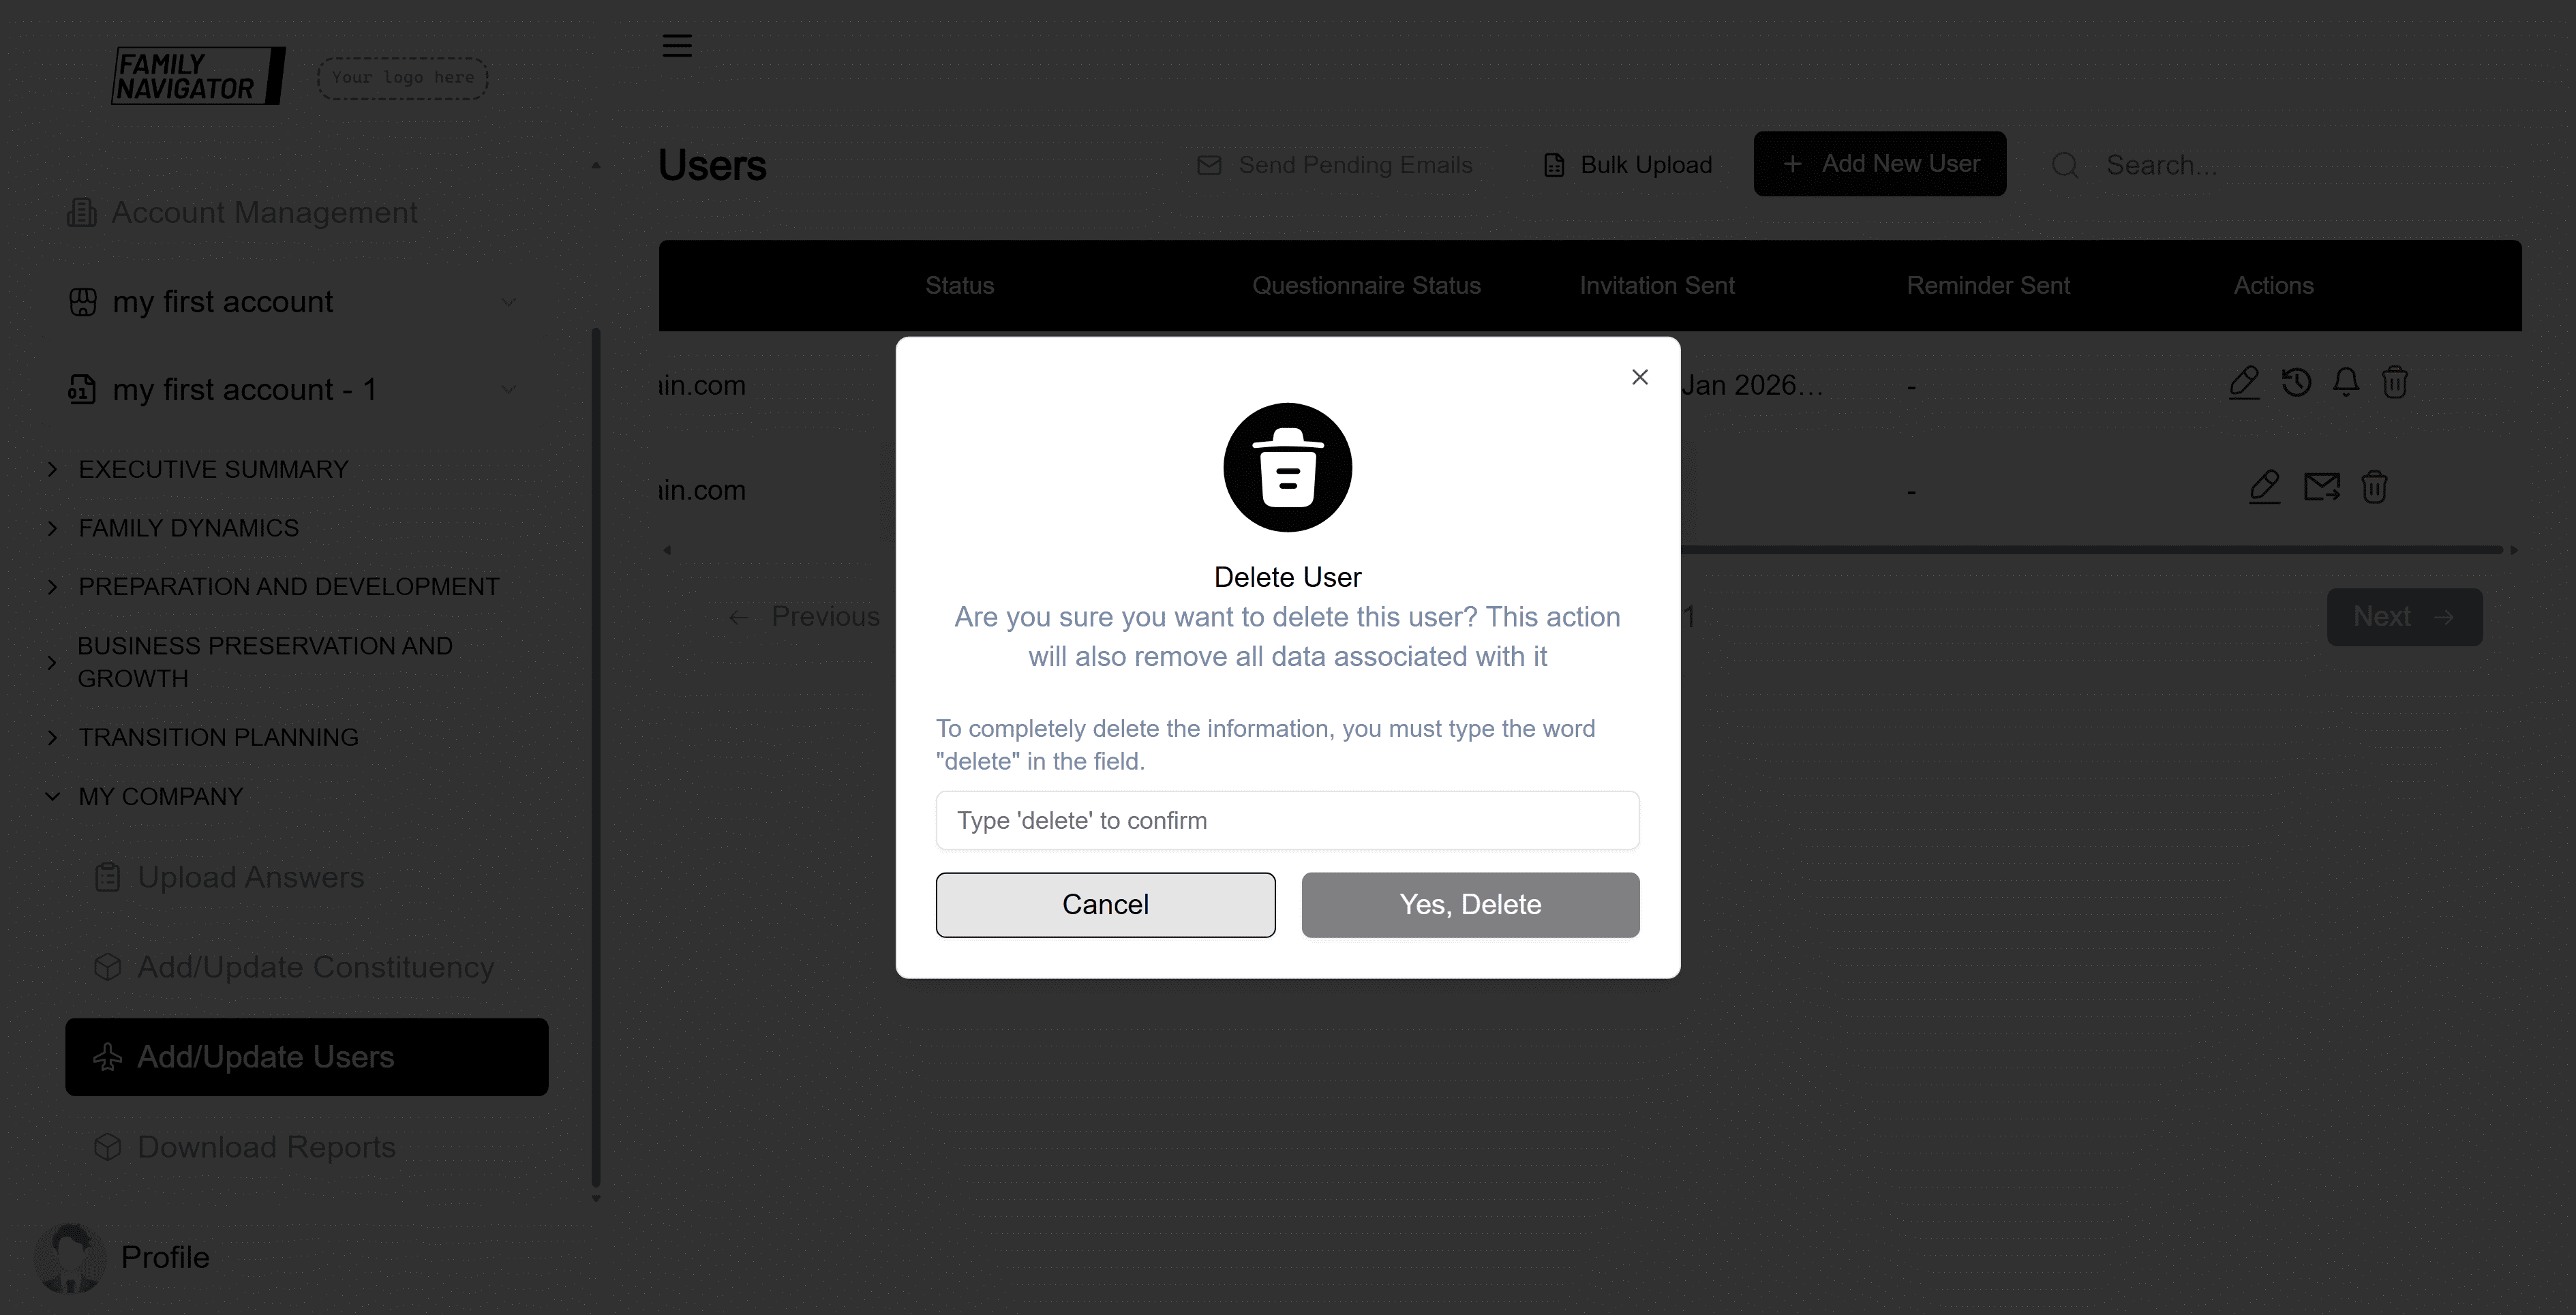
Step 4: Deletion Complete
The user will be removed from the list, and you will see a success message.
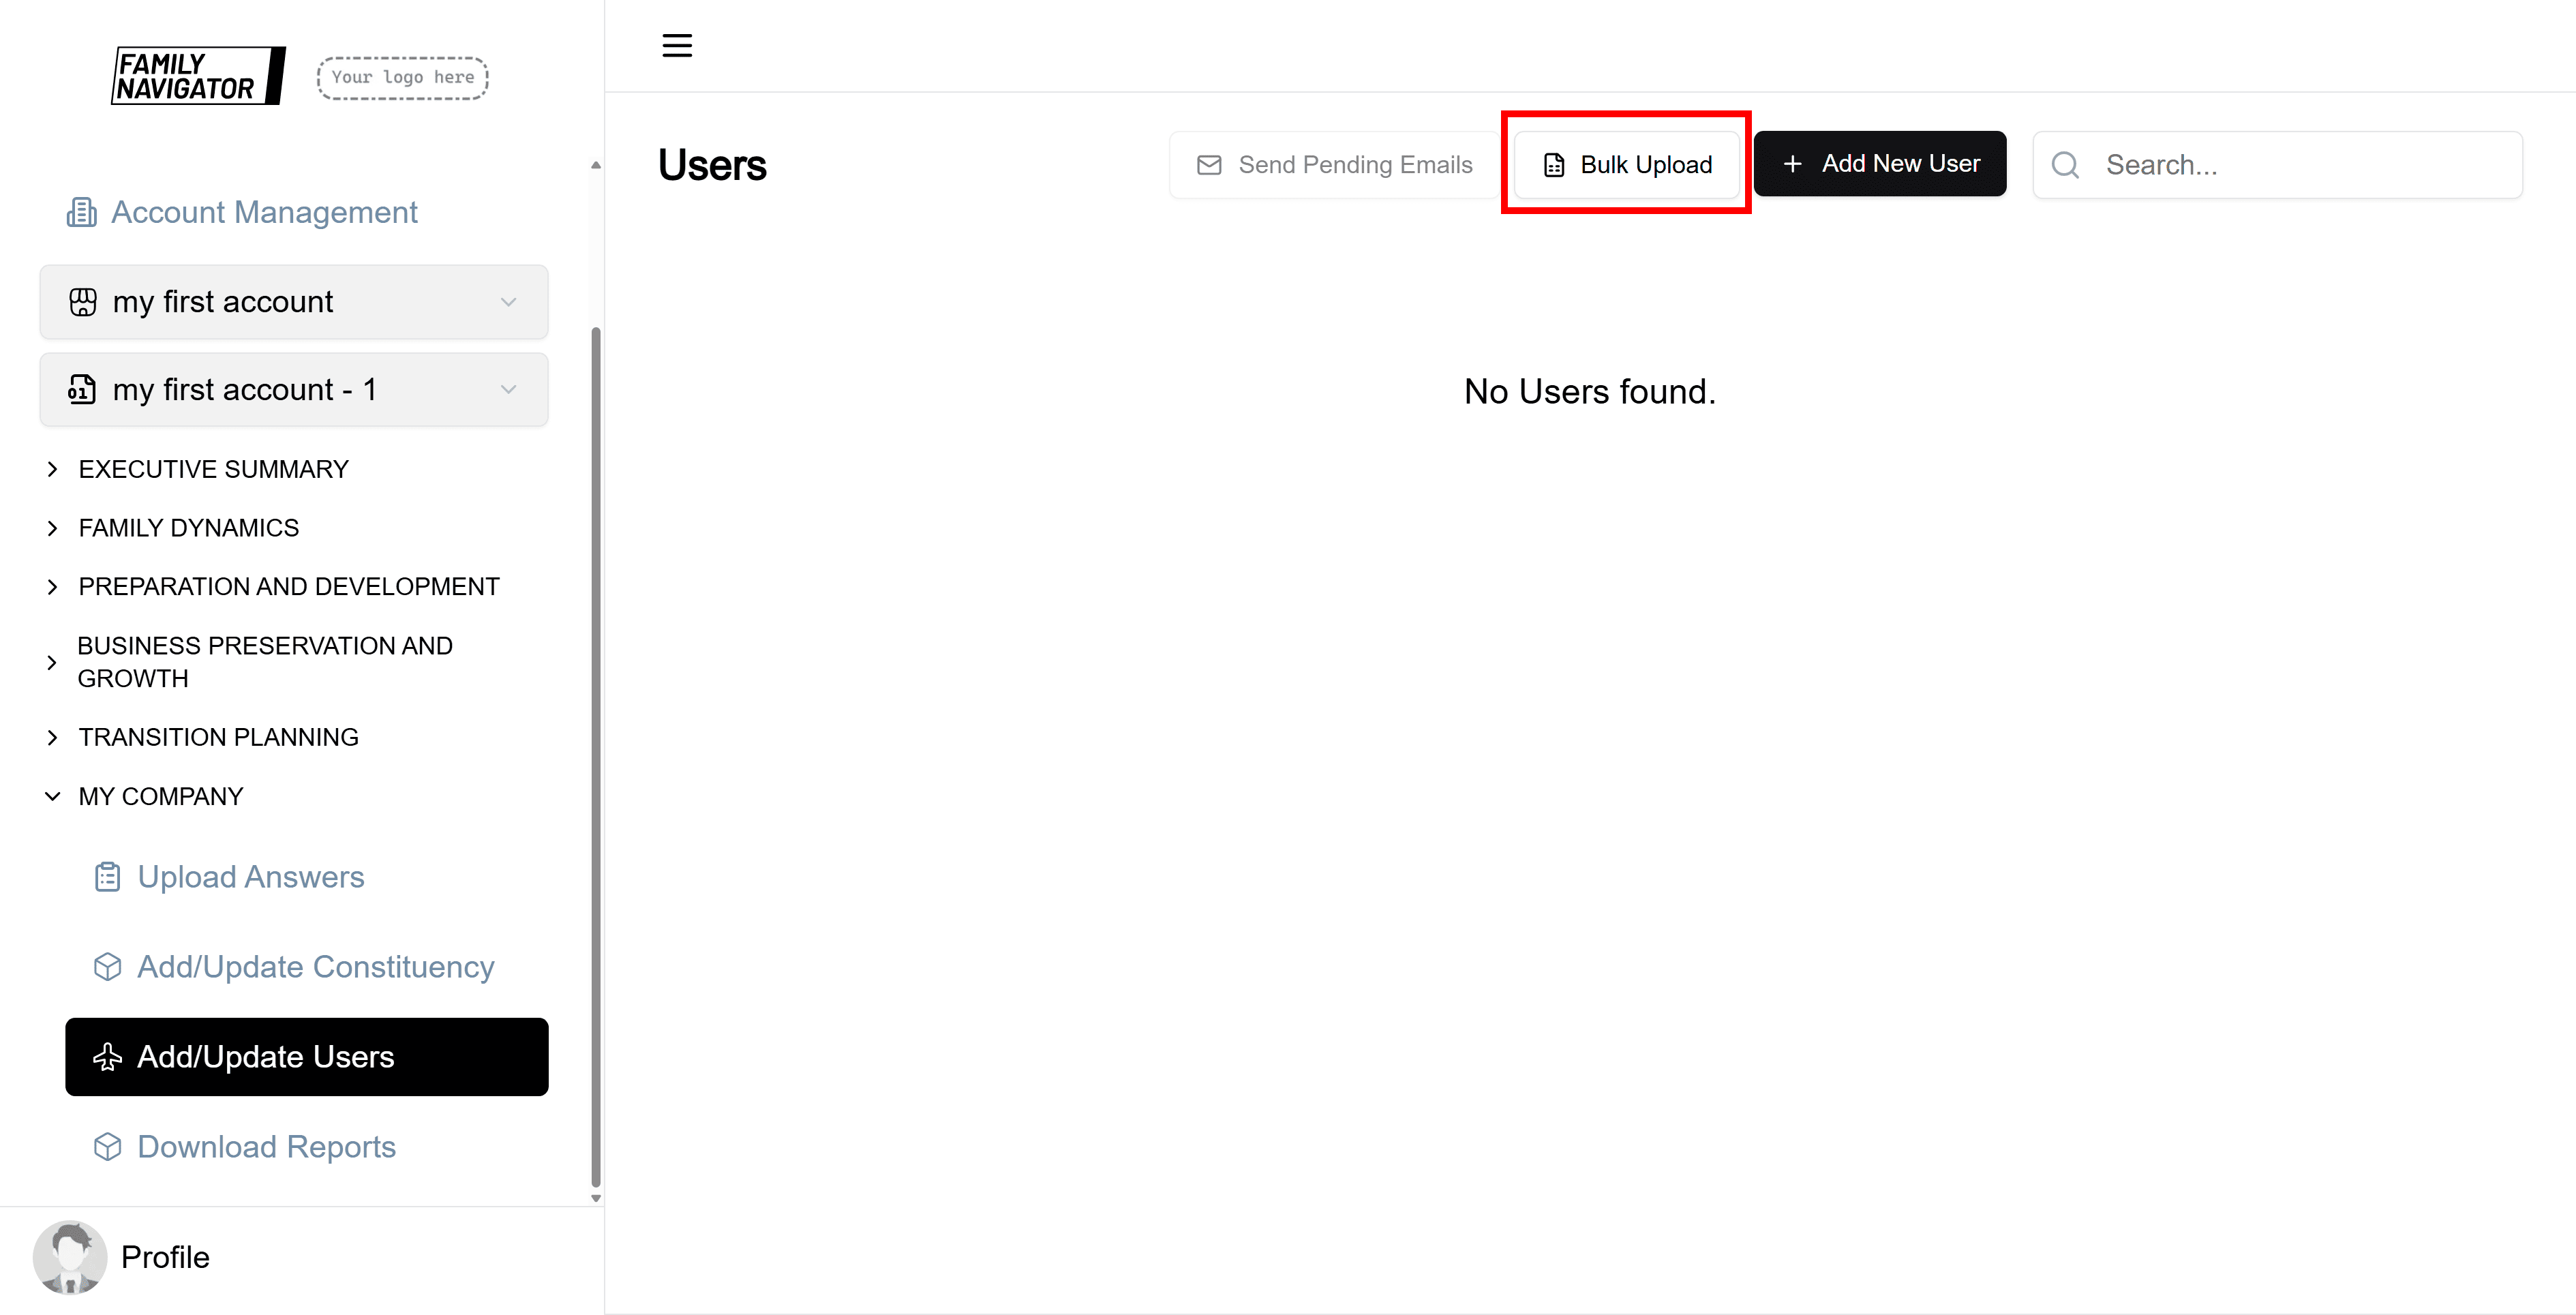
Bulk Upload Users
The “Bulk Upload” action allows you to create multiple users from a specified Excel file.
Step 1: Open Bulk Upload Modal
Click the "Bulk Upload" button located next to the "Add New User" button.
Step 2: Upload File
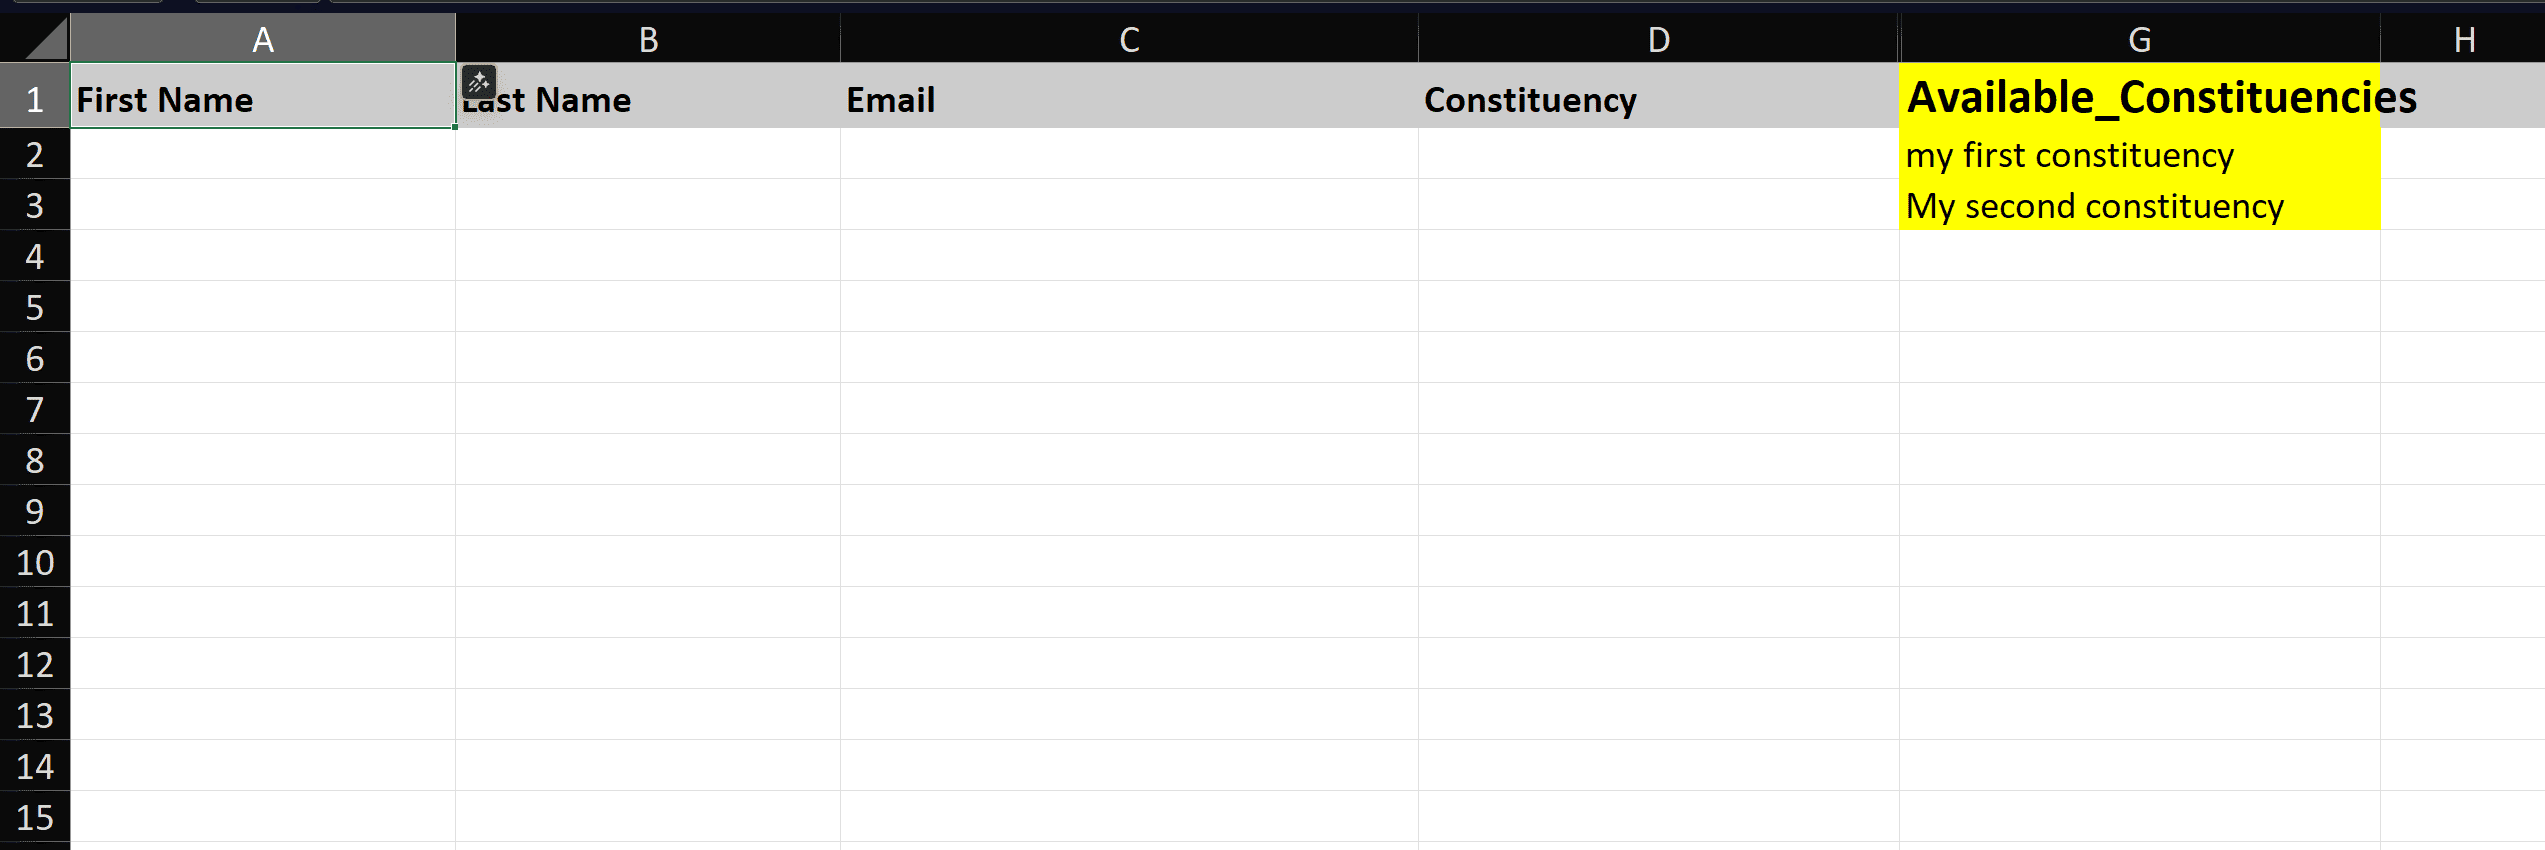
Follow the instructions in the modal to upload a CSV or Excel file containing user data. The file should include columns for first name, last name, constituency, family generation, and email.
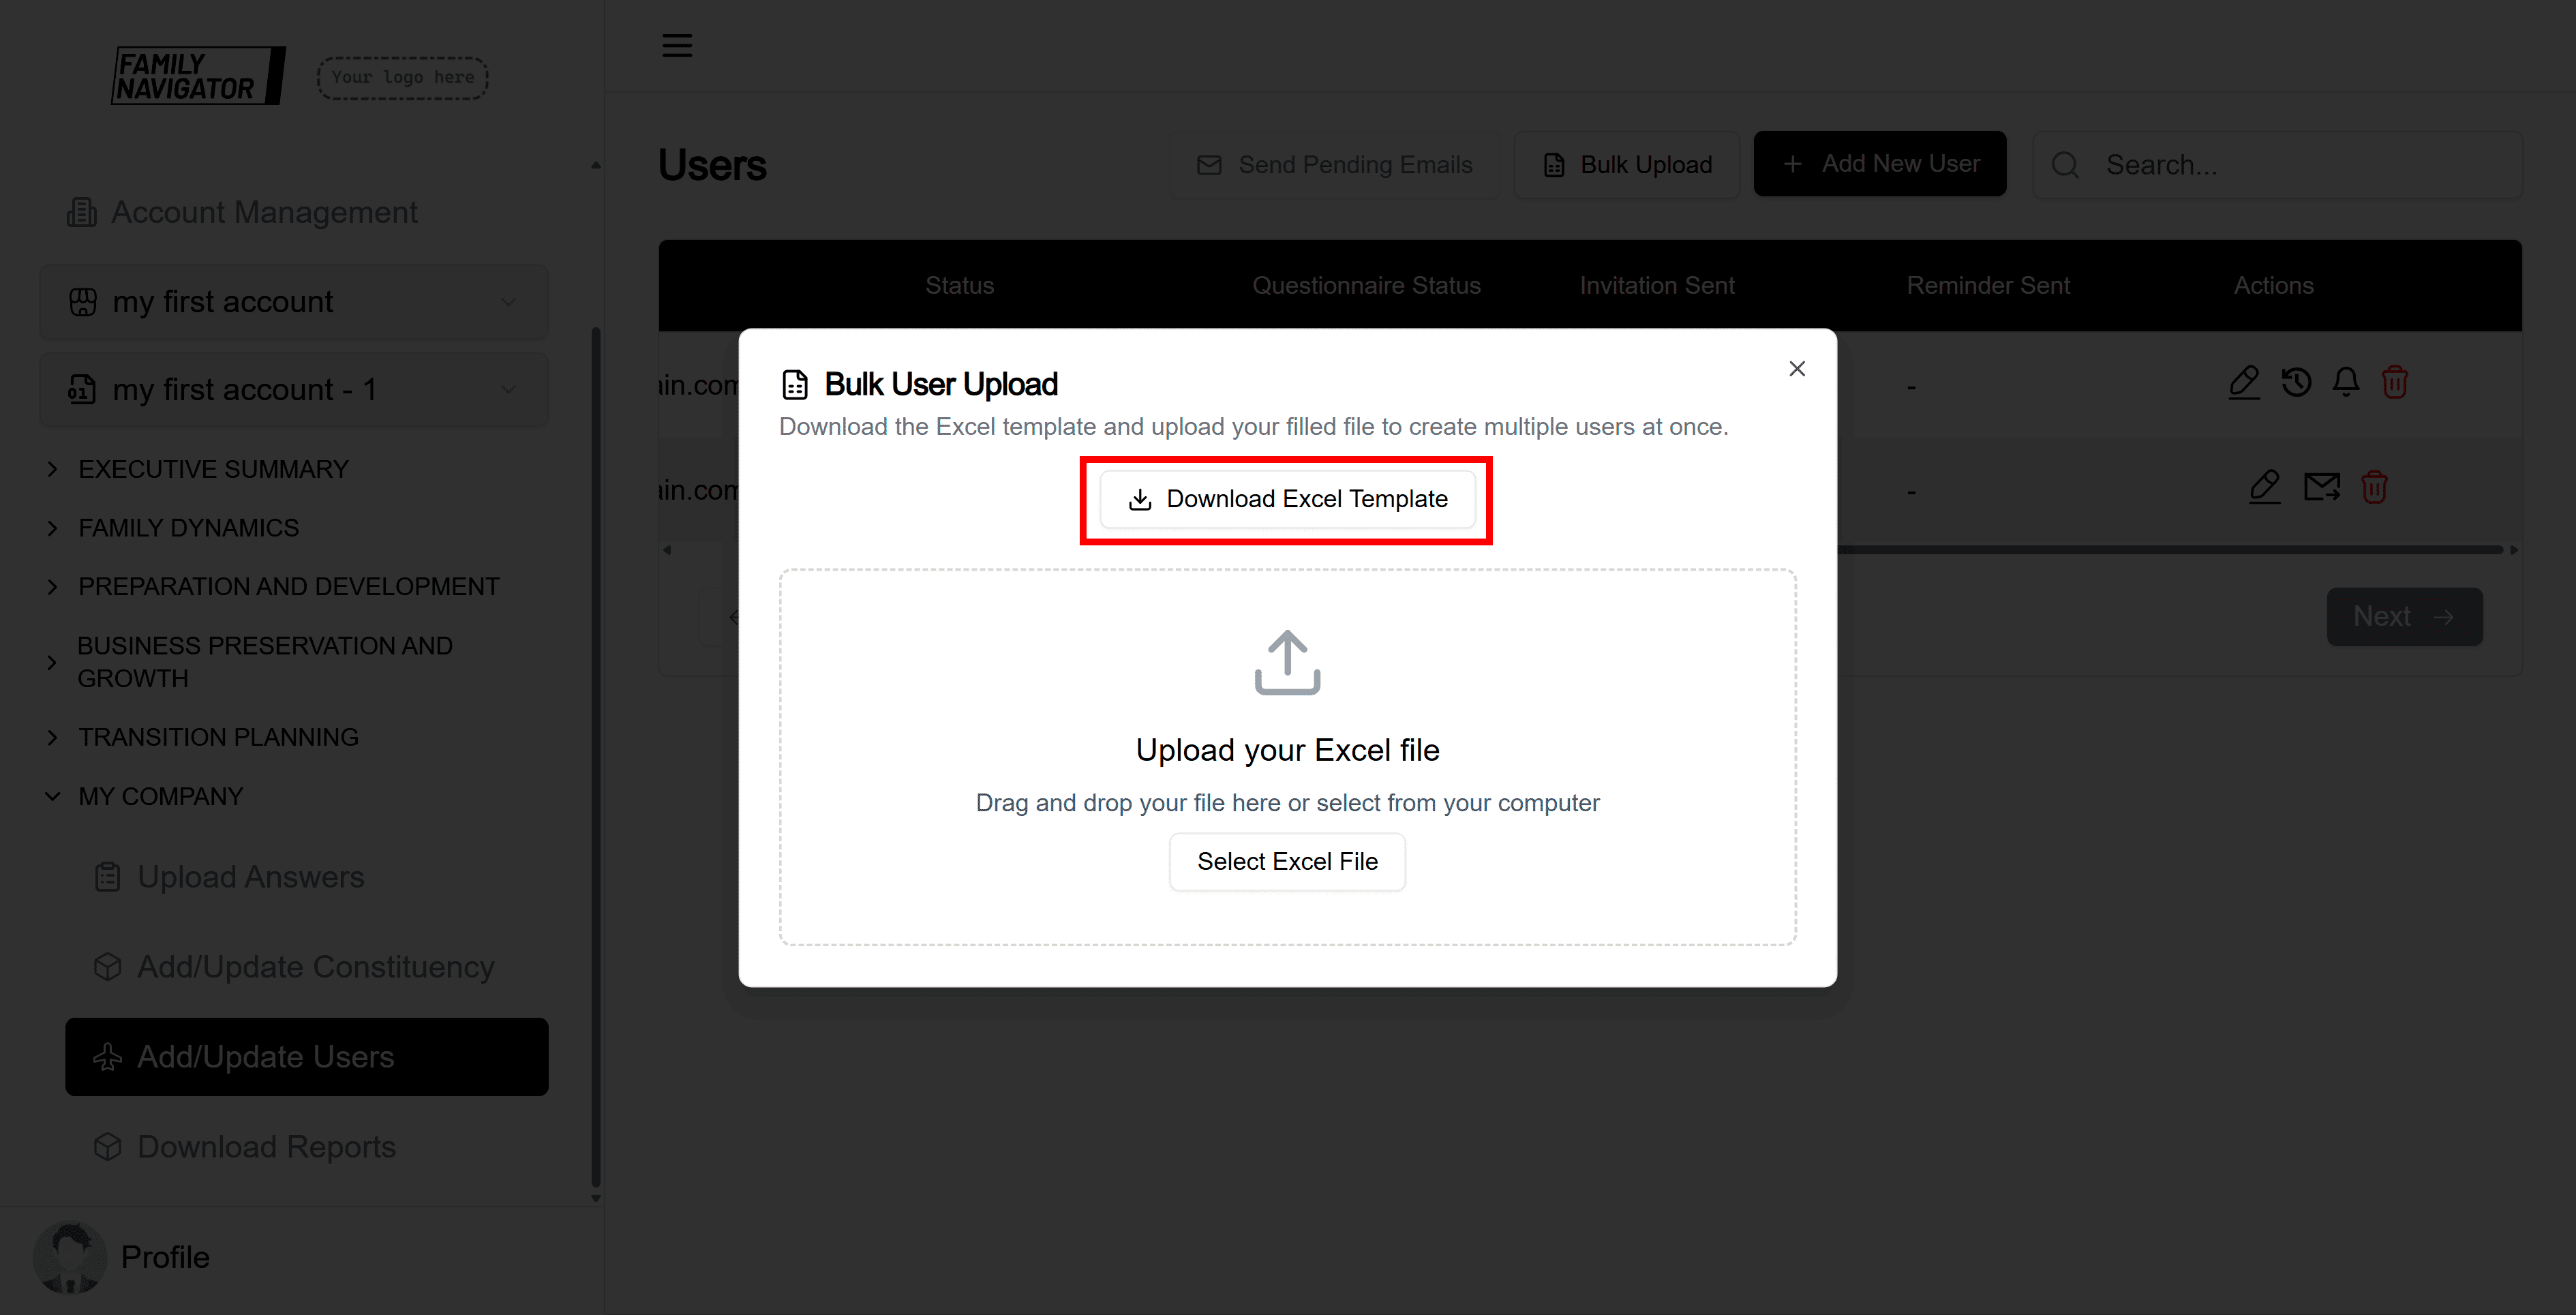
Step 3: Process Upload
Click “Validate File” to validate the file. If everything went well and there are no validation errors, click “Create User(s)”.

Sending Pending Emails
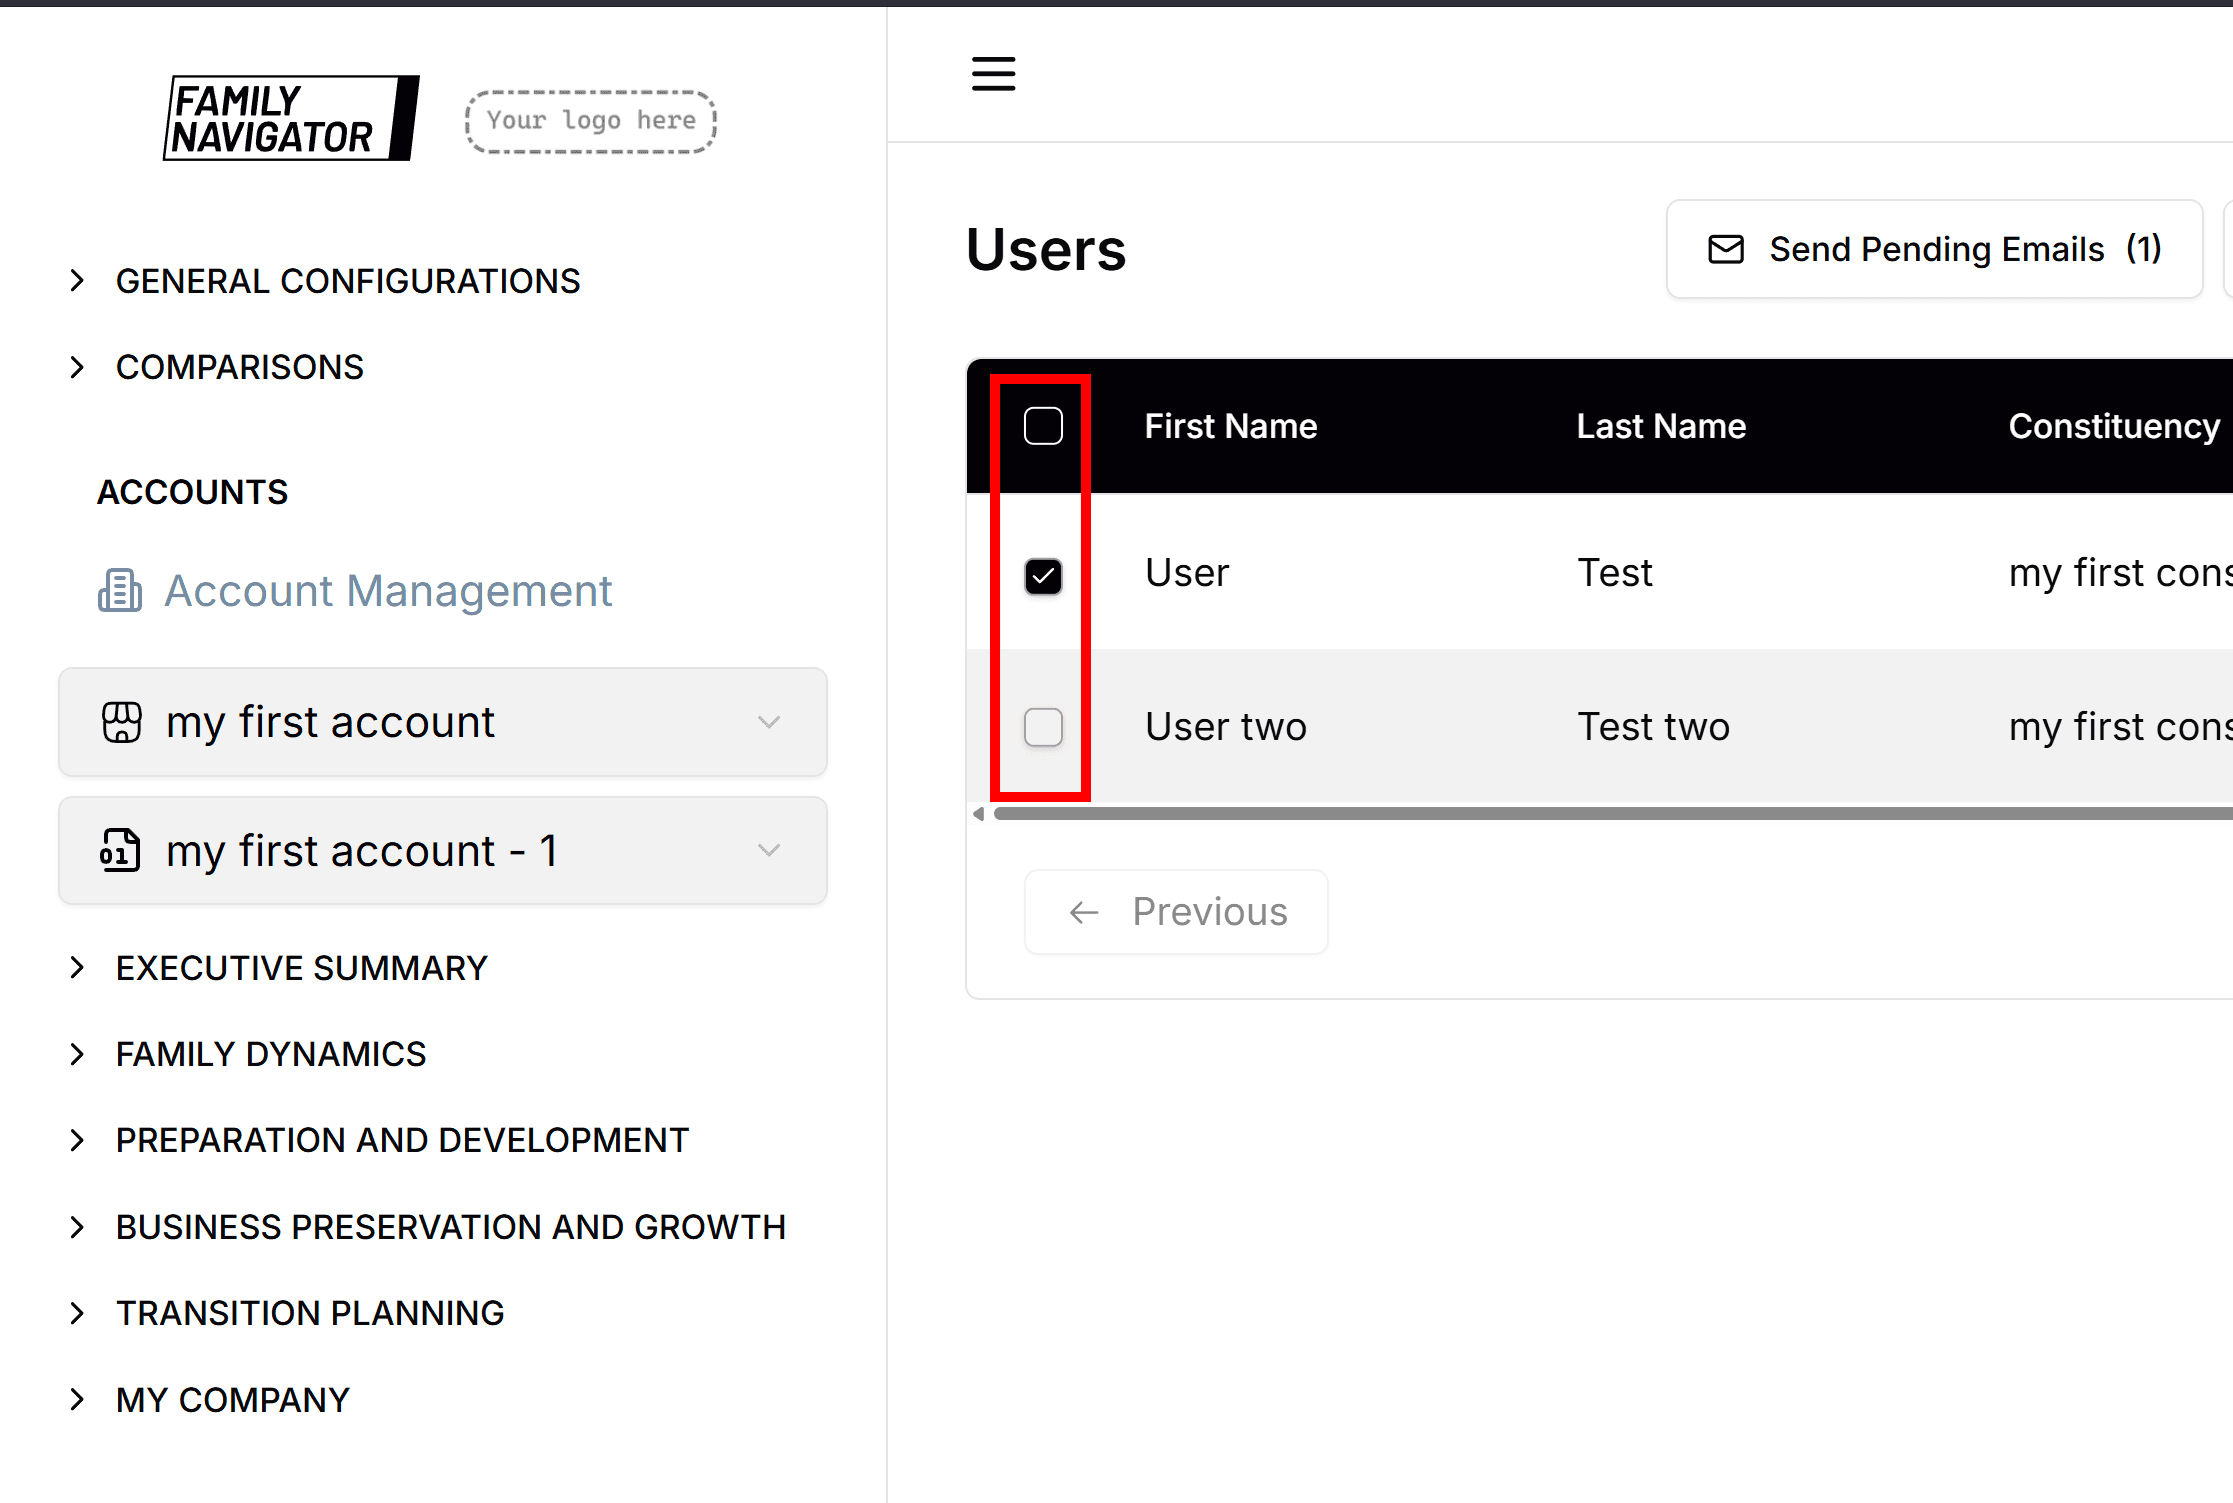
Step 1: Select Users
Use the checkboxes in the table to select individual users or check the header checkbox to select all users on the current page.
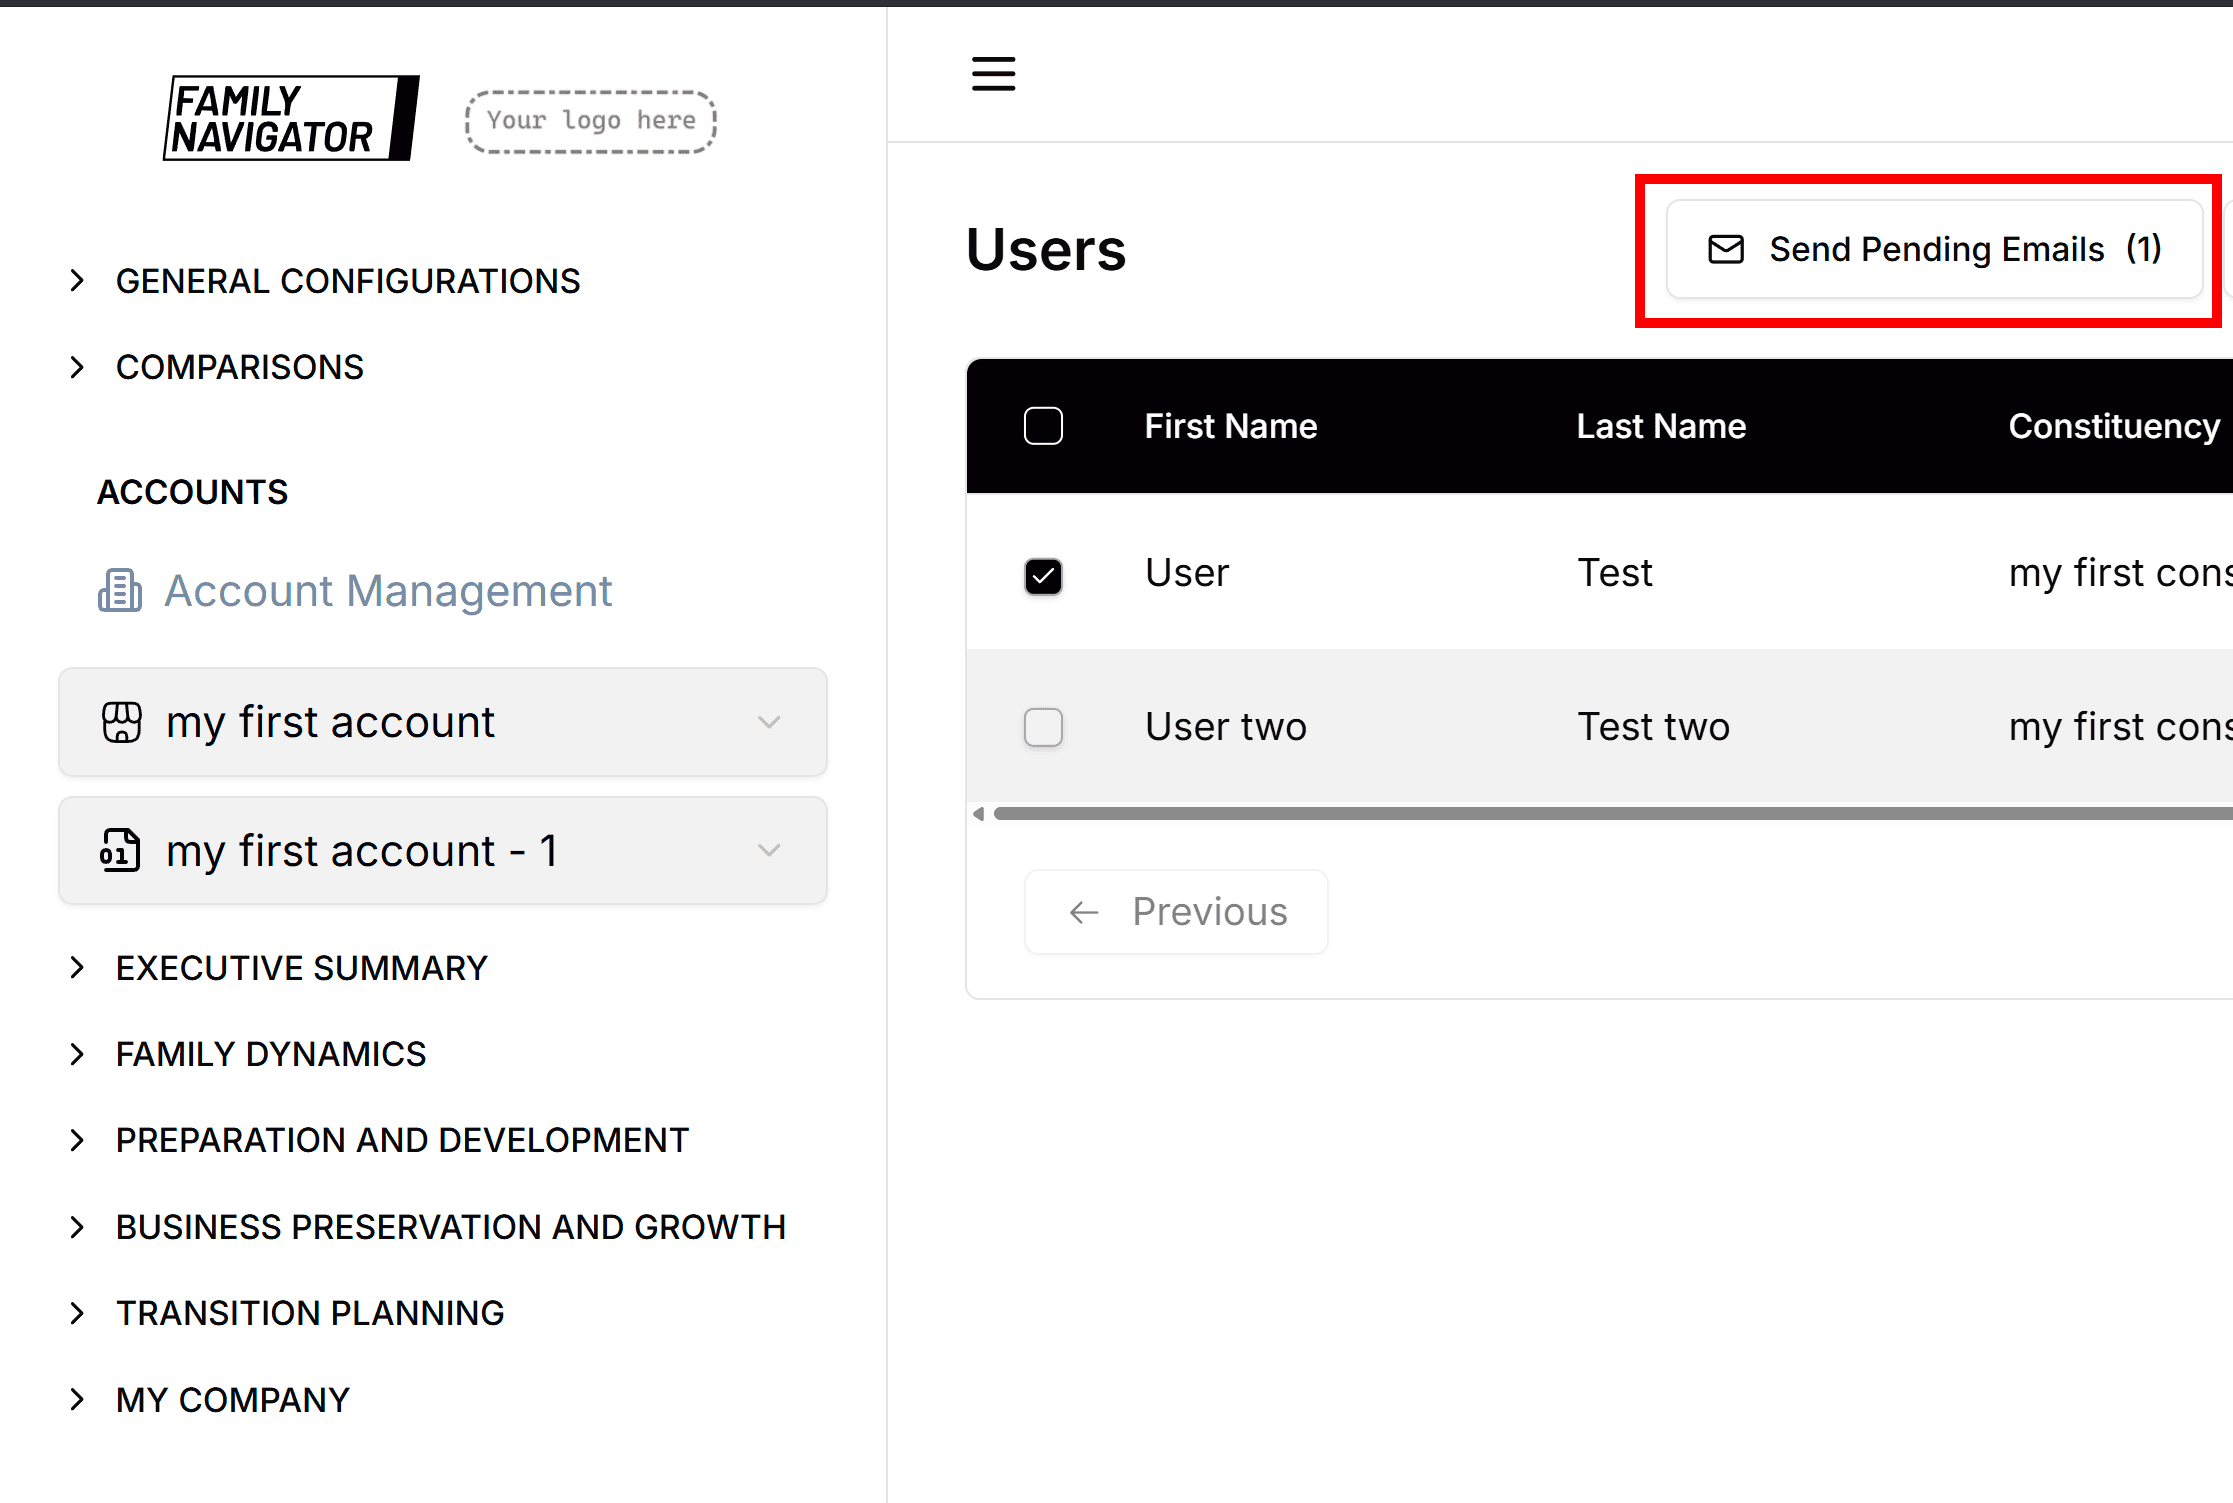
Step 2: Send Pending Emails
Click the "Send Pending Emails" button. This will send survey invitations to all selected users who haven't received them yet.
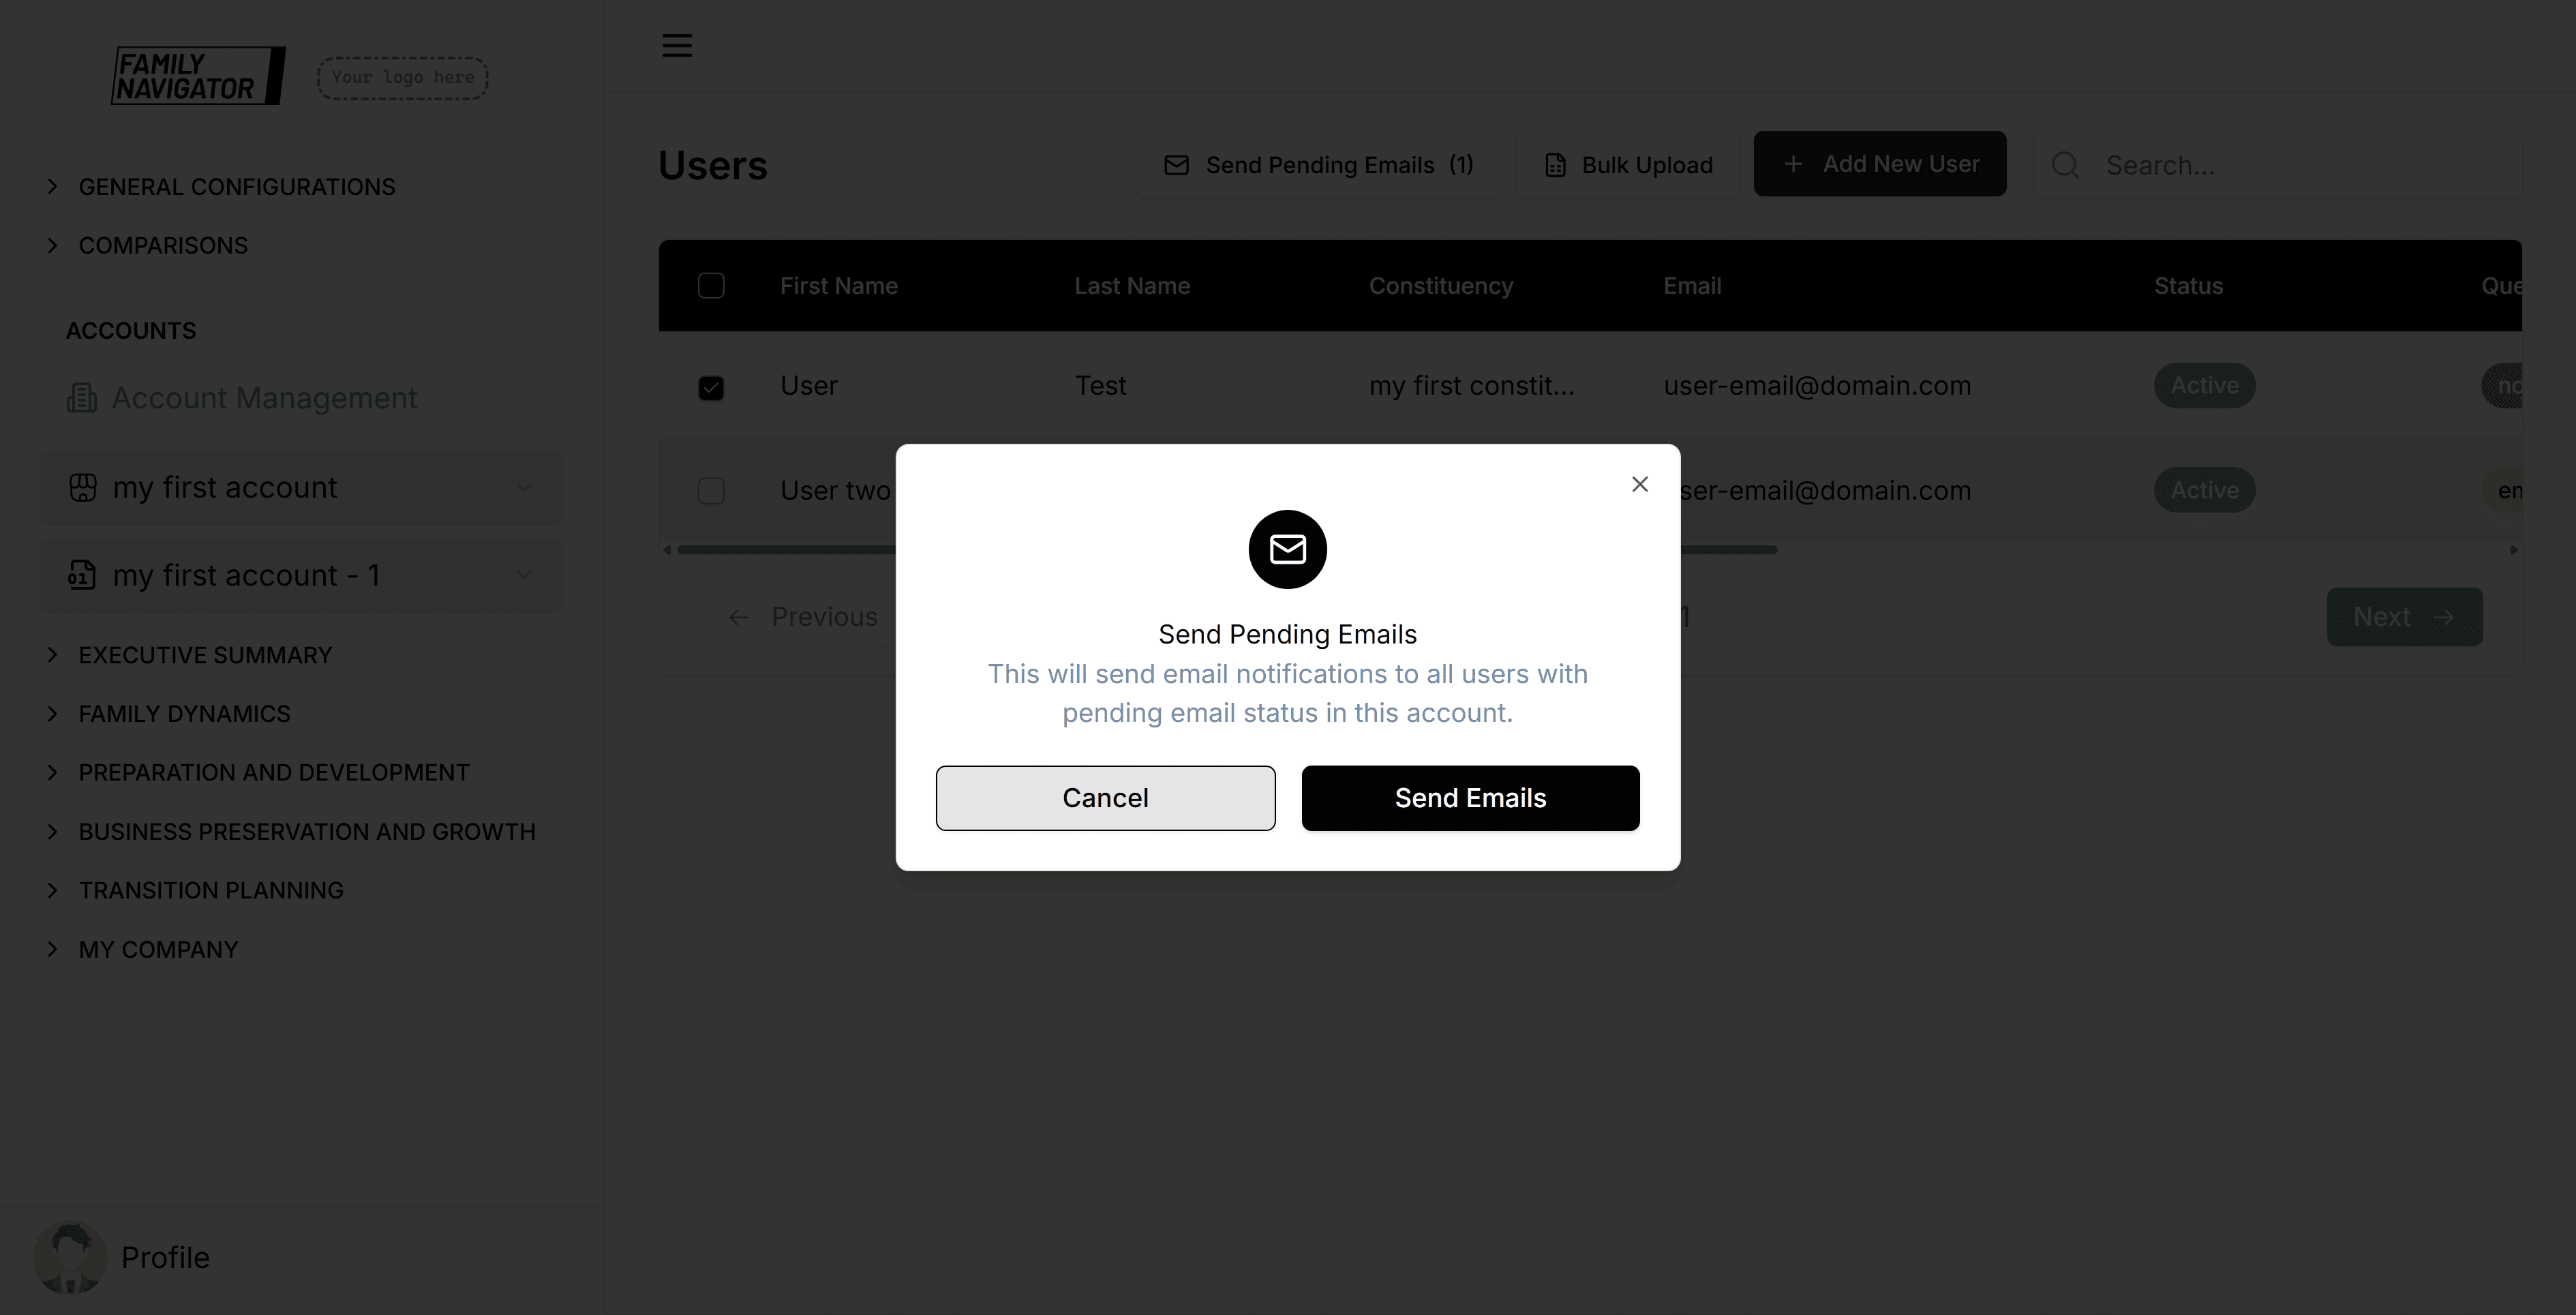
Step 3: Confirmation
A confirmation modal will appear. Click "Confirm" to proceed.
Resending Questionnaires
Step 1: Locate the User
Find the user who needs the questionnaire resent.
Step 2: Open Resend Modal
Click the "Resend" button in the Actions column for the user.
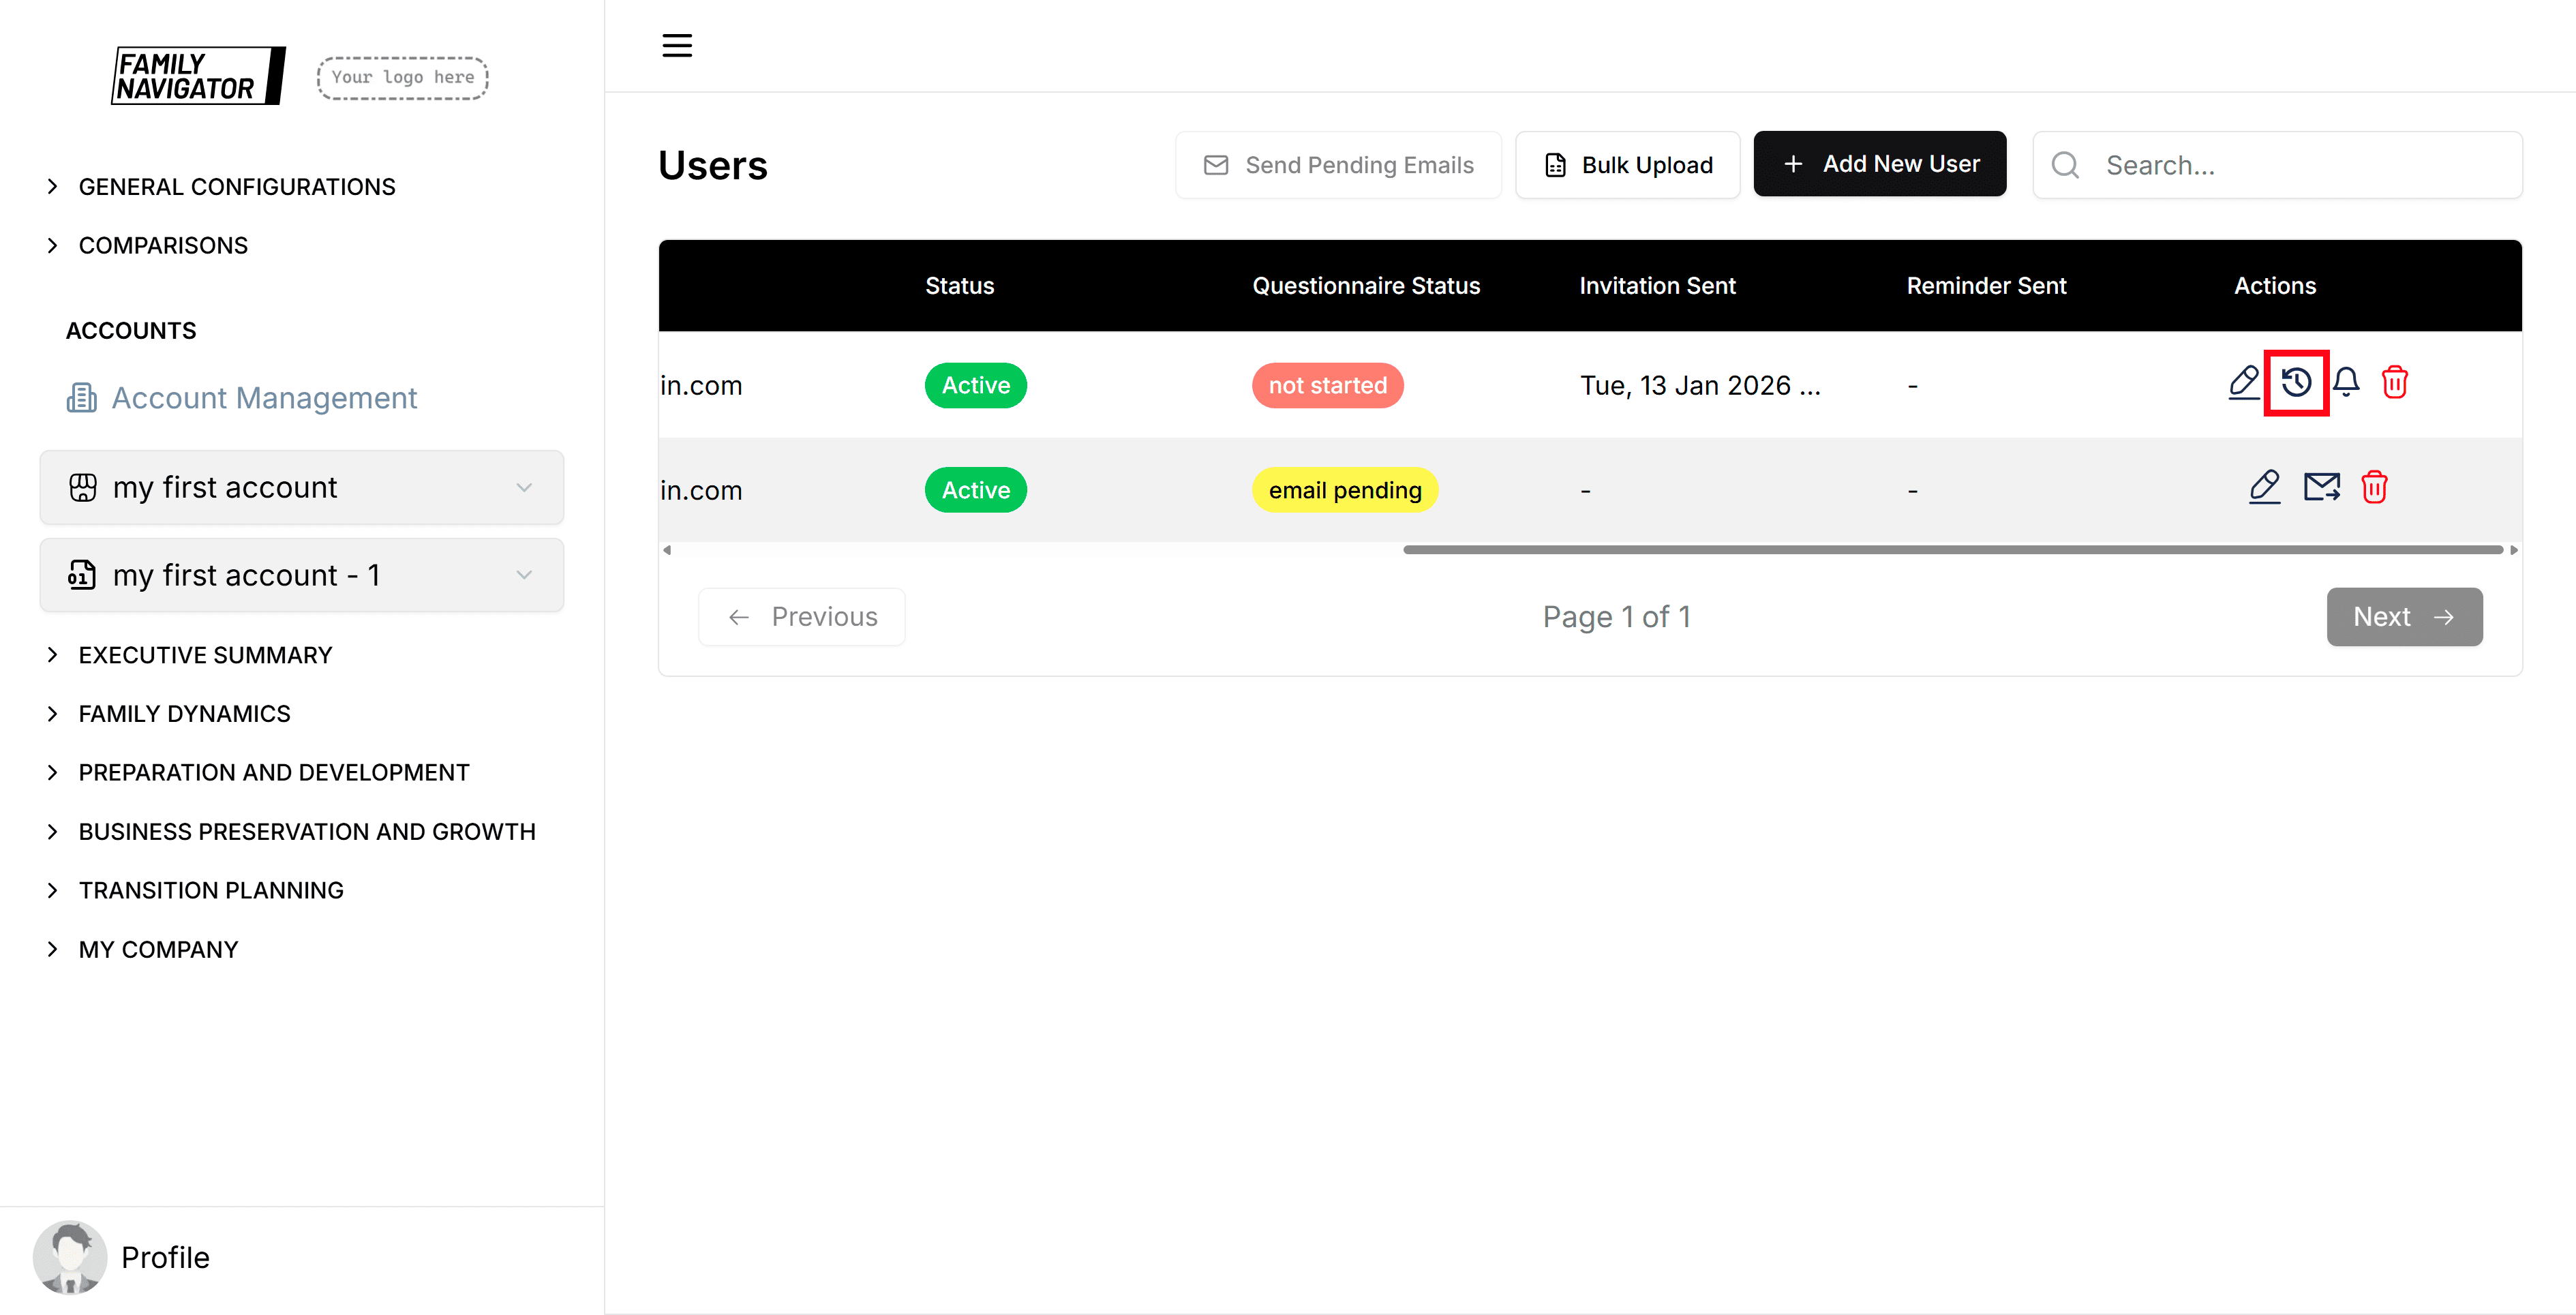
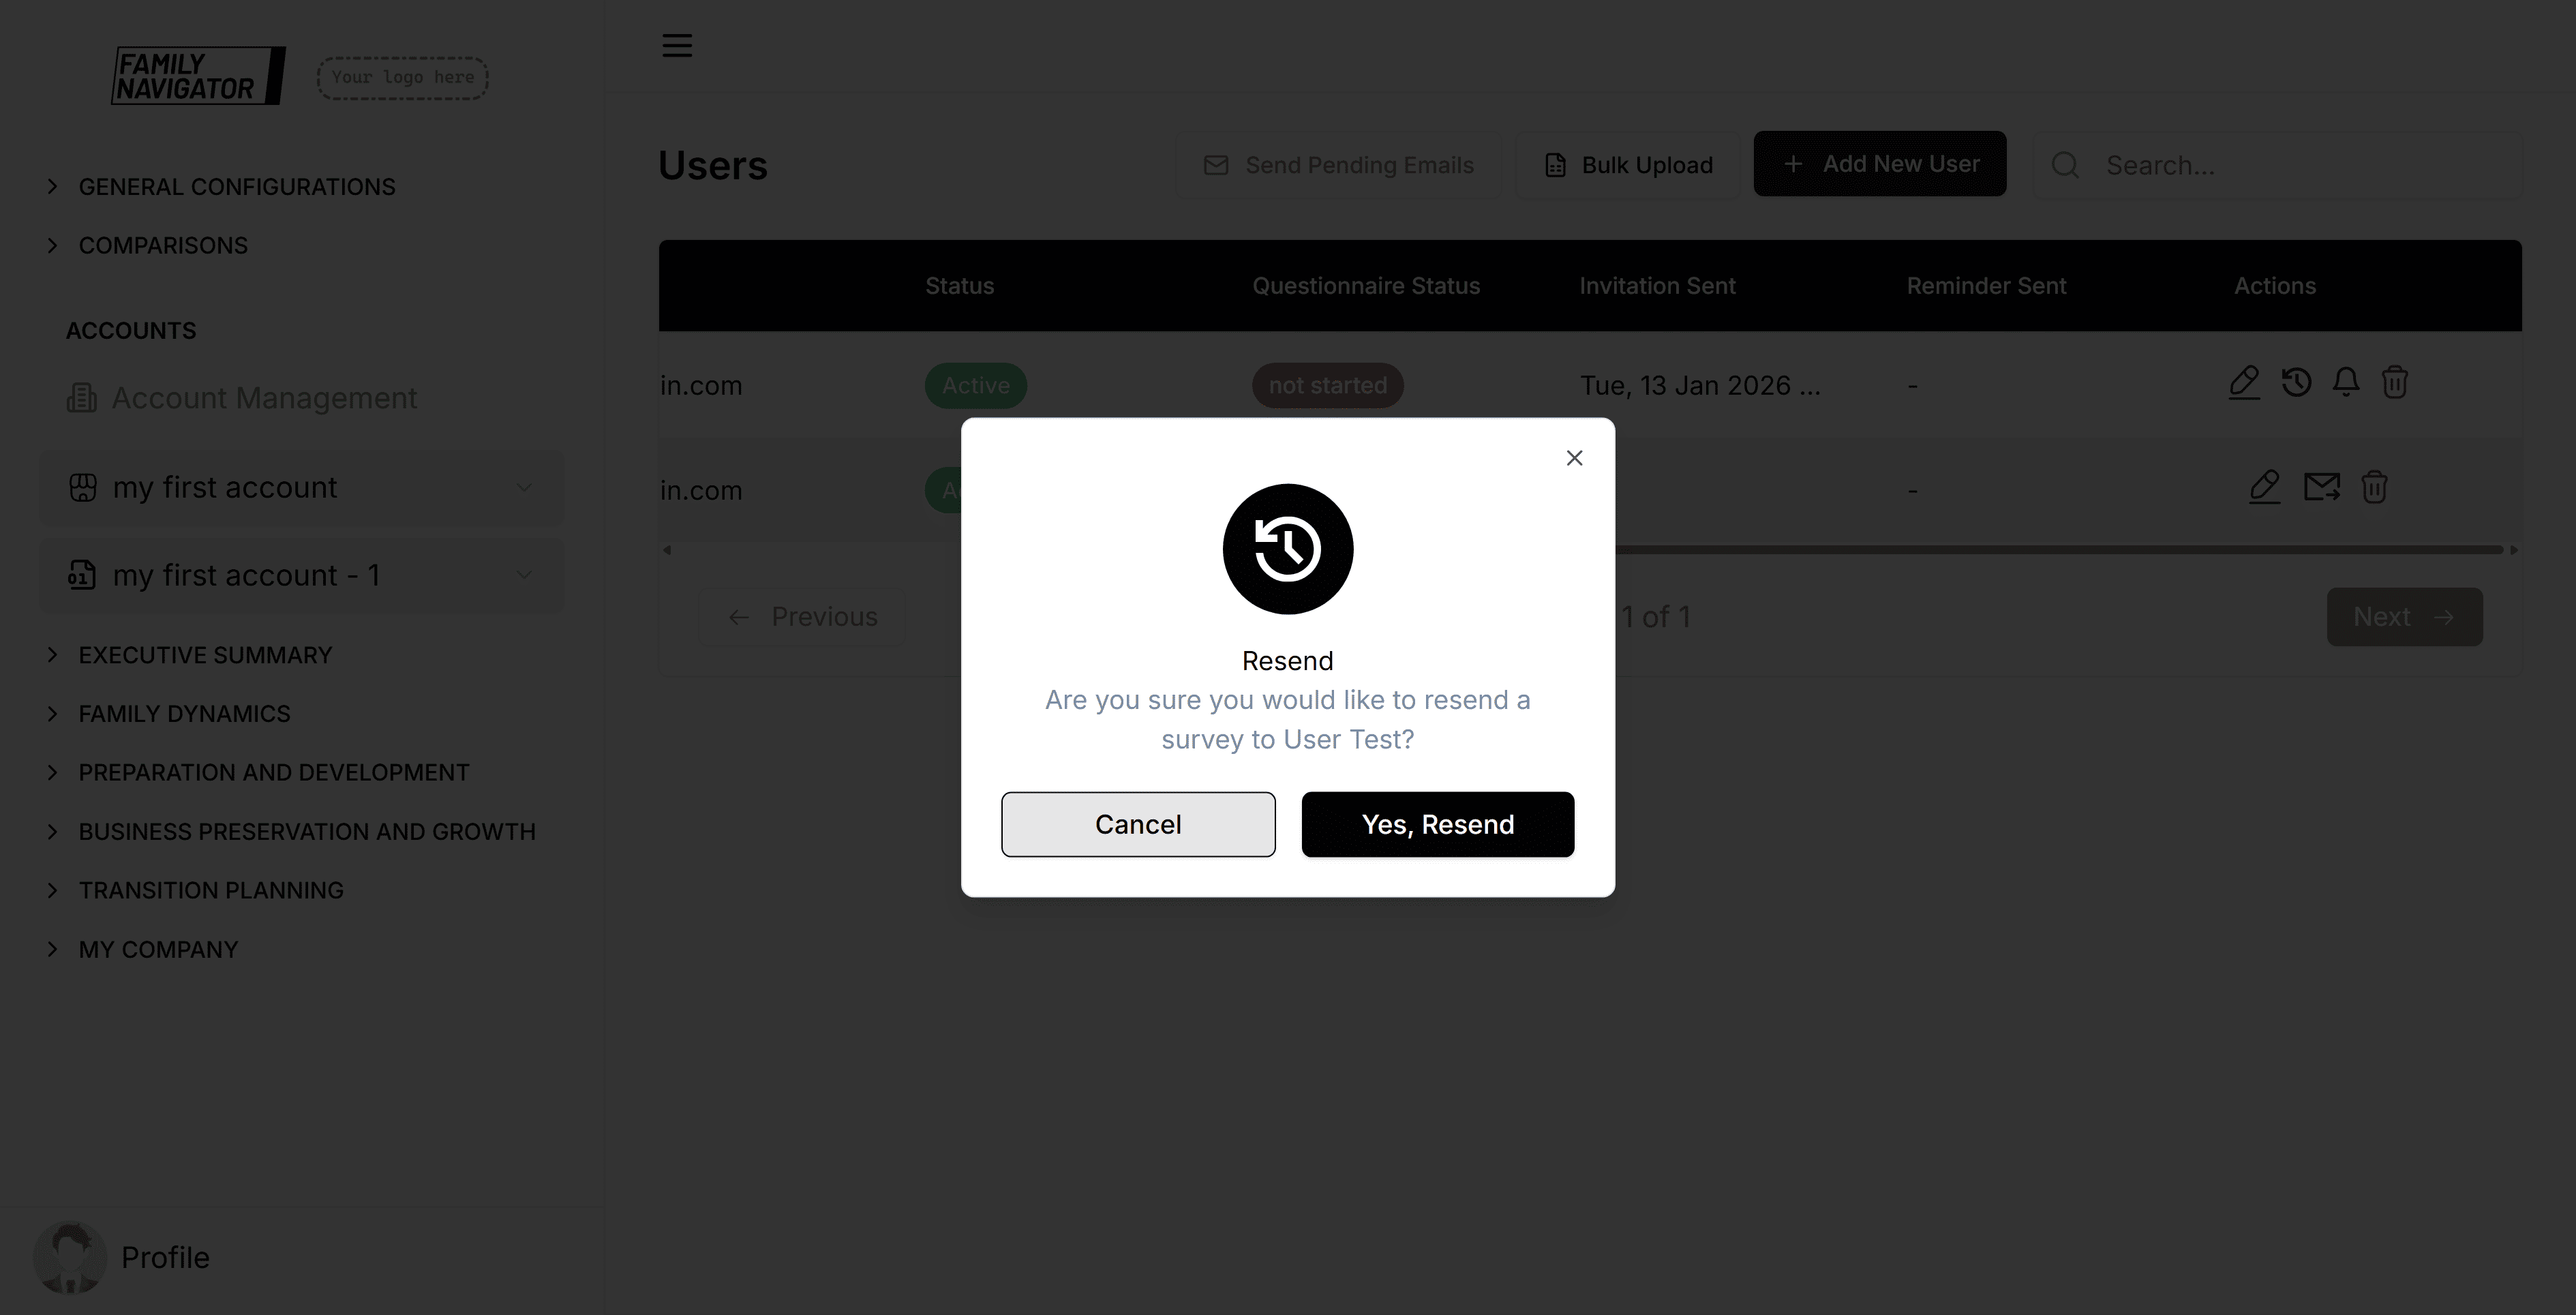
Step 3: Confirm Resend
In the modal, click "Confirm" to resend the questionnaire to the user.
Sending Reminders
Step 1: Locate the User
Find the user who needs a reminder.
Step 2: Open Send Reminder Modal
Click the "Send Reminder" button in the Actions column for the user.
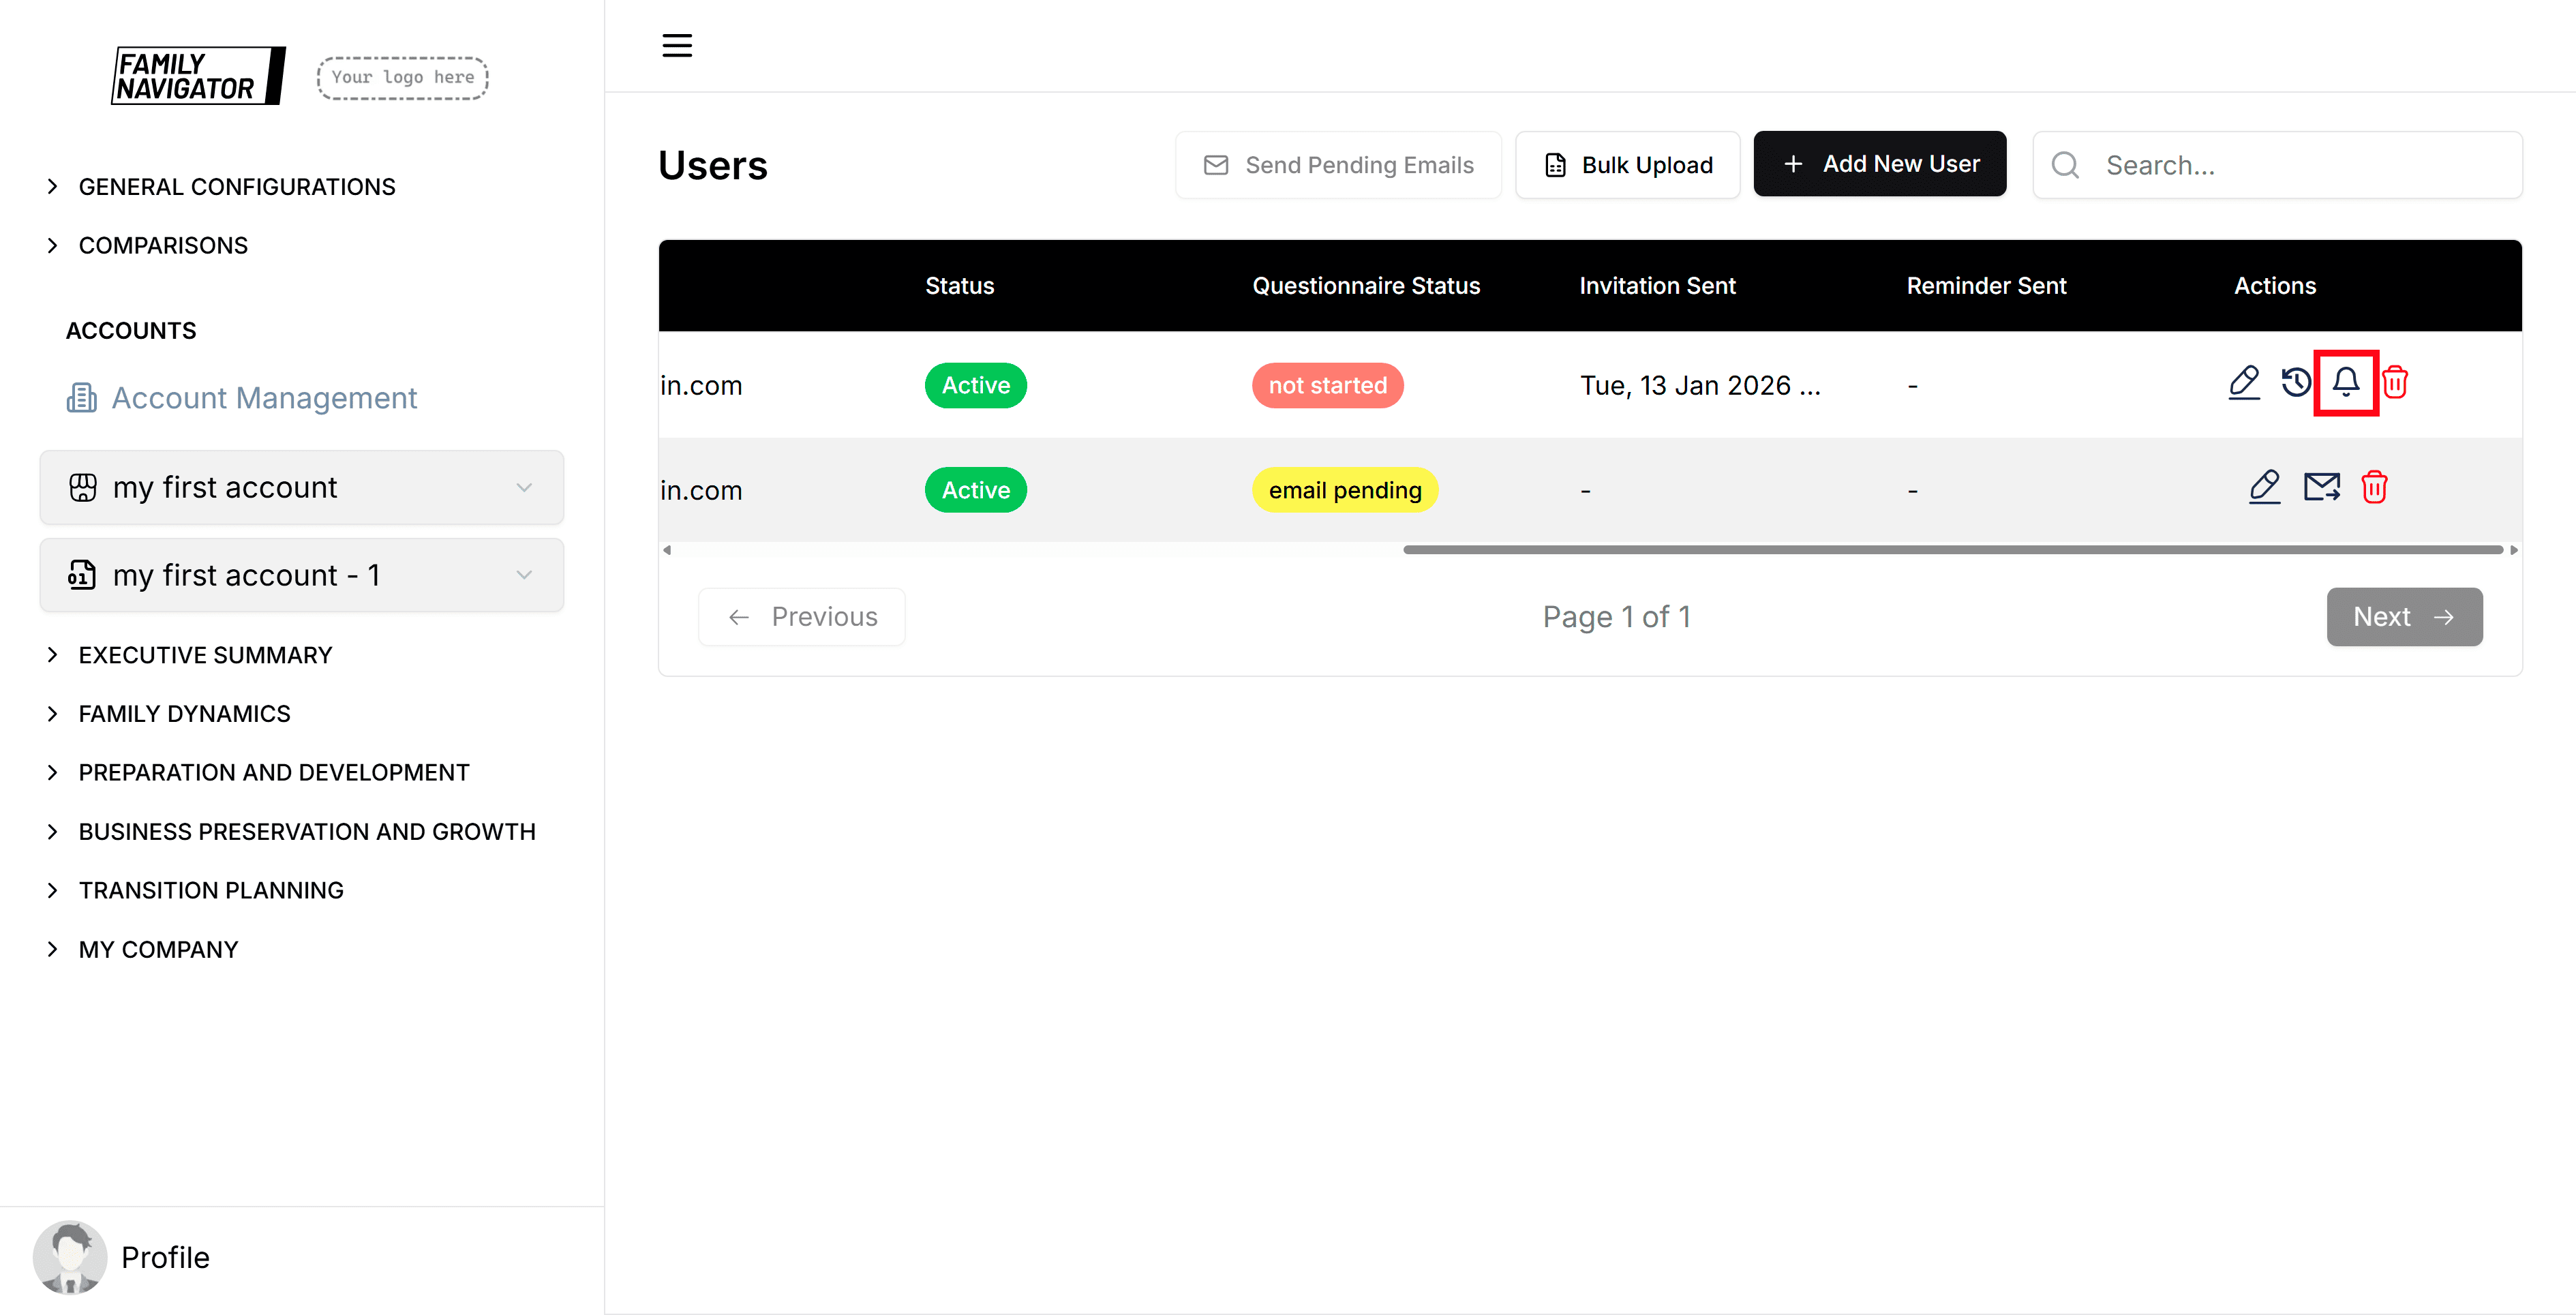
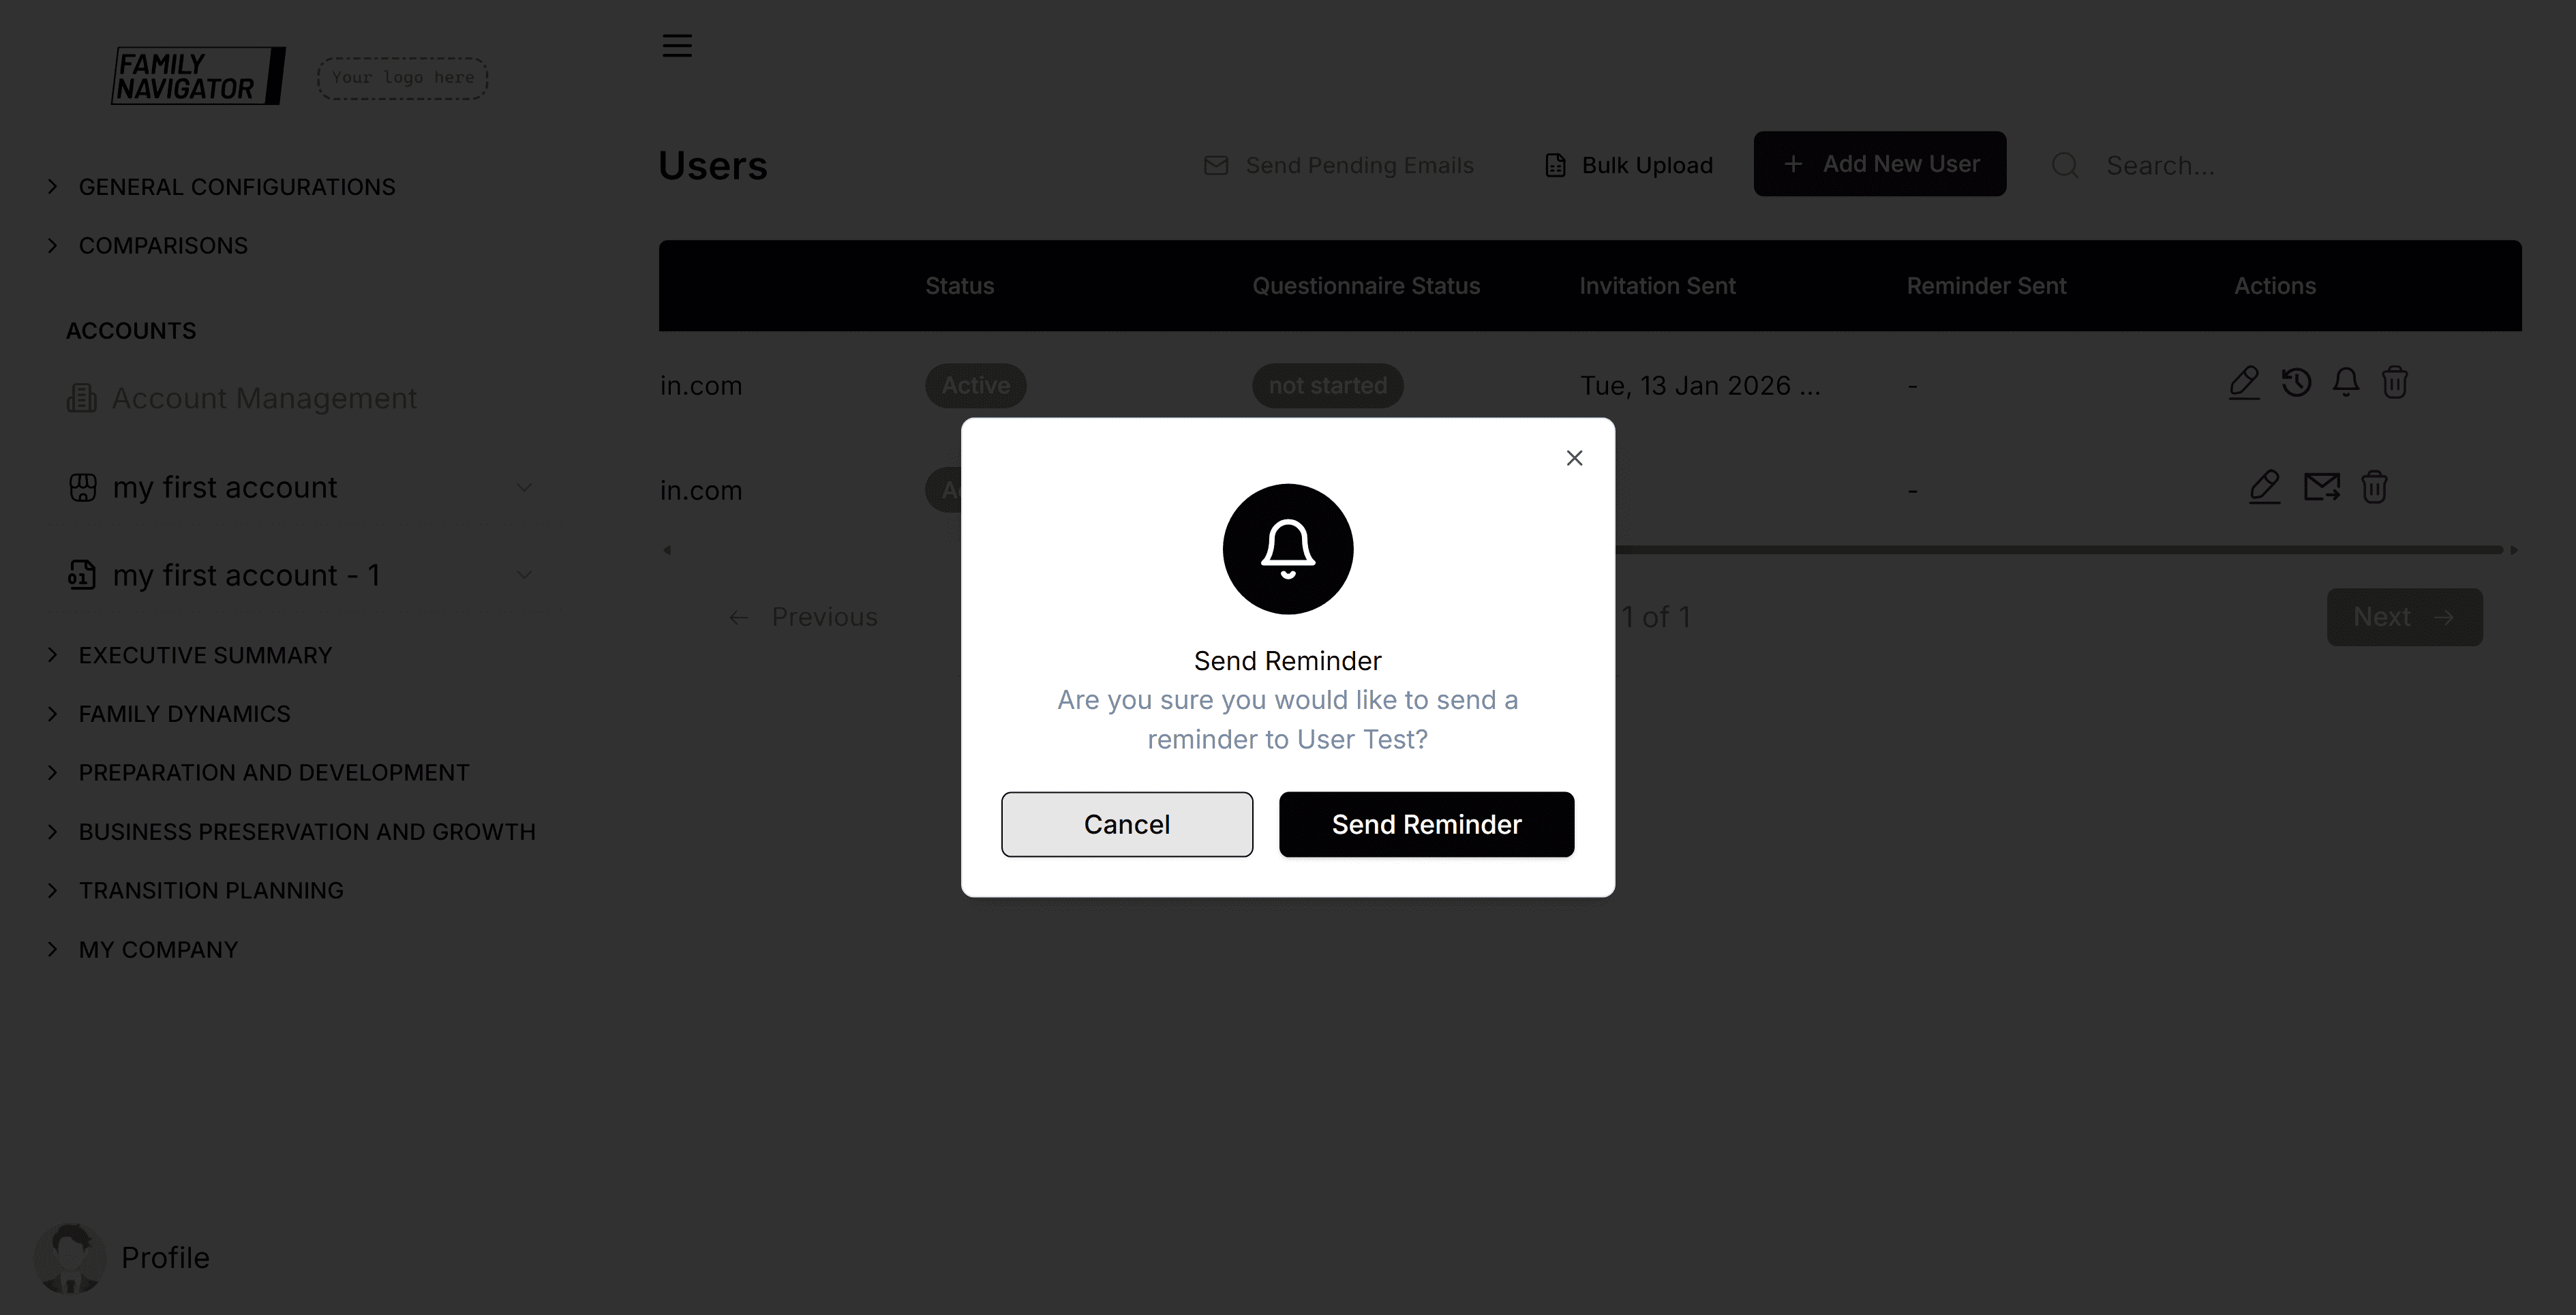
Step 3: Confirm Send Reminder
In the modal, click "Confirm" to send a reminder to the user.
Questionnaire Status
The Questionnaire Status column shows the current state of each user's survey completion. Here are the possible statuses:
- Email Pending: The survey invitation email has not been sent yet to the user.
- Not Started: The survey invitation has been sent, but the user has not begun filling out the questionnaire.
- In Progress: The user has started the questionnaire but has not completed it yet.
- Completed: The user has fully completed and submitted the questionnaire.
Additional Features
- Search: Use the search bar to quickly find users by first name, last name, email, or constituency.
- Pagination: Navigate through multiple pages of users using the Previous/Next buttons.
- Status Indicators: View user status including questionnaire completion status, invitation sent date, and reminder sent date.
- Real-time Updates: The table updates automatically when questionnaire statuses change.
Troubleshooting
- Form Validation Errors: Ensure all required fields are filled and the email format is correct.
- Duplicate Emails: User emails must be unique within the account.
- Constituency Required: Users must be assigned to a constituency. Create constituencies first if needed.
- Bulk Upload Format: Ensure your CSV/Excel file follows the required format with proper column headers.
- Permission Issues: Make sure you have the necessary permissions to manage users.